I did a few modifications to my custom Global 1940 table over the holidays, so I used the opportunity to take more detailed pictures of it than the ones I posted in 2010 in the Global Gaming Table thread. I’ll be posting the new photos below, along with some background information. In the text for the first four pictures I’ll describe the general design of the table itself; in the text for the other five photos I’ll give more details about the map customizations I made.
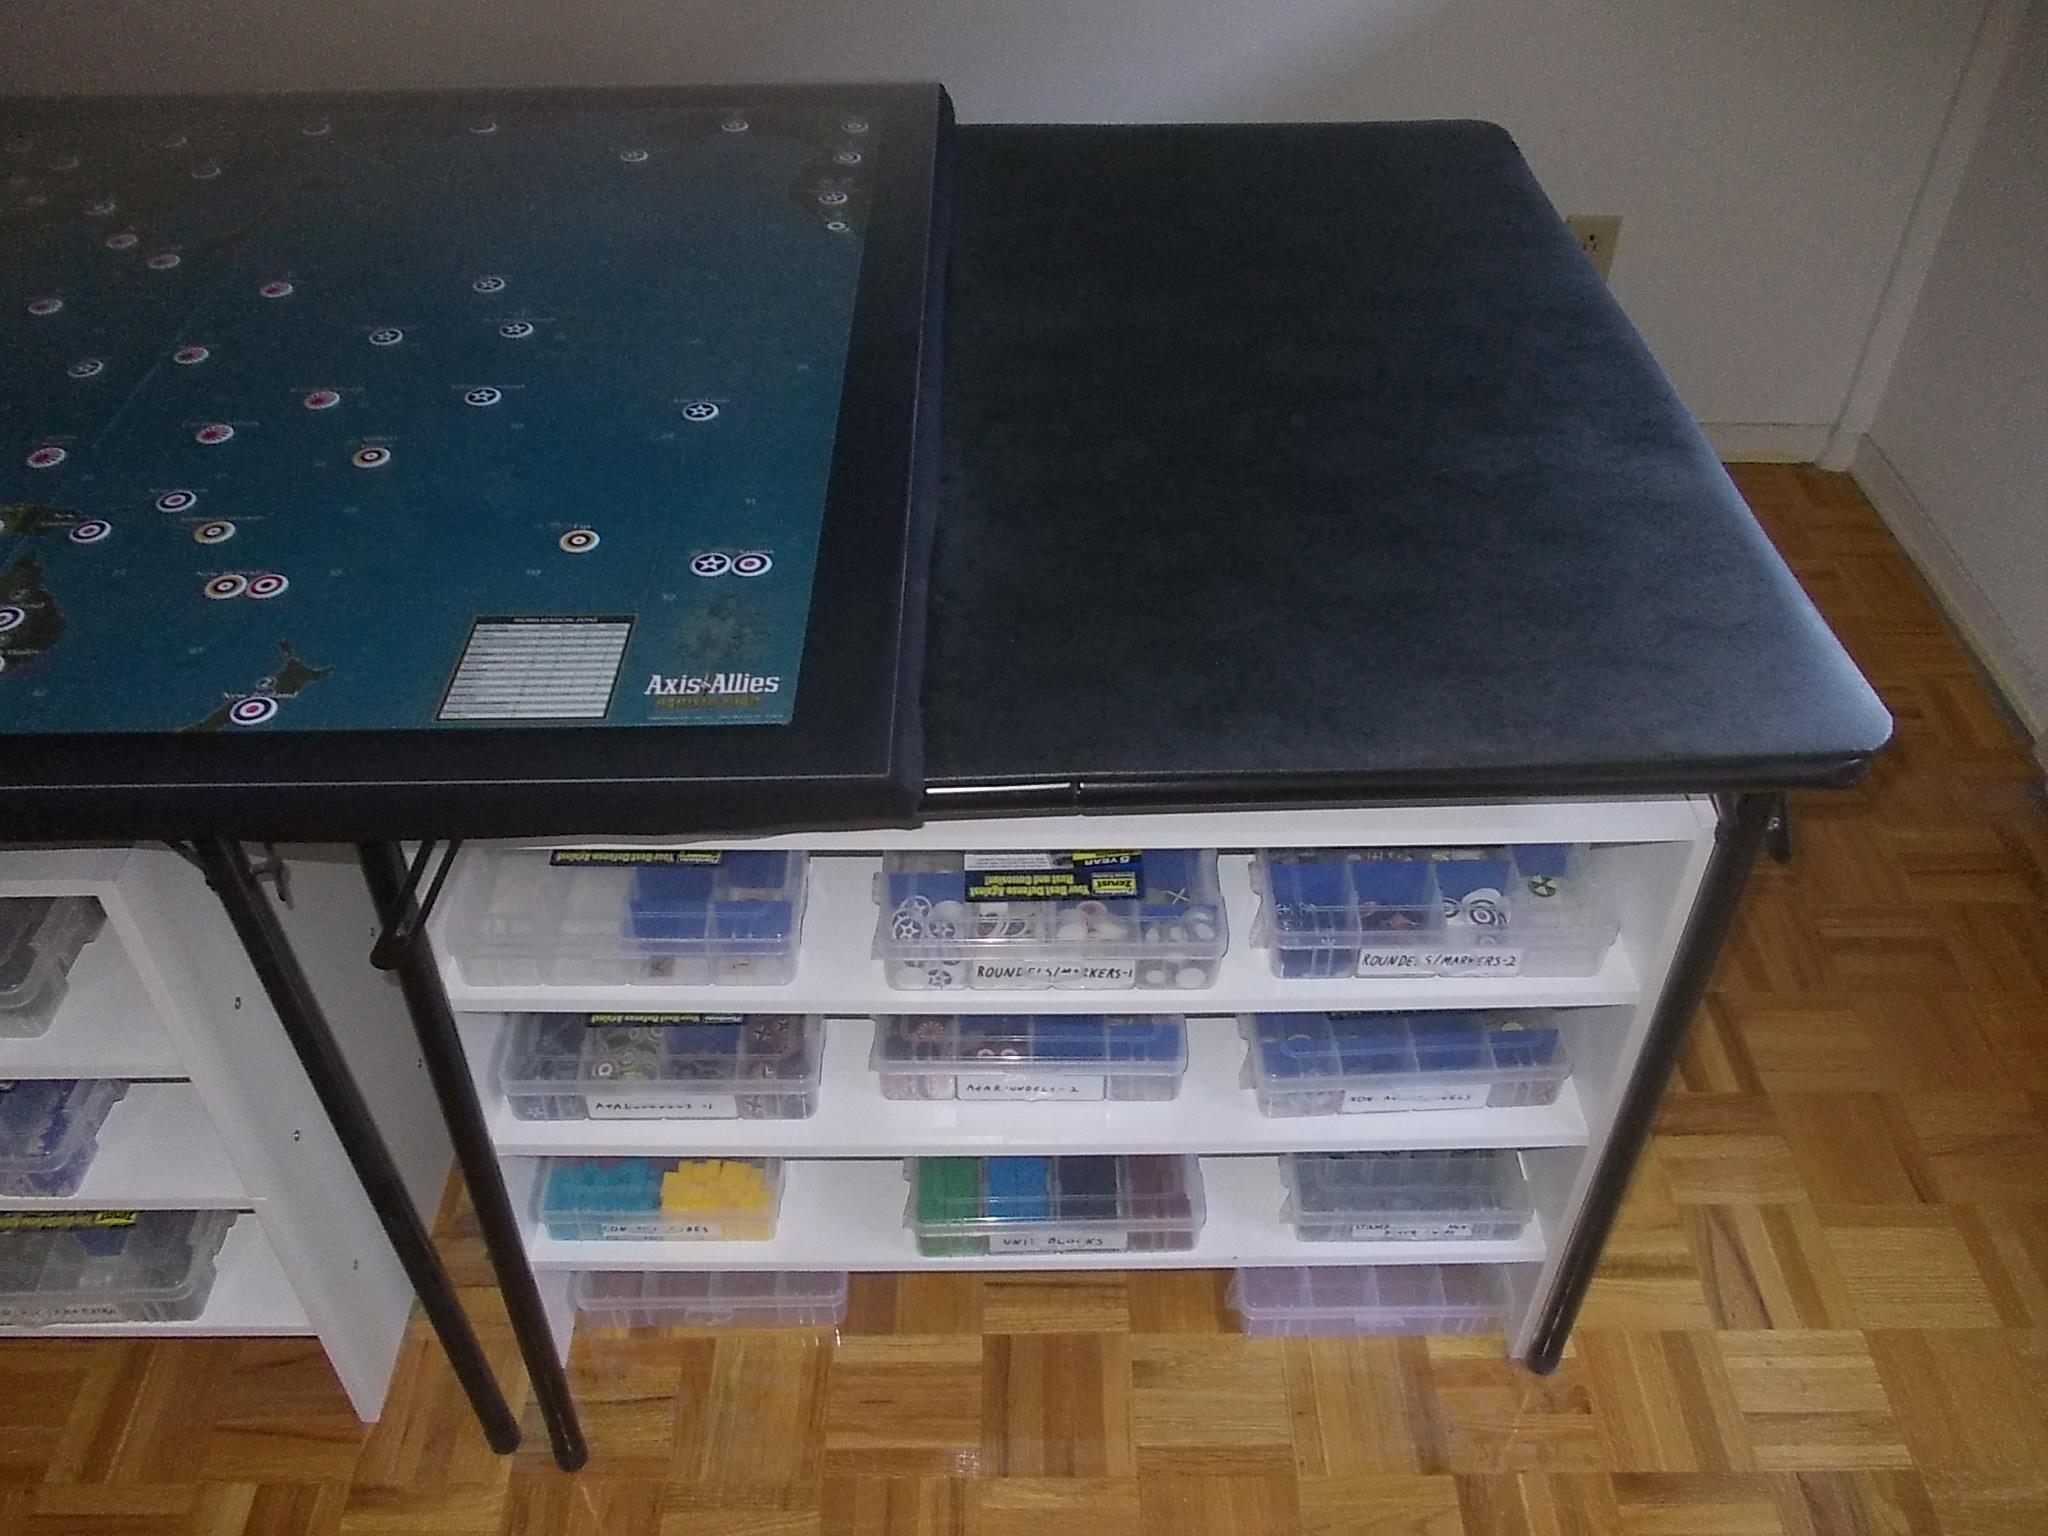
Like many other folks here, I’ve been extremely impressed by (and envious of) the superb wooden A&A tables that several board members have custom-built built for themselves. I have no woodworking skills at all, so tables such as Young Grasshopper’s are quite beyond my capacities – and even if I had the required talent and tools, I wouldn’t have the patience to build anything of that caliber. I therefore opted for a design which made use of as many “store-boughten” components as possible. Apart from the sheet of acrylic, which set me back about $150 with shipping, I don’t recall the individual pieces costing very much. One fringe benefit of the design I used is that, if I ever have to move, all the components can be disassembled and stowed for transportation; even the sheet of acrylic can be rolled into tube (though admittedly a rather large one).
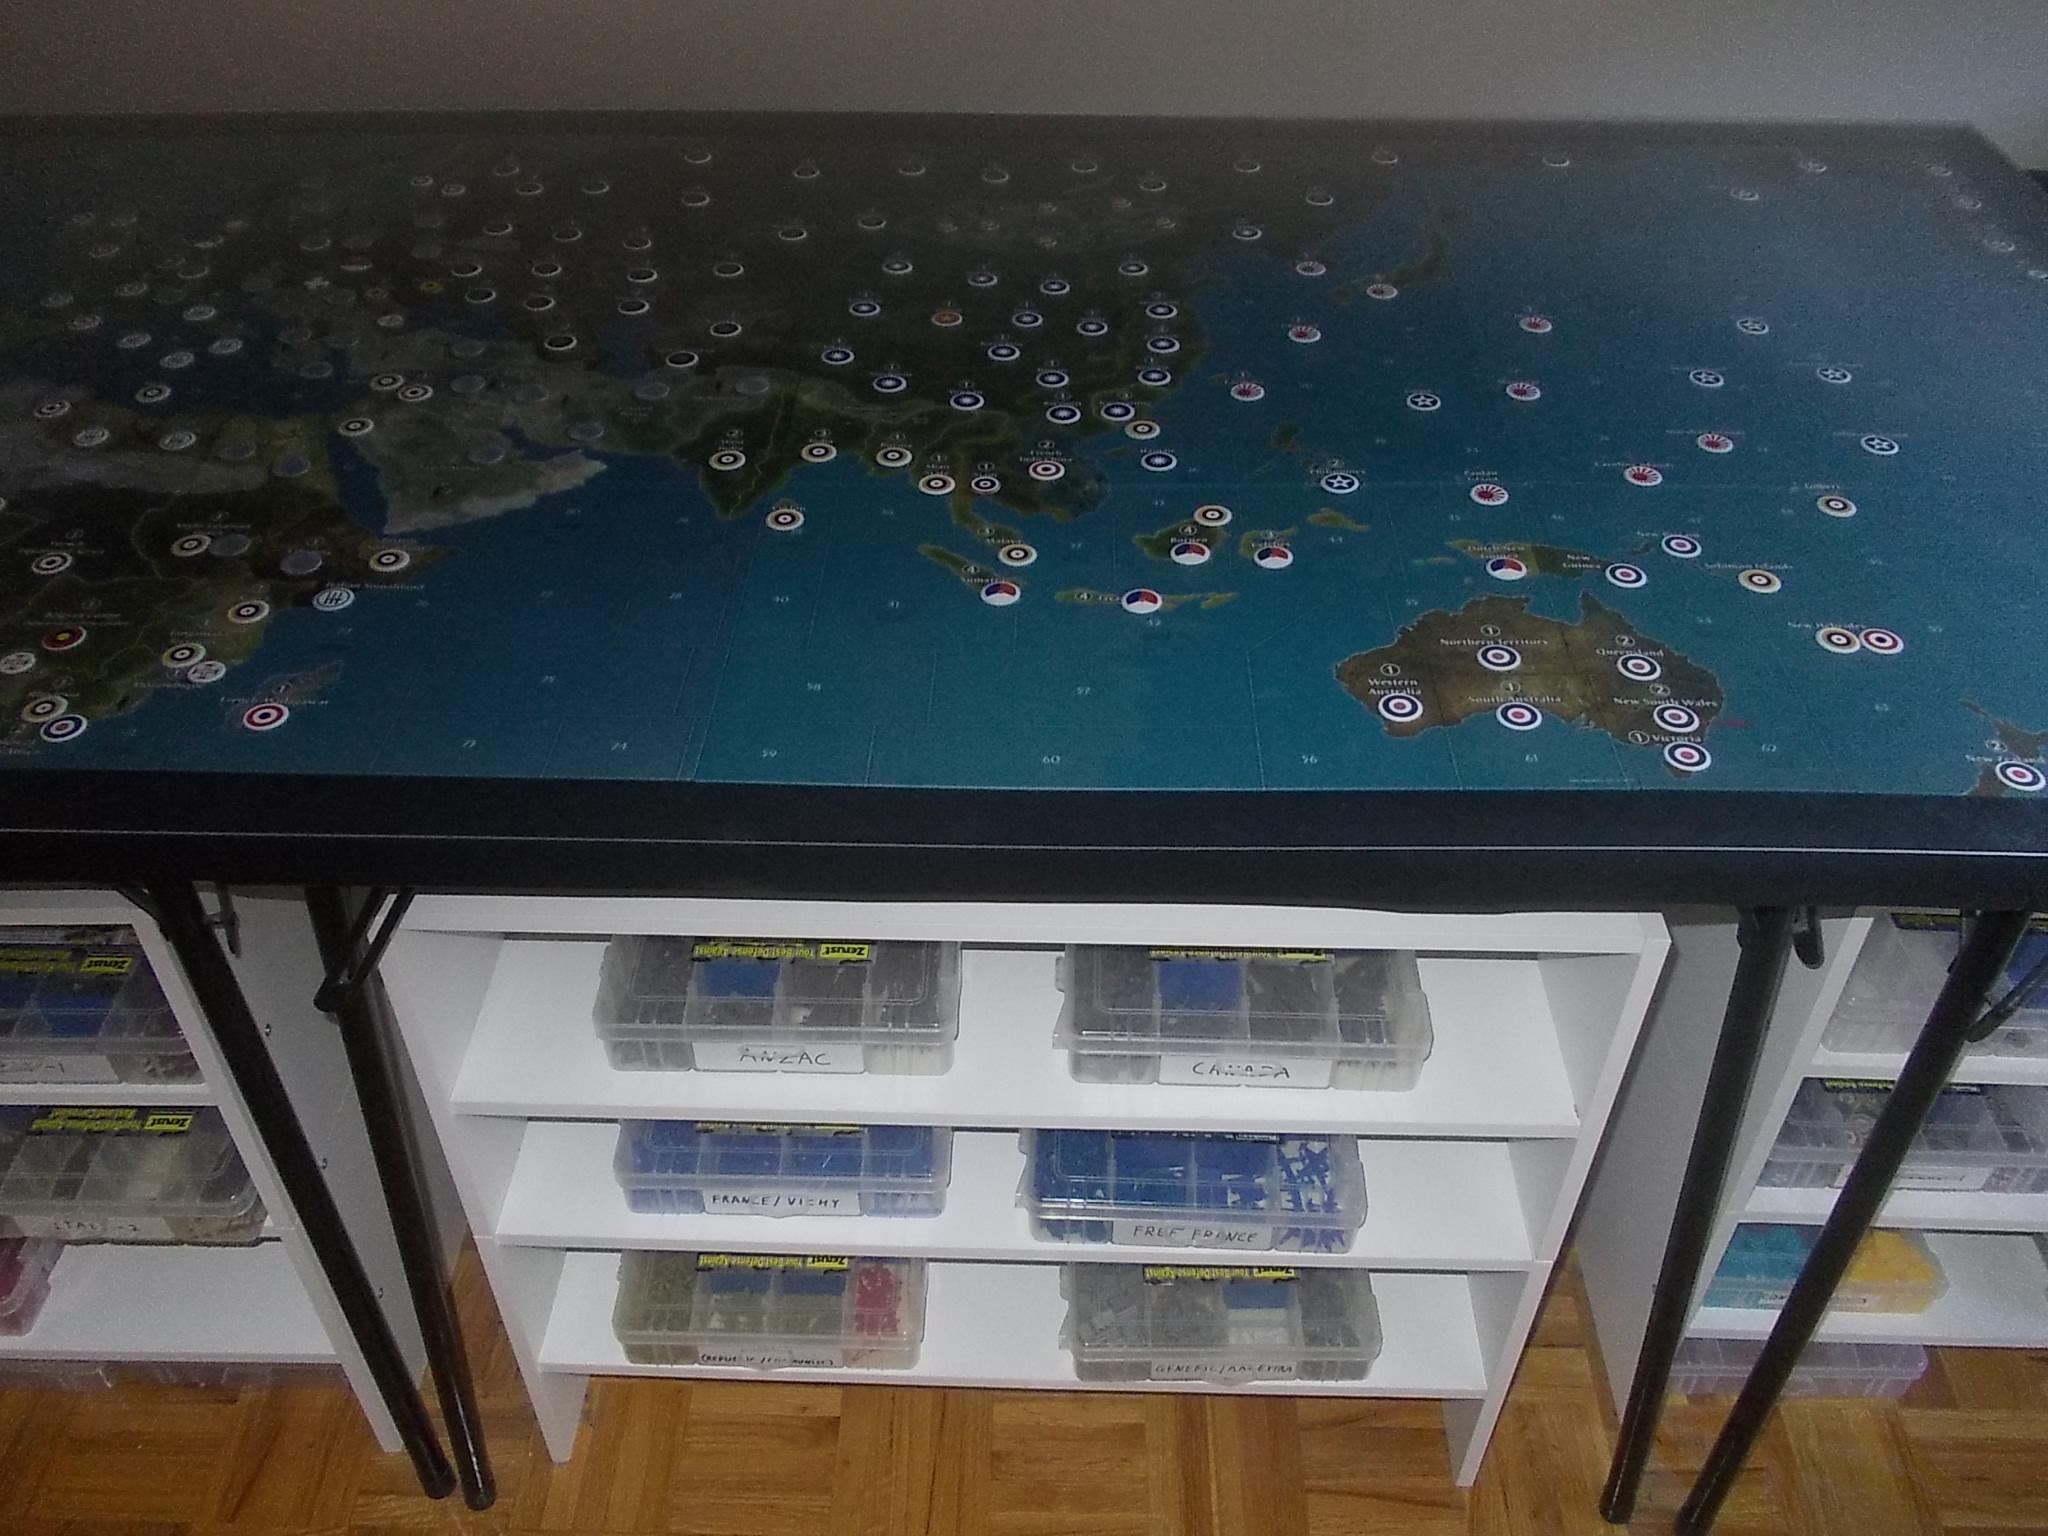
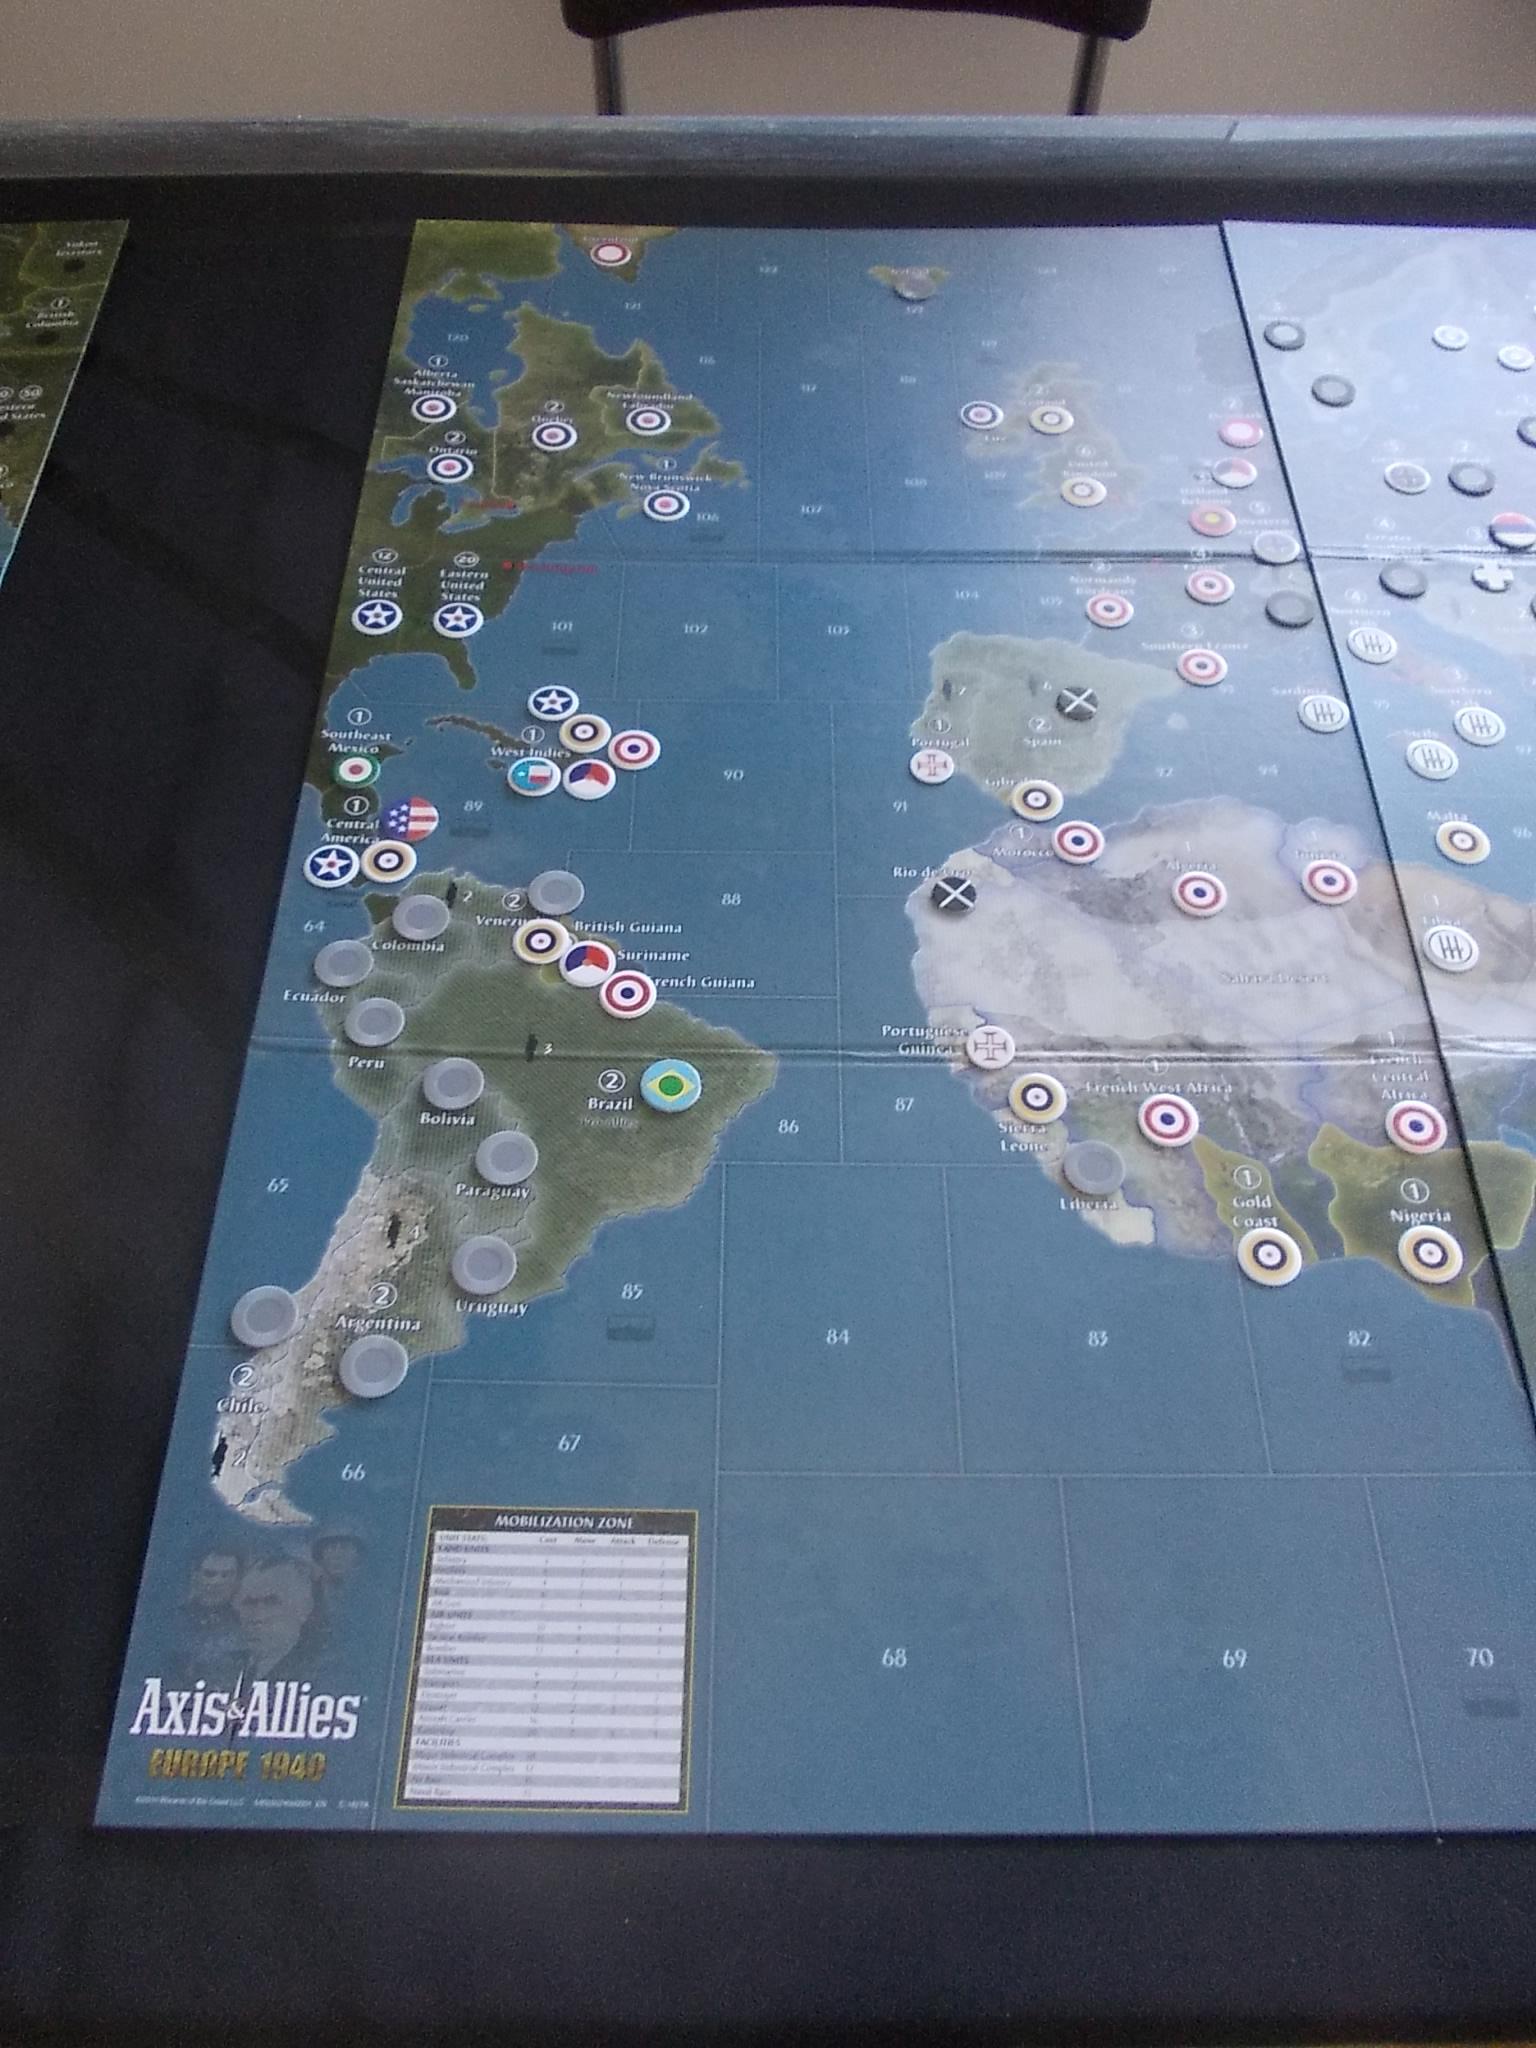
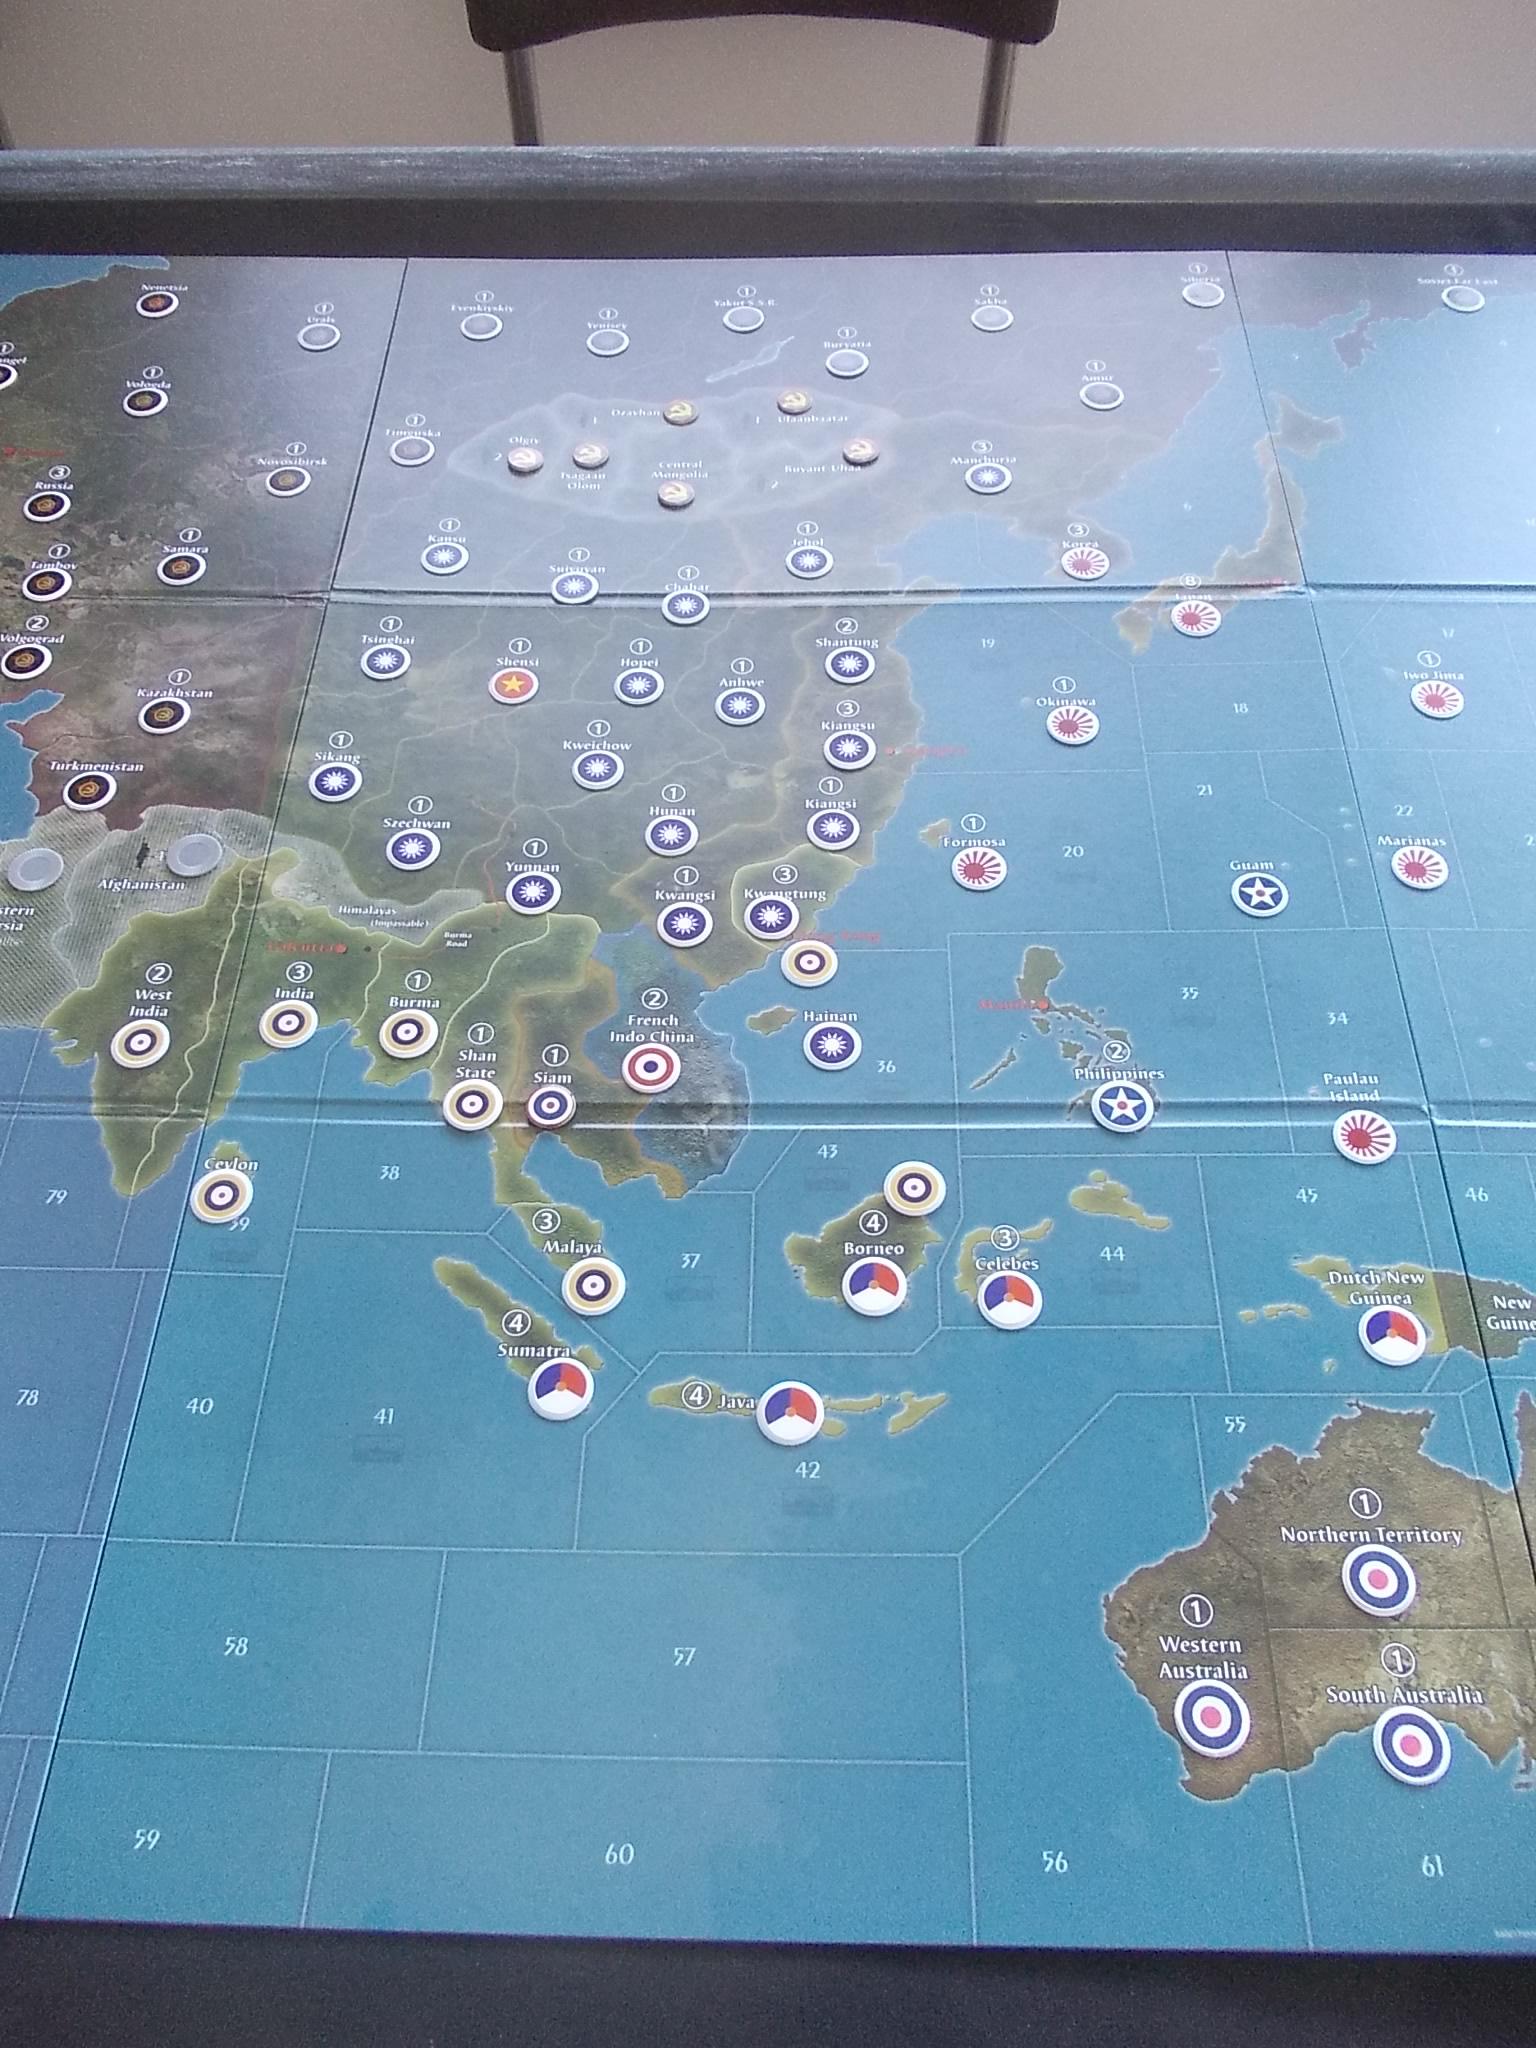
I started by getting four identical folding-leg card tables (each table measuring 33.5 x 33.5 inches), which I laid out end to end for a total length of 134 inches. On top of these, I made a lightweight raised platform using three wood-framed painting canvasses (purchased from an art supply store) covered with black cloth (purchased from a fabric store). The platform measures 96 x 36 inches. I put the four Global 1940 (1st edition) map board panels on top of the platform, along with a second copy of the right-side panel from Pacific 1940 to help me vizualize how the sea zones and land territories connect between the Pacific and Europe games when you cross the map border at 90 degrees west longitude. I marked the connecting “lanes” between the two maps using black electrical tape, which I applied directly to the black cloth covering the platform (extending the tape under the map boards on each side). I then used little pieces of double-faced tape to stick some customized roundels to the map board (a topic to which I’ll return in more detail later), then covered the platform with a thin sheet of non-glare acrylic which I ordered (custom-cut to the required size of 96 x 36 inches) from a local plastics distributor.
Here’s the left side of the finished table…