I have been playing around with different configurations for a custom table and wanted to note some things I’ve landed on that I really like. A main one thing is having the map mounted so that it can slide around as needed on top of a bigger playing area. My table is 65” x 95” in total with a 5.5” arm rest around the outside and the middle is a recessed neoprene surface. I have the OOB Global map mounted on 1/2” rigid foam with a 1/2” aluminum frame around it. This allows the map to slide up close to whoever’s turn it is, but then be in the middle so both players can roll dice In front of them without disturbing the map and in easy view of the other player. (Plus we like lots of room to roll the bones). This ability to adjust the surface along with a standing height, makes it comfortable for long uses because you can move around more and don’t feel as tied down.
Things I’ve learned and changed from original design - I originally used too big of a frame for the map and mounted it on too high of a foam block (you can see these pictures at the bottom) - it made it hard to see the other player’s dice and the big frame took up too much real estate. My global map is mounted on much thinner foam (the framing is bad, you can see if you look closely) but I also used much thinner aluminum angle for the frame. This gives just enough grip when needing to move the map around (I use furniture slides on the bottom, which glide very nicely on the neoprene) but doesn’t make the whole thing too bulky. Having it an inch or so off the surface keeps the dice off, but isn’t so heigh that you can’t see the other player’s dice rolls. When playing other versions (such as Zombies) the board is much smaller, but it can easily swap in and out on the same table since it can move around where ever it is needed or be pushed aside.
I originally made it normal table height, but found long reaches while sitting were harder and it just felt cramped. Standing height with a bar stool is a great way to have the best of both worlds.
The 5.5” rim around the table itself gives you a nice arm rest that doesn’t interfere with the gaming surface. I’m playing with how to best add some cushion to this part - open to suggestions. Sometimes I just lay a piece of leftover neoprene on it.
Dice bounce nice on the neoprene and stay off the floor. It also feels nice and has enough give to allow things to slide but be picked up easily. Wouldn’t definitely go with neoprene again as a surface covering.
I made the drawers open to the inside of the table so you can stay hunched over the action while accessing and stowing stuff away. 50/50 on whether I would keep this if I were to do it again. If I were doing it again, I might try to build customer drawers form scratch using actual drawer glides, but that was beyond my ability when I first did this, so I just used clear plexiglass boxes with aluminum pulls mounted on them. It’s nice having them clear, and I was happy with how the pulls came out, but without glides they can be a little fussy sliding in and out of their slots.
I originally designed the table so that I could put a cover surface back on top when not in use, but find I don’t really ever do that, so if I were to do it again, I might not mess with that part (I never even finished staining those as you can see in the pictures).
CF362D52-269F-4480-8CBB-08139099138F.jpeg A9E12EA1-66EB-4671-86AC-68C62FD30AD5.jpeg 858DE1F2-030A-4D5A-93E4-70A7D1180ADB.jpeg 8F513EE0-DA37-4BA9-880E-4D5EF7BF431F.jpeg F0188165-757B-4CC1-BF67-5045832283C9.jpeg 2E3CD627-0D31-4121-ACF8-682F9F58A40B.jpeg
Painted playing pieces
-
In my back yard fallout shelter thats 10 feet below ground with battery backup and two years of food.
Right beside my guns and gold bullion, precious stones and all my other Mad Max gear.:-D
Just kidding. Its in a shoe boxDammit - I’ll ignore that you told me its a shoebox… I like the other answer better. :-D
-
i would never paint anything for money i would worry endlessly that they would feel ripped off and disapointed.
-
I’m not sure $1000 would cover it. When I get serious about painting I can paint for 3 hours after work for 3 weeks just to do one faction. Considering there is 11 factions (Counting US and UK as different factions on each map) that is a rough estimate of 495 hours. $750 would be ~$1.66/hour.
Before I started painting I thought $1000 for a set would be fair too, but I was amazed how much time I spent getting as far as I did. I’m not even done yet.
Some people might paint faster or slower depending on their skill or how much detail they are trying to add.
Precisely what I was say’in early Track. The numbers just don’t add up…
-
I guess if the buyer covered supplies (2 new games in box) shipping and paint it might be more reasonable.
or if the painter developed som kind of systemI paint 28mm scale Warhammer models….and I have a hell of a lot of them
I also have a job and money, so I can afford to pay someone to paint 750+ plastic dudes
After painting my figures, I bought a varnish/shading product that you dip the models into adding a protective coating and shadeing to all the recesses. Dramaticly increasing the detail in the model for almost no time consumption.If an A&A painter first dipped them like easter eggs. Then detailed them. Then dipped them in a varnish I think they would look pretty sweet.
Shipping and material costs, and a system, still does not break even. Whether the client/customer has a job and money is not important (other than the fact that if they have neither than they probably aren’t going to be a customer). How much they’ll pay in comparison to what it would take to break even considering min. wage is what we were referring to.
That being said… a lot of variables to consider that can’t necessarily be quantified. Some of them situational: If the painter is unemployed, I suppose anything is ok (but then we get into what is fair for paying for another’s work that is both an artistic endeavor and kinda “factory work”… which involves a whole host of things to consider). Or if the painter is independently wealthy, I suppose it also doesn’t matter. There’s also the less tangible side of it… you like the idea of your little troops out there on some other board being appreciated, your troops fighting the good fight many miles away… and/or if you like painting them so much that time and money is not in question.
*shrug
I’m familiar with some of the products used for the shading process you mention, I’ve used them on my 25mm & 28mm figs in the past. But at 15mm and below you start running into problems - the recesses of the piece are so small the liquid has a tendency to blotch. Not always - sometimes it turns out quite nice. There’s also the problem of the material itself - sometimes the end results are different on plastic then lead/pewter. I think I’ve even read some post on here somewhere about someone who had all of their (plastic) figs ‘bubble’ after using it. At the end of the day, I wouldn’t trust that as a shading technique on A&A plastics. It might turn out really cool… but I wouldn’t want to risk a huge “do-over” (or worse, ruining the minis). In regard to the protective coating - yeah, I agree. I use the spray cans from hobby stores, not a dull or gloss coat, the regular sealant (though that’s a personal preference, I do like the look of some of the glossed pieces I’ve seen).
You have a link to any pics of those models Oz? I’d be interested - the Warhammer line produces some pretty cool sculpts.
-
I pulled from wikipedia various aircraft roundels and made a draft decal sheet at 1000 x 600 pixels. The roundels are too large in the draft to go on aircraft, they would have be shrunk down quite a bit. Sadly, my posting skills are not nearly as good as my cut and paste an image together skills. Is there some trick to attaching a .png image file of about 150kb?
Thanks
-
It is the warhammer line of products, 40k to be specific.
I do not have very many pics right now, though in the future ill try to take some. -
Deg - yeah, was led to Wiki’s roundels in the past, thought it was nifty but at the end of the day… nothing to do with them except perhaps use them to decorate a dice tower. Hmm… don’t know the tricks you need Deg…
Let me know Oz… I like the 40k figs…
-
So think of this, my friend had an original classic game that went through a fire and the shading from the fire made some cool looking pieces. I’ve had the dog find some pieces that were dropped and chewed up and they look like they’ve been in a battle, I still would like to take a few Naval units and cut them in half and put them on a base so they would look like their sinking
-
Chagadiel and Others,
I really enjoyed seeing the pics of your wonderful paint jobs. I especially liked the Japanese Carriers. Any more pics?
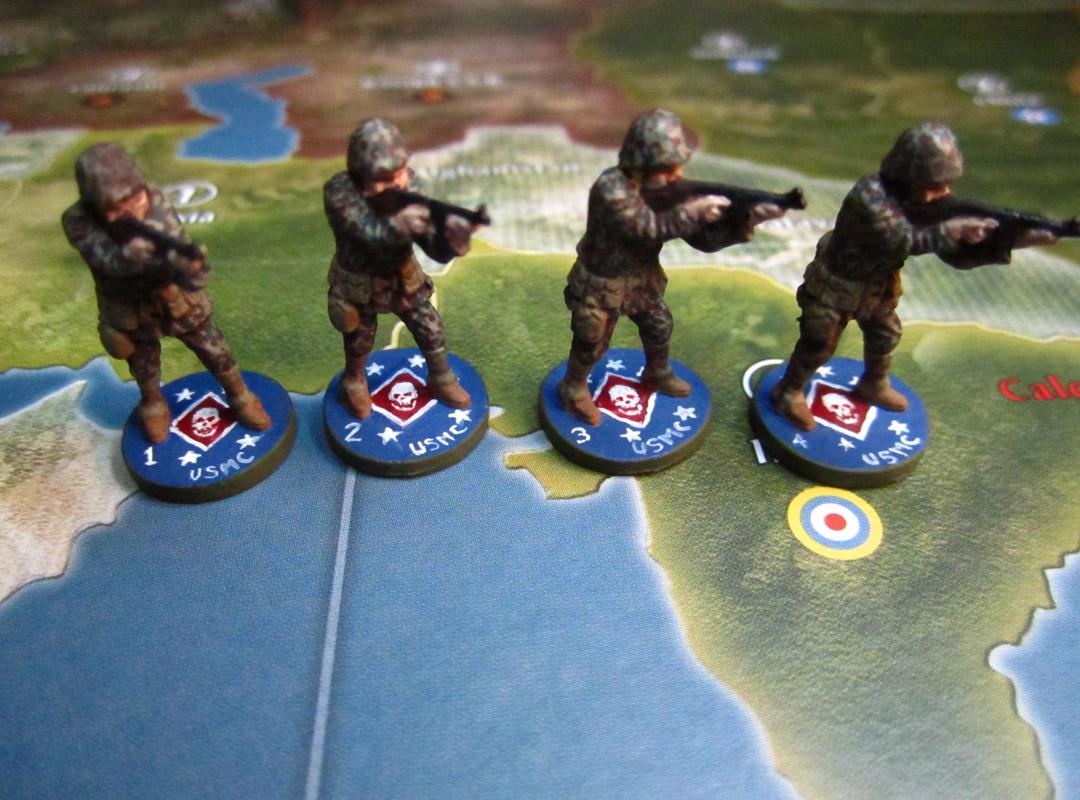
Here’s some links to a few pics of my units that I had “Allworkandnoclay” paint for me. Marines, Marine Raiders, ParaMarines, and Army Paratroopers.
For the “Special Forces” type of units I had their shoulder patch painted on their bases instead of their national insignia. And the “regular” Marine grunts have the Marine Anchor & Globe to differentiate them from American Army soldiers.
http://www.axisandallies.org/forums/index.php?topic=26127.0
http://www.axisandallies.org/forums/index.php?topic=26122.0
I hope Ya’ll enjoy them, I feel it’s important to share info/pics and in so doing boost each others’ interest in this hobby.
“Tall Paul” Â
-
Those are pretty nifty Paul! Like those paratroopers… you got any pics of the Marine Raiders where the focus is on the soldier and not the stand as much - like some of the cool paratrooper pics? Would enjoy seeing the detail of those awesome camo jobs on those…
(btw - cool idea for designating different troop types) 8-)
-
Viracocha and Others,
Here’s a pic of the Marine Raiders. I hope this is what you wanted. There are two different threads I just started. One on the MARINES, and the other on the PARATROOPERS(see Reply #91 above for links). If you’ll scroll through them you’ll see several pics and graphics.
As you can see these Marine Raiders have camo from head-to-toe. The regular Marine “grunts” only have camo helmets.
I guess I should go ahead and post pics of the ParaMarine Raiders with the Paratroop thread, too.
“Tall Paul”

-
Viracocha and Others,
(btw - cool idea for designating different troop types) � 8-)
Yes, there are two different reasons I wanted to paint Service or Division/Regiment/Battalion shoulder patches on the bases of units instead of my standard National insignia.
First, I wanted the U.S. Marines to look different from the U.S. Army units. The Marines dominating in the Pacific, and the Army dominating in Europe and elsewhere.
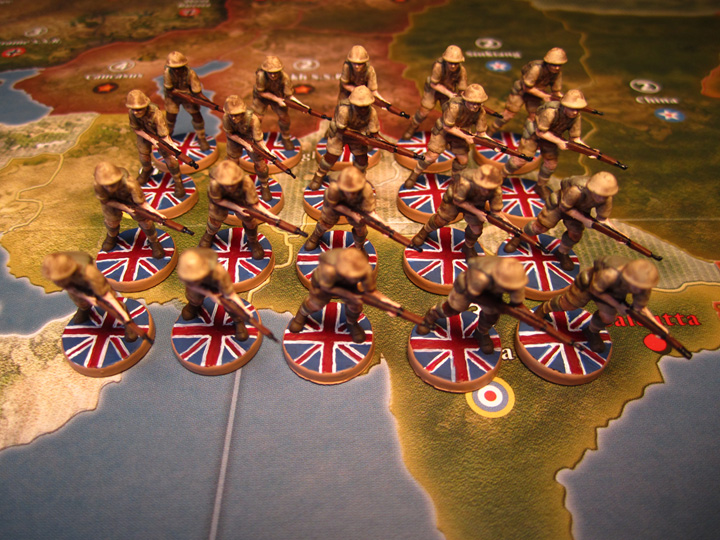
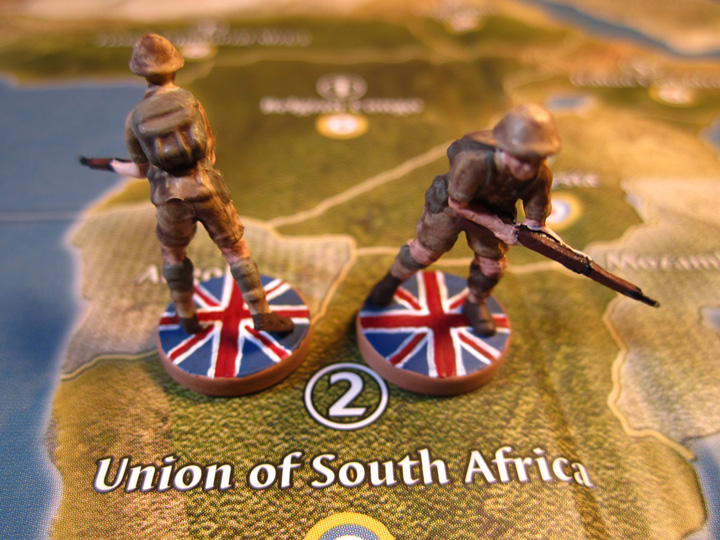
I did the same thing with my UK-Europe(London-based) and my
UK-Pacific(Calcutta-based) Infantry. The UK-P© units I had painted with “Union Jack” insignia on their bases. I nick-named them “Jacks”. I’ll post a pic of my “Jacks” for you.Second, IN SOME UPCOMING FUTURE GAMES the Marines will probably have different A/D/C/M factors from the standard Infantry units and thus need to be different looking.
“Tall Paul”

-
And a close-up, front and back of my “Jacks”.
“Tall Paul”

-
<long whistle=“”>Those will look sweet in-game. :-D</long>
-
Viracocha,
I’ll consider that as a grand compliment from someone who’s painted some great looking pieces yourself.
Irregardless of how good the "Jack’s might look, I think it’s most important that they be easily distinguished from their European brethren.
The Italian Infantry are on the way, with the Germans soon available(?). I think I’ll get the Major and Minor Industrial Complexes and Anti-Aircraft Guns painted next.
Then some aircraft. I already have loads of them just waiting. Wildcats, Warhawks, Mustangs, Mitchells, Commandos, TBF “Turkeys”, FockeWolves, and all of the Italian a/c. Not to mention all of the OOB a/c.
“Tall Paul”
-
@Tall:
Chagadiel and Others,
I really enjoyed seeing the pics of your wonderful paint jobs. I especially liked the Japanese Carriers. Any more pics?
“Tall Paul” �
Maybe this one……couple of modified classic carriers plus experimental paint schemes…
-
Paul - cheers my man. Right now I’m painting FMG Italians… whew, takes some time. Some damn good detail on these. I like that your set (by AllWork) will have so many different characteristics that could represent other stats/abilities for units. Though this would of course prolong an already long game - I don’t care, I’m not only a mini junkie but am a sucker for cool house rules as well. I’d love to do this/have more individual stats for units… but unfortunately, I don’t get to play as much anymore and when I do, it’s usually limited to 1 day. I’m jealous. :evil:
Dangermouse - still lov’in those carriers… especially the camo ones…
-
They all look great. really good. i am about to paint some marines and paras but they are 20mm metal as the plastics from fmg is too much to ship uk. 20mm scale is 1/76 which is spot on for the board game figs.


