


I have been playing around with different configurations for a custom table and wanted to note some things I’ve landed on that I really like. A main one thing is having the map mounted so that it can slide around as needed on top of a bigger playing area. My table is 65” x 95” in total with a 5.5” arm rest around the outside and the middle is a recessed neoprene surface. I have the OOB Global map mounted on 1/2” rigid foam with a 1/2” aluminum frame around it. This allows the map to slide up close to whoever’s turn it is, but then be in the middle so both players can roll dice In front of them without disturbing the map and in easy view of the other player. (Plus we like lots of room to roll the bones). This ability to adjust the surface along with a standing height, makes it comfortable for long uses because you can move around more and don’t feel as tied down.
Things I’ve learned and changed from original design - I originally used too big of a frame for the map and mounted it on too high of a foam block (you can see these pictures at the bottom) - it made it hard to see the other player’s dice and the big frame took up too much real estate. My global map is mounted on much thinner foam (the framing is bad, you can see if you look closely) but I also used much thinner aluminum angle for the frame. This gives just enough grip when needing to move the map around (I use furniture slides on the bottom, which glide very nicely on the neoprene) but doesn’t make the whole thing too bulky. Having it an inch or so off the surface keeps the dice off, but isn’t so heigh that you can’t see the other player’s dice rolls. When playing other versions (such as Zombies) the board is much smaller, but it can easily swap in and out on the same table since it can move around where ever it is needed or be pushed aside.
I originally made it normal table height, but found long reaches while sitting were harder and it just felt cramped. Standing height with a bar stool is a great way to have the best of both worlds.
The 5.5” rim around the table itself gives you a nice arm rest that doesn’t interfere with the gaming surface. I’m playing with how to best add some cushion to this part - open to suggestions. Sometimes I just lay a piece of leftover neoprene on it.
Dice bounce nice on the neoprene and stay off the floor. It also feels nice and has enough give to allow things to slide but be picked up easily. Wouldn’t definitely go with neoprene again as a surface covering.
I made the drawers open to the inside of the table so you can stay hunched over the action while accessing and stowing stuff away. 50/50 on whether I would keep this if I were to do it again. If I were doing it again, I might try to build customer drawers form scratch using actual drawer glides, but that was beyond my ability when I first did this, so I just used clear plexiglass boxes with aluminum pulls mounted on them. It’s nice having them clear, and I was happy with how the pulls came out, but without glides they can be a little fussy sliding in and out of their slots.
I originally designed the table so that I could put a cover surface back on top when not in use, but find I don’t really ever do that, so if I were to do it again, I might not mess with that part (I never even finished staining those as you can see in the pictures).
CF362D52-269F-4480-8CBB-08139099138F.jpeg A9E12EA1-66EB-4671-86AC-68C62FD30AD5.jpeg 858DE1F2-030A-4D5A-93E4-70A7D1180ADB.jpeg 8F513EE0-DA37-4BA9-880E-4D5EF7BF431F.jpeg F0188165-757B-4CC1-BF67-5045832283C9.jpeg 2E3CD627-0D31-4121-ACF8-682F9F58A40B.jpeg
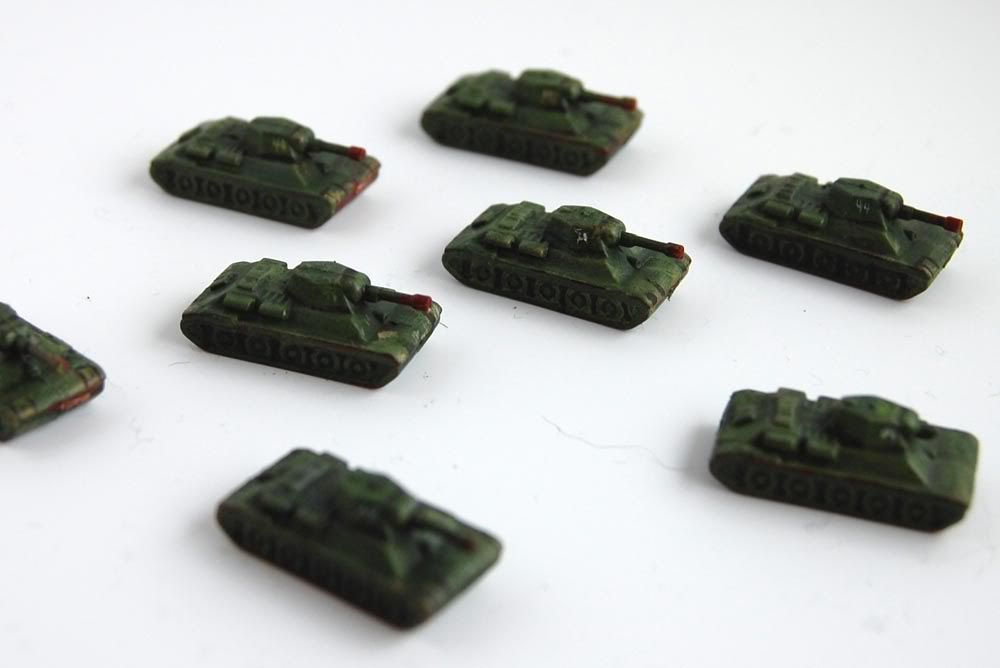
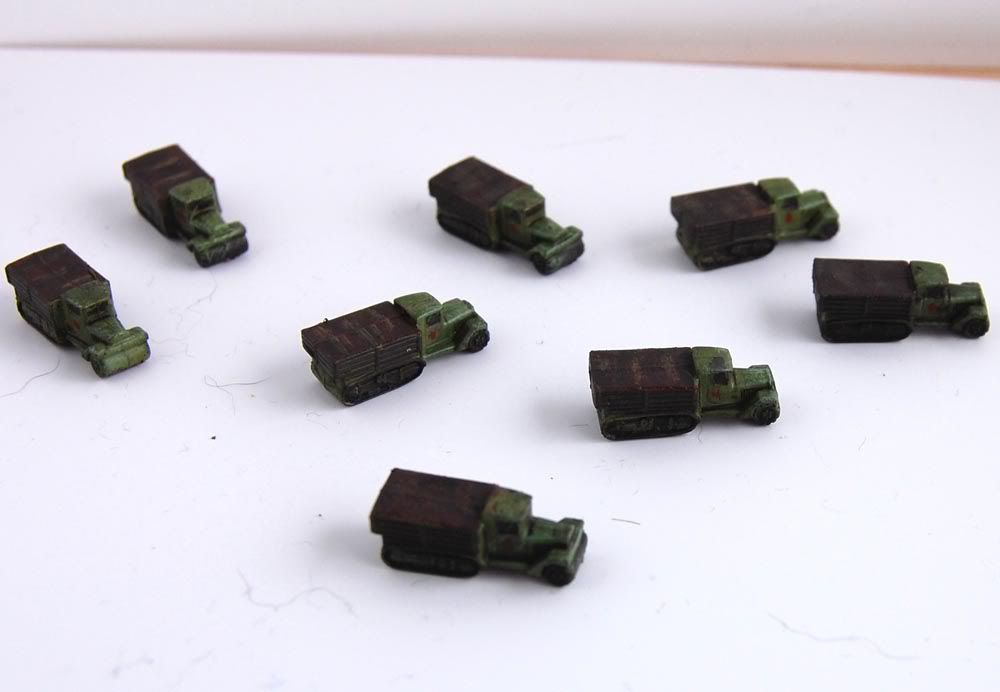
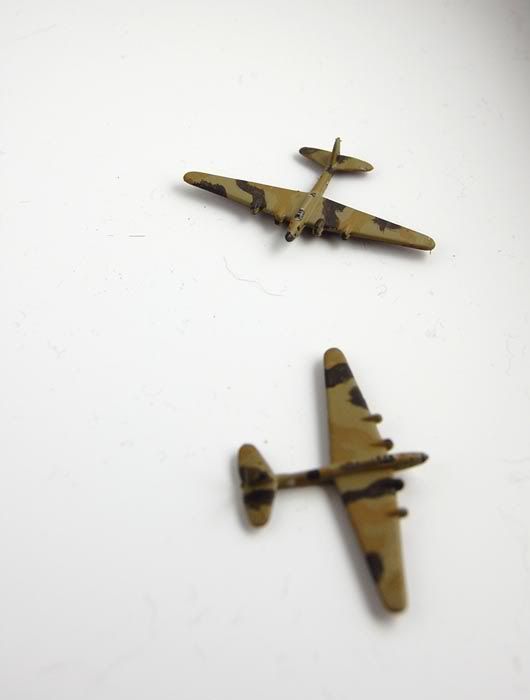
Painted playing pieces
-
some good painting there. some straight lines unlike mine on the carriers.
may i suggest trying washes on your battle ships NOT the aircraft carriers though. the batle ships have lots of nooks and detail for a dark grey or brown wash to pull out the detail.
haven´t ever tried a wash…. but maybe I should…
Try it on just one. dip a brush in a dark colour, brown works well for me. Dip the brush brush in some water and nudge the brush on the side and you will see how strong the paint is still. Keep dipping until you like the water/paint ratio. dont panic if it covers the model all over and is too thick it happens to me still just thin the brush more and apply more watered down paints until it thins and use the brush to soak up bits which are too thick.
it sounds more complicated than it is just start with a very watered down wash and see. it useally takes an hour to dry with acrylics but its the last thing mostly anyway
-
German Sd.Kfz. 251

Russian T34
russian trucks
russian bombers
-
nice… I´m working on my army as well… slow but steady :)
-
If you want me to be honest i think that you have potencial.
Some things that could improve your work:
- Use a base black spray coat from warhammer.
- put more water on ink so that is not to thick.
- use decalcs for roundels, don´t paint roundels cause that gives a really low quality look.
-
I don’t think anyone here claimed to be a professional… So obviously this is all amateur work.
-
Well… Don´t know what to say?!
I think that everyone that is painting their units are just doing it for fun. It´s not like we are trying to massproduce the troops and sell them…
We´re all amateurs and not spending all of our time and money on it…
But since I´m a nice person I´ve answered your other post about decals… Which I use for some of my units… -
If you want me to be honest i think that the painting looks very amateur.
Some things that could improve your work:
- Use a base black spray coat from warhammer.
- put more water on ink so that is not to thick.
- use decalcs for roundels, don´t paint roundels cause that gives a really low quality look.
nope i am not a profesional i just like painting. i just thought i would share the way i am doing mine which is a bit differrent i also like to see other peaples to compare interpretations of colour style and ideas which i like and borrow for my own.
i agree with the decals especially the american ones i struggel to do straight lines and stars . a black base coat takes away colour and makes it dull, a white coat is better.ANYways whats the point in it all when last night i was playing europe with my wife and she kept attacking me with backwards faceing t34s :-D
-
si germans…

-
No 1
:Megastien (or whatever you call yourself),
He was showing what he did not what you can buy. Calling it amatuer is just plain mean.
No 2 Chagadiel
:Don’t let the naysayers hold you back, they are just lacking in some part of them self.
Game on!
-
i still think that they’re great. im considering starting to paint my peices.
-
Lets try to encourage the progress of these people and not tear them down with insults. Its ok to give tips on how to do better, but lets not judge the work in any light other than a positive one.
If you can do better, then do it and post. You can only raise the bar and encourage others to do the same.
-
@Imperious:
Lets try to encourage the progress of these people and not tear them down with insults. Its ok to give tips on how to do better, but lets not judge the work in any light other than a positive one.
If you can do better, then do it and post. You can only raise the bar and encourage others to do the same.
McLovin Likes This (Insert thumbs up here)
-
Well said, IL.
-
thanks all
I leader said it best. Forums are a great place to share with like minded peaple and give a little bit back to the comunity from which you have sought ideas and influence.
-
Very cool. Nice job. I used to build a lot of 1/72 scale armor and had fun with the various paint schemes. I just don’t have time anymore.
-
Beautiful work!
So well done!
Keep on painting!
You may have however potencial to do a lot better than that!
-
really important is to use a base color with spray - this avoids the ink from being removed with your nails for example later when playing with the painted units.
Dissolve more the ink on water to have a smoother surface after painting.
only use 3 colors to tanks.
with planes and ships you only need to use 1 color and one shadow, using a second color only for details (ex:the front of zero is black and the rest of the plane is dark green or white)
camouflage in tanks was made depending the theater: jungle many diferent greens together, desert just a kind of yellow
camouflage on ships was made using one single color (for example a kind of blue/green for usa ships
camouflage on planes was made in 2 dimensions: below the plane a color of the sky - light grey more frequently (someone looking to the flying plane from ground would see the sky and the below part of the plane). The other dimension is above the plane - someone on another plane flying over that plane sees the above part the plane and the ground - for example the upper part of the usa dauntless was painted blue so that someone looking down would see the blue from the plane and the blue water of pacific ocean.
-
a good benchmarketing is to observe AA miniatures.
all land and air units look pretty real.
the ships do not look that real cause in reality the camouflage used in the ships from the different powers was really very similar, so AA naval miniatures are painted in a surreal method to make each power having specific colors.
in reality however, many times the only way to distinguish to whom each ship belonged was by analising its silhouette, not its colors (many times there was not even a flag to check)
-
I have decided to have a professionally painted set. My guy ED is a Master Painter of nearly 35 years.
But my issue is to wait till FMG pieces comes out and paint them, or just paint the OOB.
Id hate to get all these painted and have to start again and redo them when i get the FMG pieces.
hmmm….
I think i will split the difference. Paint FMG Italy and Germany, and also paint all the other nations using AA pieces.
FMG is doing USA after Germany, so perhaps i will paint USA last in the hopes of painting FMG US pieces instead of AA.
What would you do? Wait for quality or use what i got, or split the difference?
Suggested Topics

