@Steiner This board is so cool! I love the colors and how 3D it is. I’d love to see photos with all the units setup!
-A Painting Tutorial and Resource for A&A Global-
-
It takes me back to my military modeling days. When I was a teenager I would spend countless hours painting 1/72-1/35 scale miniatures to build military dioramas. I even did one for my Senior project in high school where I made a diorama of the US Special Forces camp at Lang Vei being overrun by PT-76 tanks and NVA in 1-35 scale…
Wow, those sound like really cool projects! You don’t happen to have any photos of these dioramas, do you? I bet you have a lot of experience in terrain and weathering as well. Really neat.
Maybe when my kids get a little older I can start the hobby back up and practice on my Axis and Allies pieces since they look (the infantry at least) about the same size as 1/72 scale.
I have painted some 1/72 infantry, and it is almost the same size; probably a bit closer to 1/76. Good luck on all future customization projects!
Unfortunately I don’t…I did a whole bunch of them when I was growing up though.
The first thing about terrain and weathering I would say is doing a lot of research. This hobby is really how I became super interested in history because I had to make these things very very accurate since many of the judges in the modeling contests I would enter were experts themselves or even veterans of the pieces I was portraying.
For example. The first time I did this my dad came in (a Marine multiple tour infantry/door gunner Vietnam Vet) with a Dragon set of 4 US Marines from Vietnam and said, we’re going to build a diorama and submit it in a contest that was 2 weeks away. So I diligently started putting together and painting the Marine figures based off the colors that the box had set for their uniforms and equipment. After finishing a few he came in to inspect my work and flatly said “the uniforms are the wrong color”…I said that forest green was the color the box had on it. He mentioned “sure, maybe when they’re issued, but not after they’ve been exposed to sweat, dirt, and the sun for months on end. They should be a very light green to almost a white color because this portion of the battle takes place after the monsoon season and the sun will bleach those uniforms several shades lighter then when they were issued.” I was only about 12 at this time and didn’t really have any concept of what my dad did in Vietnam at that point…but it was at this point that I realized that 1. my dad really seemed to know what he was talking about…and I wondered why that was and 2. if he saw that, then the judges would certainly see that. The following week he dropped off a stack of books on the subject in my room and basically said; “If you want to make this right, you need to start reading.” And boy did I start reading lol. I ended up taking second in that contest but it lit a fire to really get into the nitty gritty of the research portion of not only the soldiers, their equipment, and their battles, but also on books that were published that concentrated on making your figures “come to life”. It took a lot of trial and error and I must say my neck, shoulders, and eyesight probably paid for it being hunched over for hours looking through a magnifying glass trying to get that oh so small piece of equipment just the right combo of OD green and weathered dirt color. It paid off though because my hallmarks ended up being:
A 1/72 scale diorama of a city block in the battle of Hue city near the citadel. It had about a platoon and half worth of US Marines and about a platoons worth of NVA. It also had an M48 Patton tank as well as a mechanical mule with a 106mm recoiless rifle mounted on it. Lots of weathering for the city damage and the battle damage on the tank.
The first one I did was of a portion of the line at Khe Sanh in 1/35 scale complete with a trench line, bunker, lots of sandbags, and jarheads either taking cover from incoming or shooting the “pig” (an M60 machine gun). Not to mention getting the mud the right reddish. In the trench line the level of detail went from expended C ration cans, spend shell casings, to rats running along the edges.
I did a 1/35 scale one of a PBR river boat extraction of a SEAL team under fire in the Mekong Delta. That was a very difficult one to do trying to get the resin I used as water to look realistic with the motor wash of the boat, the splashes of the team scrambling in the shallow water to get to the boat, and the splashes to make it look like rifle and machine gun fire was landing in the water around them as they exfilled. I don’t know how many times I had to start over getting it just right…but once I did…it looked awesome.
The senior project I did was on the evolution of Special Operations forces within the US military from WWII to present. I made a timeline over all types of different units we’ve had throughout the years with a description of their mission set, training, and utility. I mounted 1/35 scale representations of each group I had made on a board to the appropriate area of the timeline for graphic representation of what those troops would look like. Then I capped it off with the Special forces compound diorama set in Vietnam since that was Special Operations most prominent role they had fulfilled up to that point in their history. (9/11 hadn’t happened yet)
Sadly, once I joined the Army, most of my stuff either got destroyed in PCS moves or was unknowingly thrown out by my parents throughout the years…plus that hobby has kind of gone by the wayside. I still have a bunch of the unfinished models from those years sitting in a plastic Rubbermaid container somewhere in my garage…maybe by picking up the hobby again I can get my wife to get off my back about getting rid of it LOL!
-
The first time I did this my dad came in (a Marine multiple tour infantry/door gunner Vietnam Vet) with a Dragon set of 4 US Marines from Vietnam and said, we’re going to build a diorama and submit it in a contest that was 2 weeks away. So I diligently started putting together and painting the Marine figures based off the colors that the box had set for their uniforms and equipment. After finishing a few he came in to inspect my work and flatly said “the uniforms are the wrong color”…I said that forest green was the color the box had on it. He mentioned “sure, maybe when they’re issued, but not after they’ve been exposed to sweat, dirt, and the sun for months on end. They should be a very light green to almost a white color because this portion of the battle takes place after the monsoon season and the sun will bleach those uniforms several shades lighter then when they were issued.” I was only about 12 at this time and didn’t really have any concept of what my dad did in Vietnam at that point…but it was at this point that I realized that 1. my dad really seemed to know what he was talking about…and I wondered why that was and 2. if he saw that, then the judges would certainly see that. The following week he dropped off a stack of books on the subject in my room and basically said; “If you want to make this right, you need to start reading.” And boy did I start reading lol. I ended up taking second in that contest but it lit a fire to really get into the nitty gritty of the research portion of not only the soldiers, their equipment, and their battles, but also on books that were published that concentrated on making your figures “come to life”. It took a lot of trial and error and I must say my neck, shoulders, and eyesight probably paid for it being hunched over for hours looking through a magnifying glass trying to get that oh so small piece of equipment just the right combo of OD green and weathered dirt color.
The close connection between modeling work and history is one of the reasons that it is so great. Your work becomes that much more personal and interesting when you have studied the history behind it and can make your pieces/dioramas/game boards have stories and authenticity.
I did a 1/35 scale one of a PBR river boat extraction of a SEAL team under fire in the Mekong Delta. That was a very difficult one to do trying to get the resin I used as water to look realistic with the motor wash of the boat, the splashes of the team scrambling in the shallow water to get to the boat, and the splashes to make it look like rifle and machine gun fire was landing in the water around them as they exfilled. I don’t know how many times I had to start over getting it just right…but once I did…it looked awesome.
Uff, that sounds terribly frustrating. You’re right though- I bet it looked really sweet! I’ve only ever seen dioramas with stagnant/flowing water, and those looked great, so I can imagine that the effects you could get with some hard work would be well worth it.
-
I have had some more free time lately, so I decided to whip out the paints again and paint the P-51 Mustangs that I got from HBG’s US Supplement Set. I only have 4, but that’s enough for the European theater. I went for four different schemes for variety and to add some life to the game, since each plane comes from a different fighter group. From top left, clockwise. “Beantown Banshee” with invasion stripes and the anti-glare panel. The second is “Snoot’s Sniper” from the 352nd FG. Then a plane roughly based off of a Mustang from the 55th FG. The last is from the 332nd African American “Tuskegee Airmen”, or “Red Tails” as they were affectionately known as.

The inspiration and research came from several different sources, which I will provide below to help my fellow customizers in their quest for their perfect set! I am also (re)painting my Russian air force (VVS), so some of these sources were found as I did the research for that.
For P-51 specific schemes I found an RC modeler’s site which had a lot of great examples.
http://www.rcgroups.com/forums/showthread.php?t=1112761A resource for general air force painting information is this site by “Fritz the Fox”, with paint schemes and information on different planes and periods of the war.
http://www.fritzthefox.com/camo_guide.htmlA Russian air force specific site is hobbyvista.com. Under the “Monthly” section, which I have linked, the author has done extensive research using WWII photographs to determine exact paint schemes and deployment of different fighter groups. If you look under “Links” there is also a plethora of other references that should meet all your Russian painting needs!
http://vvs.hobbyvista.com/Monthly/index.phpI will post more links if/when I find them. Feel free to share any useful sites or resources you have used, even if it doesn’t pertain to air forces.
-
It’s amazing how realistic a sculpt small enough to fit on a quarter can be made to look with a good paint job!
-
Talk about perfect timing. I have been looking at multiple sources to decide how to go about painting mine. I think I am going with the “Red Tails” after looking at all of yours.
-
Hey guys! I’m selling my fully painted 1942 set over on the Marketplace; in the process of preparing the set for sale, I took photos of all of the pieces. They are the pieces that I began painting as a beginner, so you can see the development of the quality over time. I thought you might like to see them for ideas, questions, laughs, etc. If for no other reason, A&A painters love photos!
Here is the link to my Flickr page, where you can see them all. http://goo.gl/SbKgLZ
Happy Wednesday!
Looks awesome! Um…how much for the whole set!
Hey Redleg, I sent you a PM. If anyone else is interested, you can look in the Marketplace subforum for the information.
-
Are we doing the deal? I’ve sent 3 PMs with no response. All I need is your pay pal stuff and I can pay in full. Awaiting a yes or no so we can either move forward or I can move onto something else…
-
Are we doing the deal? I’ve sent 3 PMs with no response. All I need is your pay pal stuff and I can pay in full. Awaiting a yes or no so we can either move forward or I can move onto something else…
Sorry for the lack of response - I have been busy the last day or two. Thanks for your patience - I just got back to you.
-
I just went through this whole thread again and on top of being inspired by the pieces I bought from you to get back into painting…I can see that I may have lost a step or two in the last 15 years lol…The pieces you’ve demonstrated on this thread are just amazing and I’m hoping that I can get to that level eventually. As you can see from the thread I started, I am painting again…but I sure have a long way to go before I get to your quality of work. Well done and just know that you’re quality of work is now on my front sight post!
Thanks RedLeg! Practice is certainly the best way to improve - you’ll find that you learn from experience; you’ll become familiar with your paint’s viscosity and characteristics, you’ll get a better eye for detail, and you’ll develop your own style. If you want to save your Global pieces until you get to a level you’re happy with, you could get some of HBG’s cheap factory decline pieces for practice.
If you ever have any questions, let me know!
-
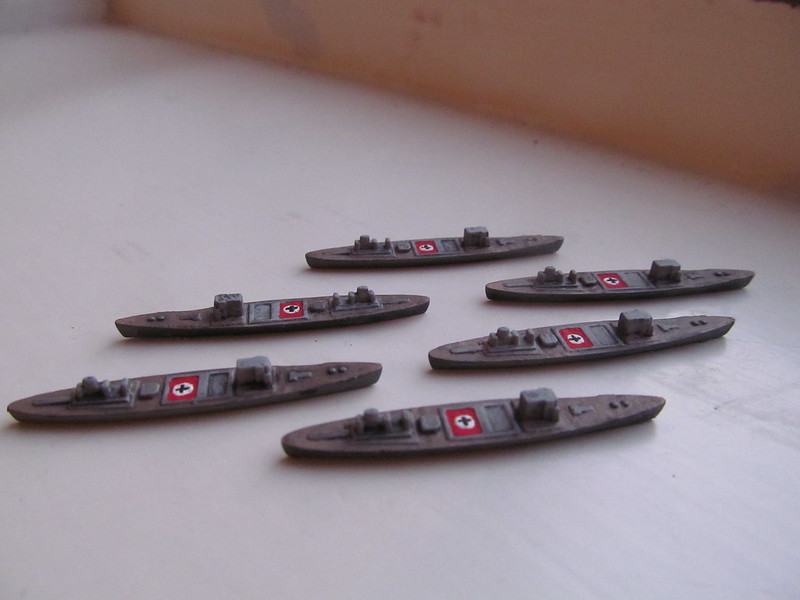
The ships of the Kriegsmarine have finished their time in the drydocks and are ready to cruise the Atlantic!
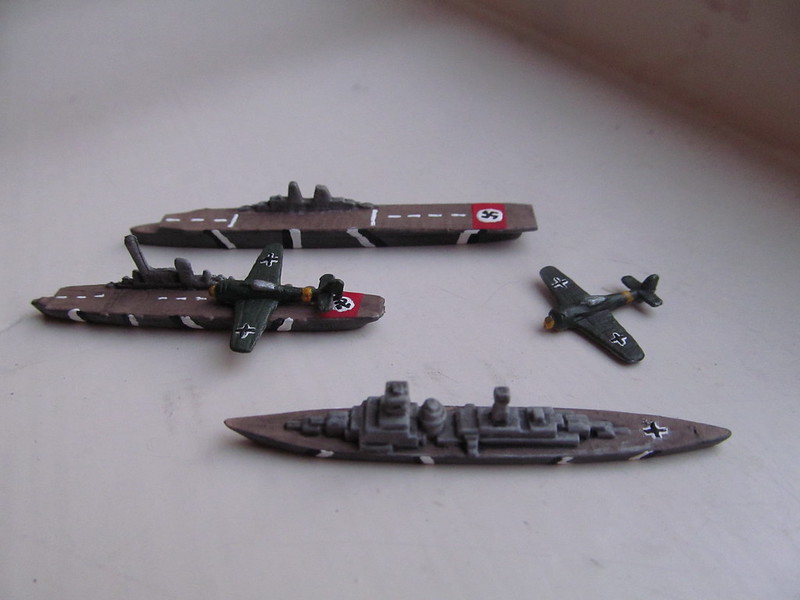
Battleships
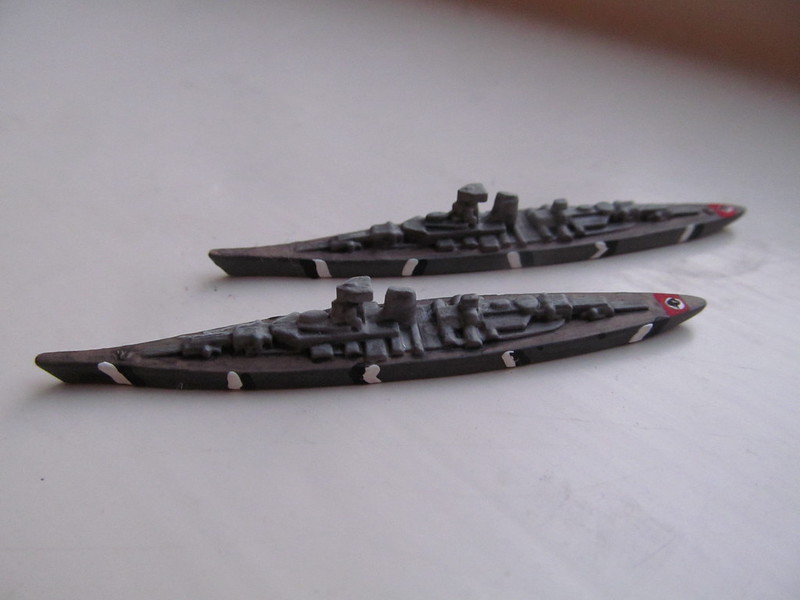
Aircraft Carriers - front are HBG Light Carriers, rear are OOB.
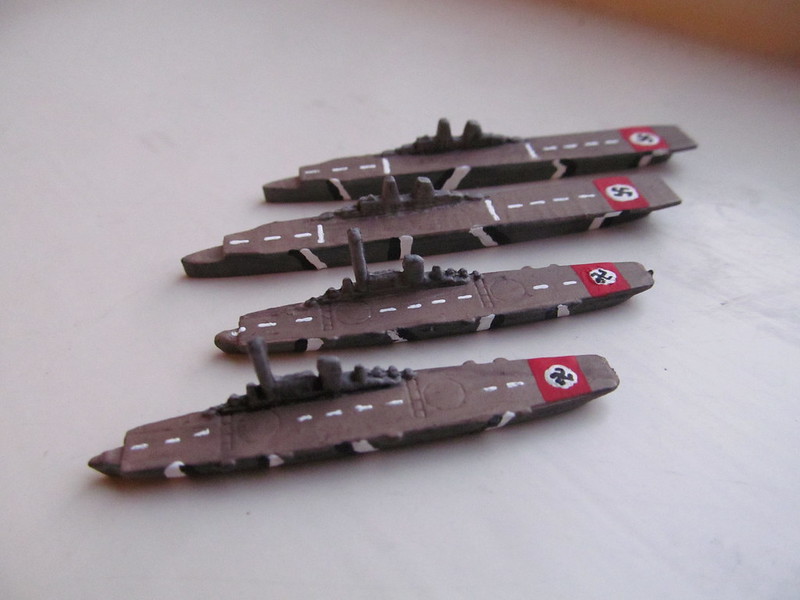
Cruisers - my personal favorites.
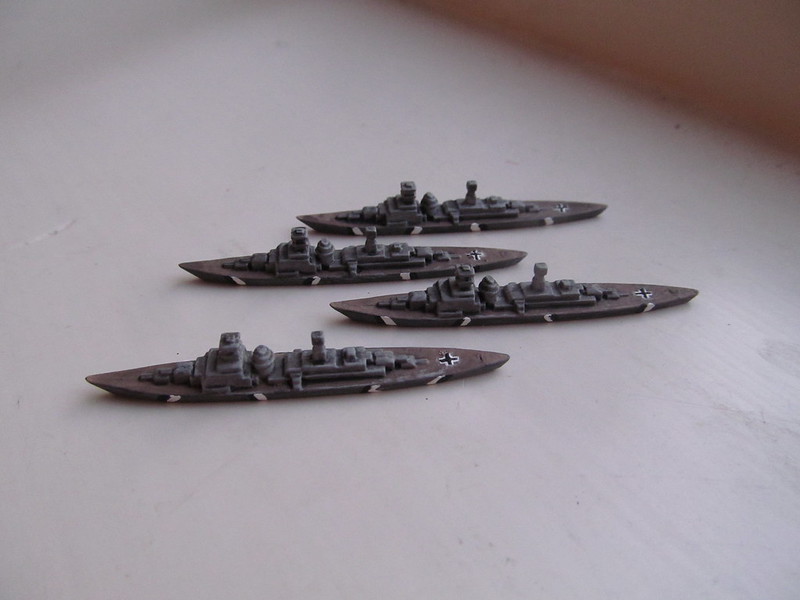
Destroyers

Transports
-
Those are awesome, my friend! They look like they are ready for a fight! :-D
-
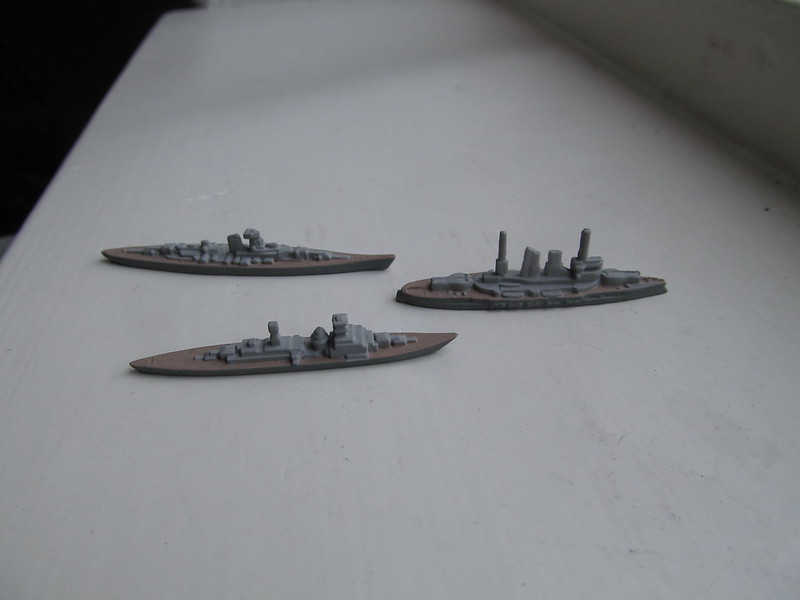
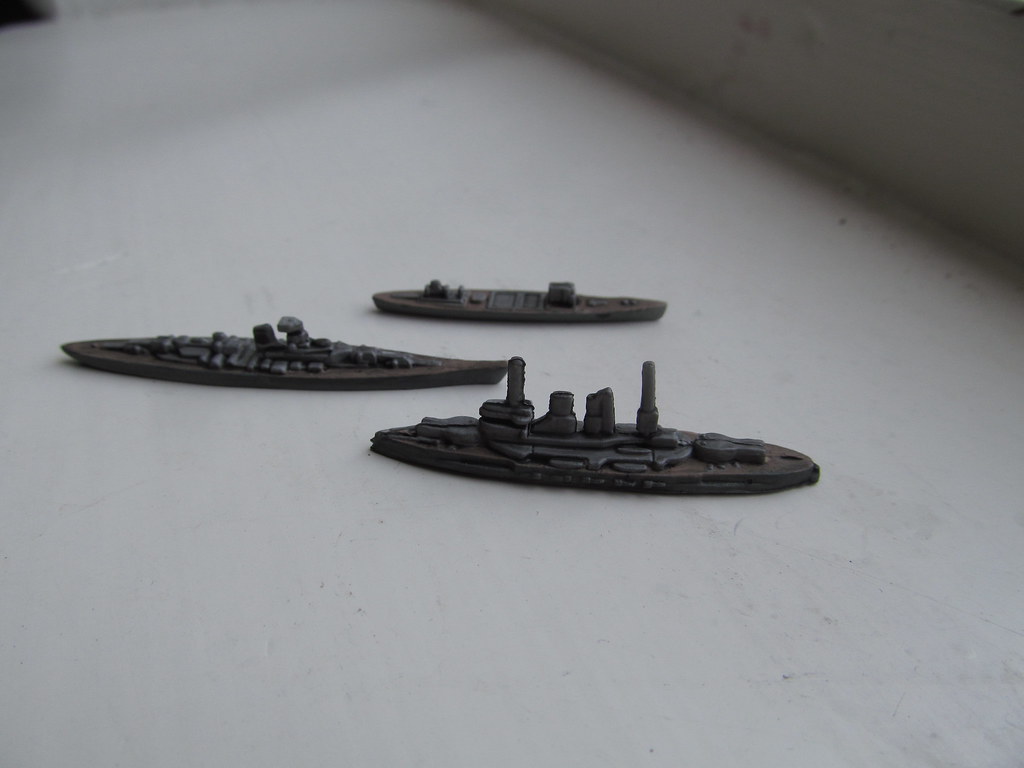
I thought I would take a before and and after shot of the navy to show you what a difference an inkwash will make. While these are not my best work, I think they still serve the purpose!
The shot below is the ships before an inkwash. At this point they just have a coat of primer, one or two base coats for the deck, hull, and superstructure. Notice how flat the piece looks; it looks fine, but it’s not what it could be.
This next shot is after an inkwash. It makes the crevices pop, and you get a much more three dimensional piece, especially from a few feet away on the gaming table. I recommend that you also give it a good drybrushing to make it look even better. Of course, some of it is subjective; you might prefer it to be more of a flat, fresh paint look rather than a battle-worn look.
-
Yeah, I can tell a big difference, just by you putting the pictures, side by side. It does look better!
-
For those of you interested in my storage solution for my pieces, wait no longer. Below is a picture of my custom build storage box.
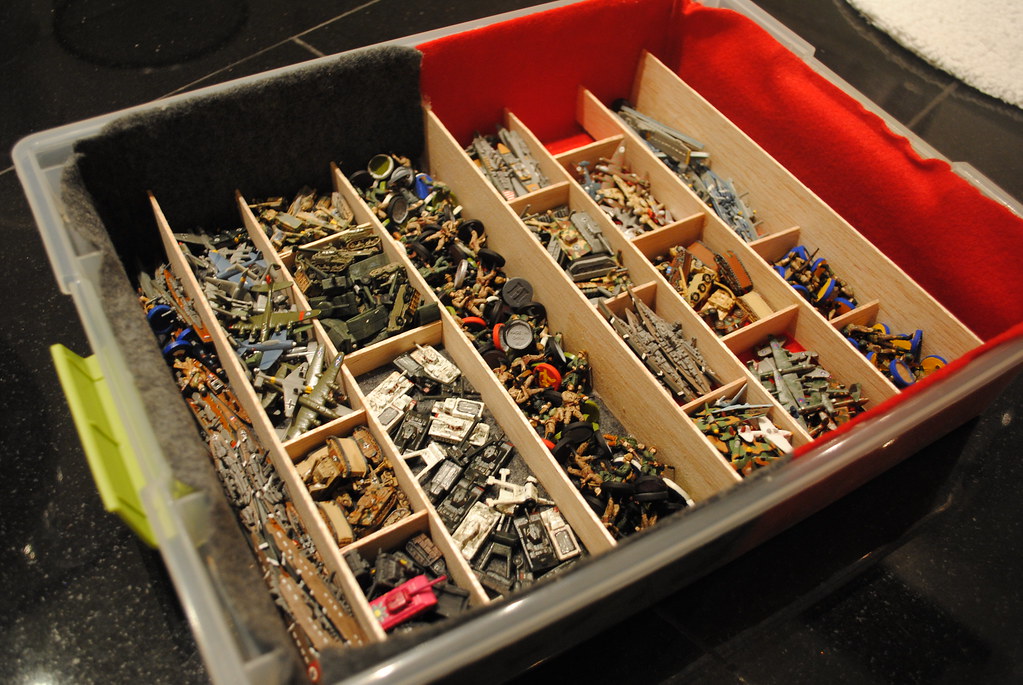
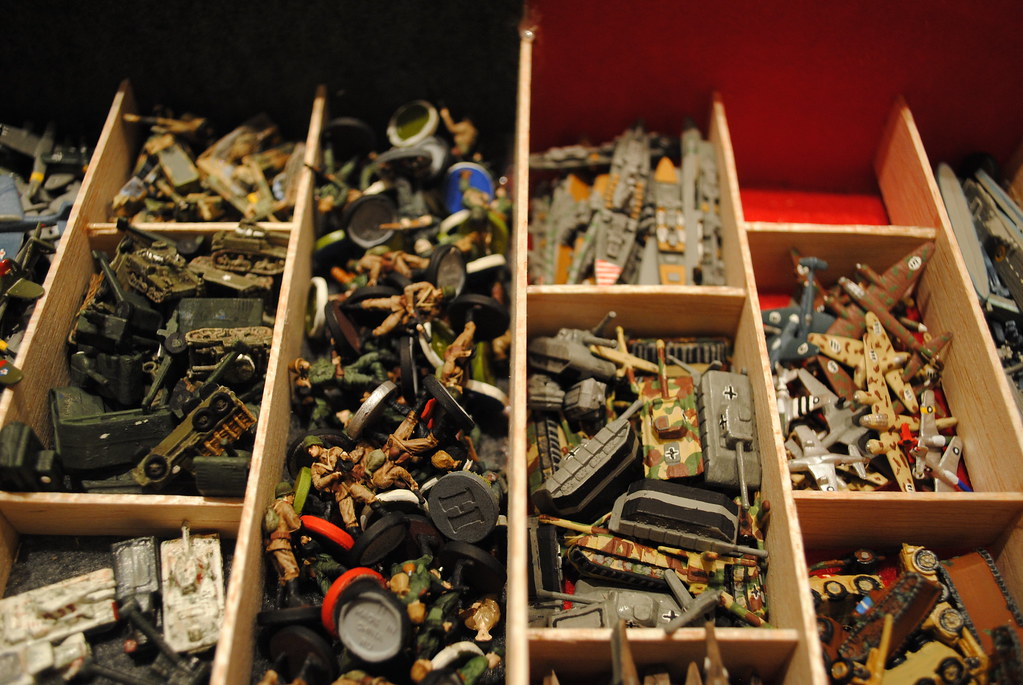
This is only one of three that I was planning on building. Each box would hold one nation on each side; this one was originally constructed for the Germans and the Japanese, which is why I used the black and read felt. The Axis Powers!
I only ever got around to building one, but I will need to build two more pretty soon, as this one is too full at the moment.
The materials I used:
-
Plastic container with snap on lid (Target)
-
Long strips of balsa wood (Michaels)
-
Sheets of felt, cut to size (Hobby Lobby)
-
Hot glue
-
Exacto knife
The rest is pretty self explanatory. You just measure how big you want the individual sections to be, cut the balsa wood to size, glue the felt down, glue the balsa wood down, and you’re done.
I’ve found that it works pretty well for my storage needs, because it keeps the pieces secure and non-scratched because of the felt. My original idea was to see if I could fit in a second level, like a removable tray, but I scratched that idea. I also wanted to spray paint the boxes black and then paint or put a sticker of the national insignia on the box to make it look really professional. You can take the idea and run with it - you guys are creative.
Post your storage solutions here, or let us know how you keep your pieces safe and sound!
-
-
Man that is a lot of painted pieces! I like the idea of felt. Nice job on your storage, :-)
-
What are you painting next? :-D
-
What are you painting next? :-D
Your Japanese military. I don’t have time to do anymore painting before I move, so the paints are all away for a few months.


