Hey All,
I’ve got some custom resin 4-figure and single figure .stl files available on wargame3d here:
Just search Ritterkrieg or click on the link above.![alt text](IMG_2948.JPG image url)
UPDATE:
Download link for the roundels. Click on image for larger version. These roundels are 19.4mm in diameter meaning you will have a 0.4mm cutting margin. For people that need the Pacific roundel or the Italian roundel as shipped with the game I’ve added these designs as well.
ORIGINAL MESSAGE BELOW
Hi All!
After working on my Global 1940 map cleanup and my Anniversary map file it’s time to continue my customizations: Custom roundels and tokens!
I never really liked the cardboard tokens that come with them game. Not because of the designs off the tokens, but rather the lack of weight and how easy you can pick them up from the board. I will create custom roundels and custom naval and air bases. And while I’m at it I can also work on custom movement tokens for airplanes and custom research / technology tokens.
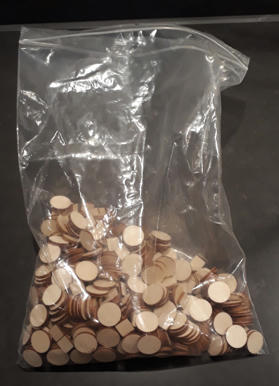
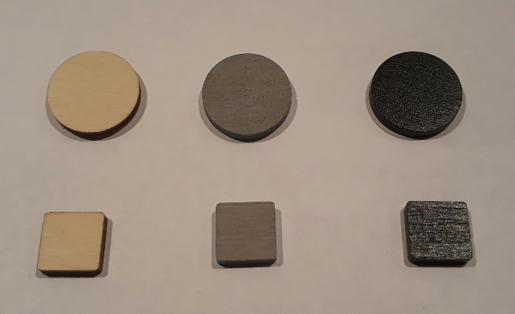
To start this off I’ve ordered a laser cutting company to cut me 19mm (or 3/4 inch for those that go with the weird imperial units :-P) discs and 12mm squares out of 3mm plywood. 550 discs and 115 squares to be more precise. More then enough to beef up my Global 1940 set (or any ww2 edition) as well as my 1914 set and some custom tokens as mentioned earlier.
Next stage is painting the wooden tokens. Fist one layer of primer followed by two layers of black paint. With a soft sanding before putting on each subsequent layer of paint. Roughly 40 discs and 10 squares done in the first batch so plenty more to do.
Unfortunately my printer broke down the moment I wanted to print my first set of roundels to glue on top of the roughly 40 black discs I’ve painted so far. So it might take a few days for the new one to come in and for me to show some more progress.
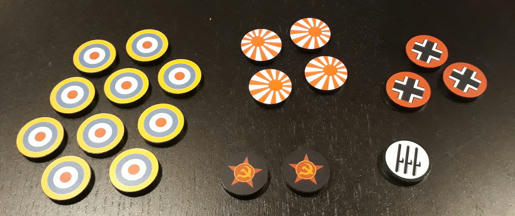
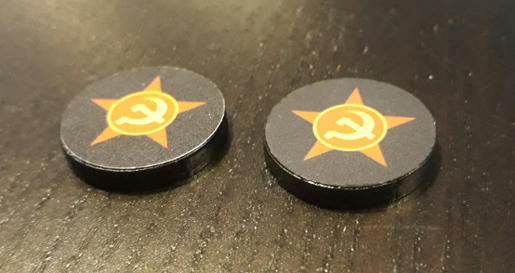
As a teaser for what it will look like when finished, I’ve done a few prototypes a few months back. Each disc is finished with a home made print on high quality photo paper that’s glued on the disc. Subsequently the whole token is sprayed with a satin varnish to seal it and give it a nice but not too obvious shine. More importantly the varnish will protect it during game play use. Note my custom research token on the right. This will replace the research token in the Anniversary edition.
And about the naval and air bases. They won’t get the same photo paper treatment… something 3D, but not a full miniature. Think more like a layered token.
Stay tuned and let me know your comments, thoughts and ideas to make our game even better.
Excellent looking roundels. As always I like the fact that these are done yourself. Allowing for a total customization of everything. Keep it going! I look forward to seeing all your customizations!
Thanks for the compliment Rank!
Still awaiting my new printer, but I’ve managed to spray paint around 90 discs in the mean time.
This is cool and all, but what makes this different from the improved custom roundels already available from HBG? Unless I’m missing something (and I’ll admit I probably am), this seems nearly identical to the improved roundels from HBG…
@Nowhere:
but what makes this different from the improved custom roundels already available from HBG?
Without having seen the HBG roundels in real live, they definitely look very similar. Judging from the HBG images and some youtube footage their roundels have a very shiny finish that I personally don’t like. But the main reason form making my own is that it gives me some freedom to also make other roundels in the exact same style. Like tech markers and remaining movement markers for airplanes.
Next to that the HBG roundels are expensive and making my own saves some money (although it takes far more time off course)
Yeah! The new printer arrived and is delivering even more crisp printouts then my previous one.
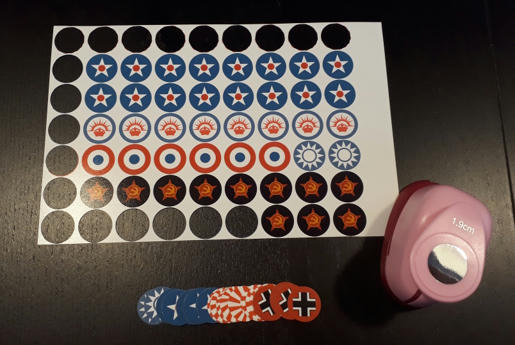
Here the first batch of home made roundels:
After printing the roundels on photo paper, I spray the paper with satin finish varnish. The next step is punching the roundels from the sheet.
Something I didn’t think about is how to cover the white paper edges of each roundel. I tried a few things, but painting them worked out best. Markers would bleed to much and ruined the look of the roundels. Painting is not a big problem for most roundels, but a bit more challenging for the Japanese red/white stripes reaching the edge of the roundel. Here an example of the Russian roundel. On the left the unpainted roundel and on the right the painted roundel. Note these are up close pictures. They look better in reality as per the first image
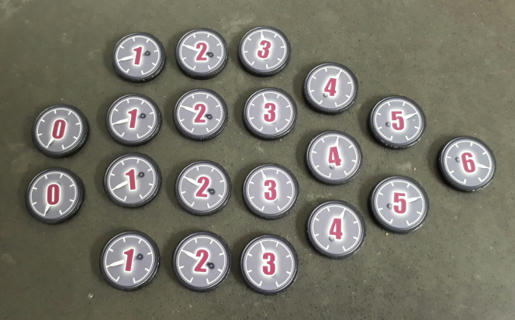
Finally some art sneak preview for the movement remaining roundels (and the research marker already shown in my first post)
Nice work. Those look Great!
A short update: I’ve been slowly but steadily working my way through the roundels and have about 15 of each nation at the time of writing.
And I’ve done a few movement remaining markers with my own custom artwork. I’m really happy with how they turned out. And they are a great addition to game play when you can mark the movements points remaining after your combat moves. I like them better then using dice as dice tend to get knocked around. A token will always keep it’s value even when flipped :-P
Looks great, looks like you found the same Etsy dealer I use :)
Thanks sired! However I didn’t get my discs on etsy. They were lasercut locally in the Netherlands.
Nice! I ordered 500 awhile back, they were identical to HBG, but my .75 punch was not accurate… did you use a .75 or 11/16?
How do you remove artwork on the OOB maps, while it looks like essentially another sea area but with some detail?
I would use the clone stamp in photoshop and grab the texture from a neighbouring sea zone
Nice! I ordered 500 awhile back, they were identical to HBG, but my .75 punch was not accurate… did you use a .75 or 11/16?
As my paper cutter is .75 (19mm) I made the discs .76 (19.4mm). This works really nice as the paper artwork doesn’t stick out of the edge of the wooden discs.
@Imperious:
How do you remove artwork on the OOB maps, while it looks like essentially another sea area but with some detail?
\
A bit off topic in this thread, but robert is right. I use the clone tool (in GIMP in my case) to copy bits and pieces from different original sea zones to match artwork and color as best as I can.
Hi Tjoek,
I guess you’re Dutch as i am, I’m a beginning global 40 player and really like how you’re doing things. I also like to make stuff myself and like HBG stuff very much, but with the shipping and taxes it becomes really expensive.
Can you give me some tips and tricks how you are doing stuff? Which shop to buy the wood etc.?
Maybe you life close to me?
Thanks so far
I guess you’re Dutch as i am, I’m a beginning global 40 player and really like how you’re doing things.
Yes I am! And thanks for the compliment.
I also like to make stuff myself and like HBG stuff very much, but with the shipping and taxes it becomes really expensive.
Can you give me some tips and tricks how you are doing stuff? Which shop to buy the wood etc.?
Maybe you life close to me?
I’ve send you a PM to discuss this offline
These look really good!!
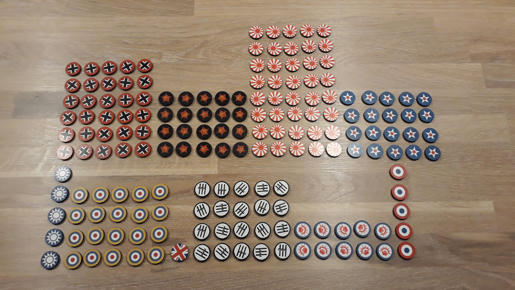
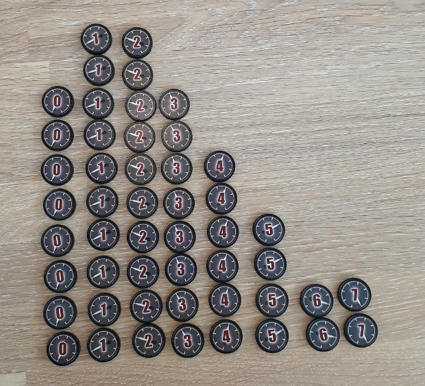
After needing to redo most of my movement tokens due to spraying on varnish when it was cold and humid outside I’ve now completed my set of roundels:
171 Control markers
30 Germany
20 Russia
40 Japan
20 USA
5 China
20 UK
1 UK Pacific (to mark the money for the Pacific)
20 Italy
10 Anzac
5 France
50 Movement markers
8 0’s
10 1’s
10 2’s
8 3’s
6 4’s
4 5’s
2 6’s
2 7’s
Update first post with a link to download the designs for these roundels including my custom design movement tokens and research tokens. Enjoy!