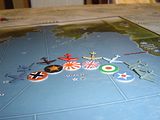
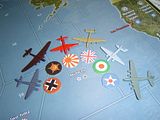
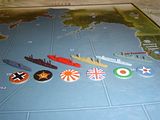
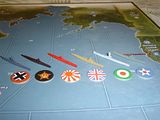
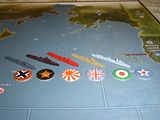
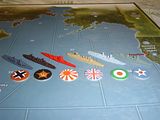
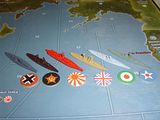
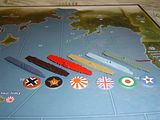
Just to add an extra comment here: I’m not sure I’m understanding the original question correctly, but if it means “what is the footprint (length x width) of every sculpt in the game?” my reaction would be that this information a) would take a lot of work to compile and b) is unnecessary for designing a custom map. To make sure that a custom map is large enough, all that’s really needed are three measurements: the dimensions of the Anniversary game board, the dimensions of the largest naval sculpt in the game (which is probably either the Japanese battleship or the American aircraft carrier), and the dimensions of the largest sculpt in the game which can be positioned on a land territory (which I think would be the American B-17 bomber). If custom map’s sea and land territories are big enough to handle those large sculpts, then they’ll be big enough to handle the smaller ones.
Plastic Playing Pieces
-
Imperious Leader '17 '16 '15 Organizer '14 Customizer '13 '12 '11 '10last edited by Feb 25, 2009, 11:48 PM
Japan should have more tanks and Italy should have 5 cruisers.
-
Japanese Infantry can also get in short supply with was supplied.
-
In my experience Japan needs more inf and more tanks & more art
and of course Italy needs more cruisers and addl art & tanks
-
While waiting for a source of high quality pieces, here is my solution. It takes care of the color, and number of pieces (except for Italy).
I combined my AAEurope, AAPacific with my AA50 pieces. I gave the Soviet Inf from the AAPacific to Italy and added the USA molded Chinese Inf of AAPacific to the Chinese Inf.
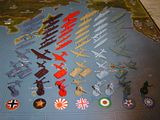
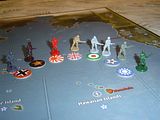
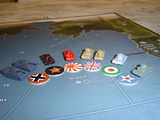
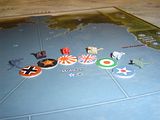
At first I only wanted to painted the Italian, Soviet, Chinese, and Japanese pieces. I got some spray paint for plastic and went to work. After I was done with these I didn’t like the two tone German, British and American pieces and decided to paint those also. Here is the result:
I am very pleased with the result. I am still very interested in replacement of high quality.
-
First set should include: Each Nation,
25 Infantry, 15 Artillery, 15 Tanks, 15 Fighter, 10 Bomber, 5 Battleship, 5 Aircraft Carrier, 10 Cruiser, 10 Destroyer, 15 Submarine and 10 Transport. China 20 Infantry. With this number of pieces it should be enough for each nation.yeah, probably have enough to go around, sounds like a decent starting point for discussion… this tacks on a couple from what comes standard for the highest counts of each piece.
as for buying 2, of course.
-
Nice job, El Capitan! :-)
-
First set should include: Each Nation,
25 Infantry, 15 Artillery, 15 Tanks, 15 Fighter, 10 Bomber, 5 Battleship, 5 Aircraft Carrier, 10 Cruiser, 10 Destroyer, 15 Submarine and 15 Transport. China 20 Infantry. Neutrals 10 infantry. With this number of pieces it should be enough for each nation. -
First set should include: Each Nation,
25 Infantry, 15 Artillery, 15 Tanks, 15 Fighter, 10 Bomber, 5 Battleship, 5 Aircraft Carrier, 10 Cruiser, 10 Destroyer, 15 Submarine and 15 Transport. China 20 Infantry. Neutrals 10 infantry. With this number of pieces it should be enough for each nation.It also would be great with some Neutral Artillery, Tank, Fighter and Bomber.
Neutrals: 10 infantry, 8 Artillery, 8 Tanks, 6 Fighter and 4 Bomber.And maybe some Neutral ships, 2 Battleship, 2 Cruiser, 4 Destroyer, 4 Submarine and 4 Transport, no need for Neutral Aircraft Carrier!
Colors for each nation could be:
Germany- Black, Dark Grey or Grey
Italy- Grey, Light Grey or Light Blue
Japan- Red or Orange
Great Britain- Tan or Light Brown
U.S.A- Green
Russia- Maroon or Dark Brown
China- YellowFrance- Blue
Neutrals- White -
While waiting for a source of high quality pieces, here is my solution. It takes care of the color, and number of pieces (except for Italy).
I combined my AAEurope, AAPacific with my AA50 pieces. I gave the Soviet Inf from the AAPacific to Italy and added the USA molded Chinese Inf of AAPacific to the Chinese Inf.
At first I only wanted to painted the Italian, Soviet, Chinese, and Japanese pieces. I got some spray paint for plastic and went to work. After I was done with these I didn’t like the two tone German, British and American pieces and decided to paint those also. Here is the result:
I am very pleased with the result. I am still very interested in replacement of high quality
Hi El Capitan !
Very nice work, your playing pieces look awsome!
Can I ask you how you painted them, maybe I paint my own, but I want to know how to do it so I dont destroy my playing pieces. -
Hi El Capitan !
Very nice work, your playing pieces look awsome!
Can I ask you how you painted them, maybe I paint my own, but I want to know how to do it so I dont destroy my playing pieces.Thanks.
I just set up an area with drop sheets and used spray paint cans with paint safe on plastic. My Soviet, Japanese, Italian and Chinese were painted with paint bought at Home Depot.
My German, British and American I used some Testors Model Master spray can enamel paint.
As long as you use a paint safe on plastic your pieces will be fine. You could also use an airbrush if you have one. The longest part is laying the pieces for painting. I sarted by painting the back and/or uderneath, let it dry then turn them to paint the front and or faceup.
Let me know if you want the same paint colors/company.
Jeff
-
Hi El Capitan !
Very nice work, your playing pieces look awsome!
Can I ask you how you painted them, maybe I paint my own, but I want to know how to do it so I dont destroy my playing pieces.Thanks.
I just set up an area with drop sheets and used spray paint cans with paint safe on plastic. My Soviet, Japanese, Italian and Chinese were painted with paint bought at Home Depot.
My German, British and American I used some Testors Model Master spray can enamel paint.
As long as you use a paint safe on plastic your pieces will be fine. You could also use an airbrush if you have one. The longest part is laying the pieces for painting. I sarted by painting the back and/or uderneath, let it dry then turn them to paint the front and or faceup.
Let me know if you want the same paint colors/company.
Jeff
Hi Jeff El Capitan !
Did you prepare your pieces in someway?, washing and drying them?
Did you just spray the color right on your pieces?, or did you prepare them with undercoat?Pizarro
-
Following scale model building practices you really should always wash plastic before you paint. Brand new pieces too because they will have mold release on them. Use some dish washing soap in warm water, rinse and air dry. ~ZP
-
Hi Jeff El Capitan !
Did you prepare your pieces in someway?, washing and drying them?
Did you just spray the color right on your pieces?, or did you prepare them with undercoat?Pizarro
My sets was brand new. I didn’t use the pieces. I didn’t prepare the pieces in anyway. Place and spray. Wait for drying turn and respray.
-
Hi El Capitan
I like some of the colors that you used. Can you tell us the names of each color that you used?
Thanks
-
Here are some other tips for painting.
Preping
Washing - You can usually get away without washing but as Zero Pilot mentioned. It it’s better to wash pieces first for best results. If you do, make sure it dries thoroughly before painting. If you want to speed up the drying use an air can or a hair dryer on low and cool setting. Avoid using a cloth since little strand of fiber can stick to the plastic.For small pieces like the A&A units you really don’t need to use a primer. I would use it only if you wanted to paint a dark colored unit with a light color. If you don’t, it just might take an extra 1 or 2 coats of paints.
If you can, always paint the units before you break them off the tree. Trying to paint them as separate pieces can be more difficult.
Painting
Airbrushes will always give you a better finish but you can still get a nice finish with spray cans. Here are some tips when using spray cans.1. Make sure your can is warm (room temperature). If it is cold put it in a bowl of hot water to warm it.
2. Shake it well.
3. When spraying, do not hold it too close. Spay can paint can sometimes be thick and if you’re too close you can have a layer of goop instead a nice coat of paint. For best results it’s always better to start farther way and apply a 2 or 3 light coats of paint rather then doing it in one coat. Also, if pieces are not on a tree, you can blow them all over the place if you are too close. You’re more prone to do this with an airbrush than a paint can.
4. Practice painting something else first so you can see what works best.
-
Do I need another final coat of matt laquer (finish/varnish; what’s the correct word for that)? Units will be touched very often…
-
There are pros and cons to varnish. Overall, varnishes will give you a more durable finish and will hold up better when rubbing up against other pieces in the box. It’s con is that it is more likely to crack and chip if the item it bent (Tank barrel) or dropped. Where piece with out it will get more nicks and scratches. Also, some varnishes can turn a little yellowish after a while. We’re talking years or something with a lot of sun exposure.
The other reason for using varnished is if you want to give something with a gloss finish a flat look or visa versa.
As for me, I didn’t use any varnishes on mine.
The key for a good durable finish with any kind of painting are layers of light coats. The thicker a paint or varnish goes on. The more prone it is to chipping and flaking.
-
Yeah, just what are those colors El Capitan?
-
-
As promised here the colors I used.
IC and AA: Krylon Flat White
Germany: Testors Model Master Spray Panzer Grey (1950)
USSR: Rust-Oleum Univeral Expresso Brown
Japan: Rust-Oleum Univeral Cardinal Red
UK: Testors Model Master Spray Afrika Mustard (1955)
Italy: Rust-Oleum Univeral Arctic Grey
China: Rust-Oleum Univeral Hunter Green
USA: Testors Model Master Spray SAC Bomber Green (1993)The results from the Testors is the nicest but colors are limitted in the spray can format.
