@SS-GEN
Will do. Thanks
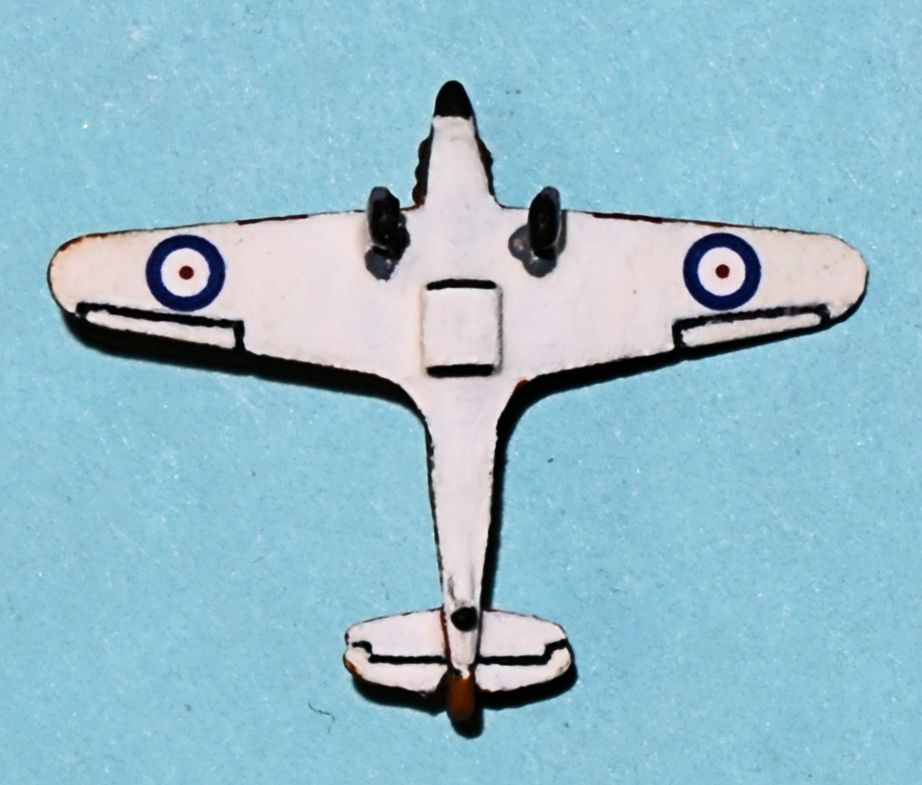
I finished a few more Hawker Hurricanes from SNAFU at Shapeways, so while FOlewnik is kept from his painting by all the overtime he’s got to put in at this time of year, I’ll share these.


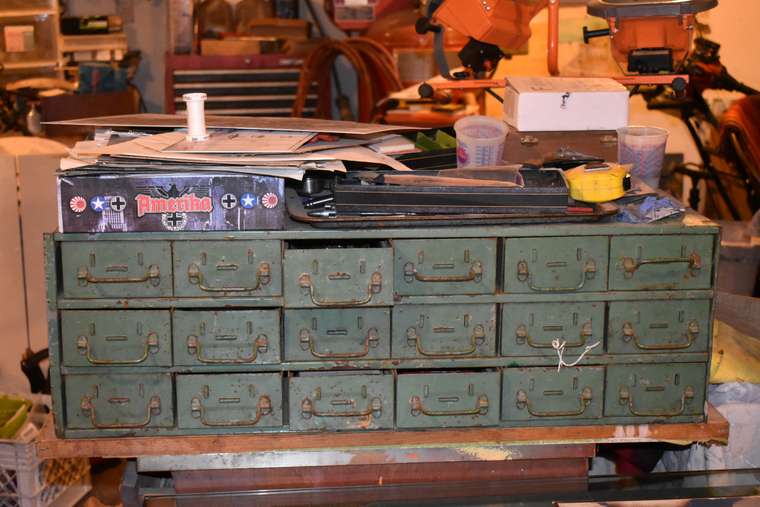
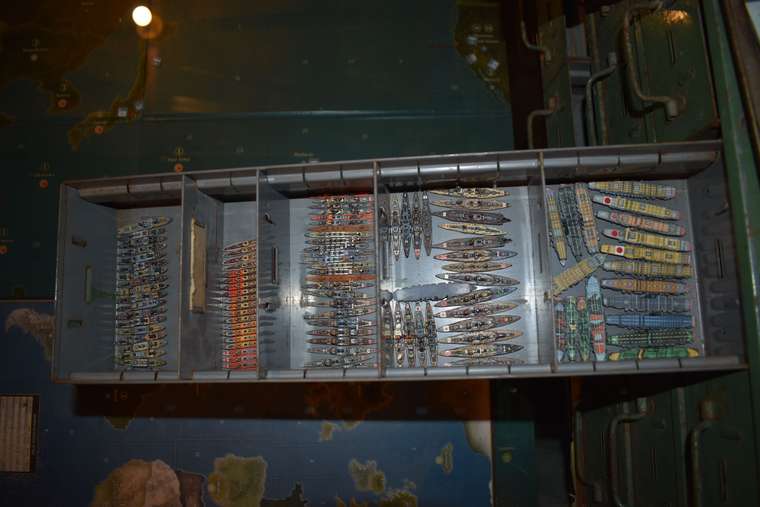
A while back someone asked about storage and I tried to describe the old metal filing cabinet piece that FOlewnik found. I grabbed a couple of shots a while ago and forgot about them, so here they are. The drawers can fit 4 piece boxes in them, with the lids, 2x2. But the painted pieces don’t get tossed together, they get separated nicely, as in the Japanese Navy drawer shown here. We’ll eventually cut some foam for each drawer but for now this is how they are.
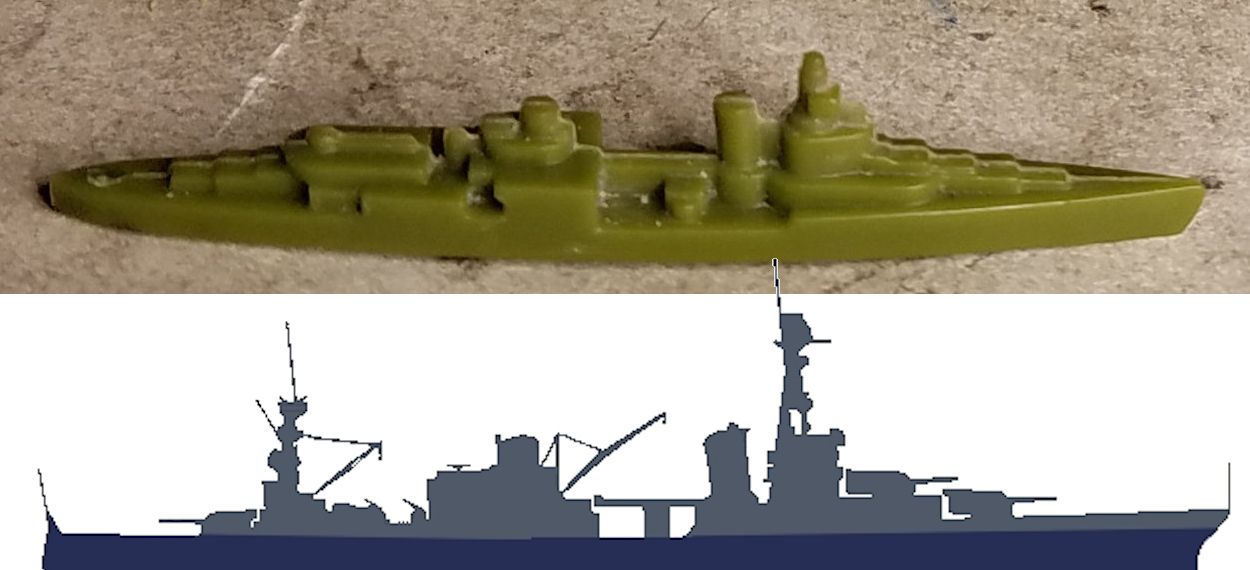
Three Northampton Class cruisers are finished now, with a possible 4th being considered. As you can see from the comparison below, the out of box (OOB for those in the know) sculpt is suspiciously close to the Northampton silhouette taken from http://www.shipcamouflage.com/ships2_9_41_plate_15.htm, so comparatively little modification work was needed to the OOB sculpt.
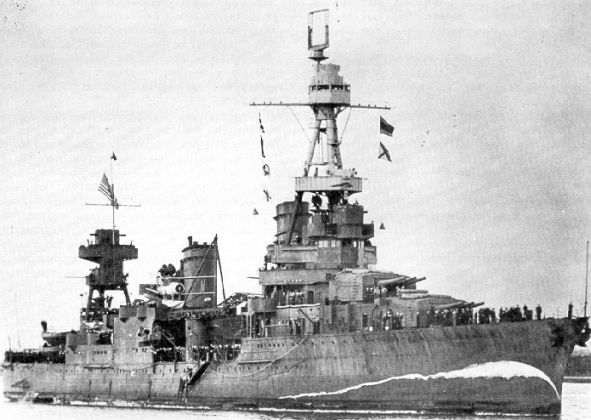
FOlewnik chose to paint the USS Northampton (CA-26) wearing Measure One (dark) camouflage, with a Measure Five false bow wave, as it wore when it returned to Pearl Harbor on Dec 8, 1941. There are great reference pictures for the false bow wave on navsource on the Northampton’s page: http://www.navsource.org/archives/04/026/04026.htm.


If it weren’t sunk by Japanese aerial torpedoes off Rennell Island on 30 JAN 1943, The USS Chicago (CA-29) might have worn this camo pattern, and we needed a cruiser in this pattern, so FOlewnik painted the USS Chicago wearing US Navy Camo Measure 12:


Last but not least, from a drawing prepared by the Bureau of Ships for a camouflage scheme intended for heavy cruisers of the Northampton Class, here is the USS Chester (CA-27) wearing Camouflage Measure 32, Design 9D, as seen prominently on http://www.navsource.org/archives/04/027/04027.htm.


The three Northampton Class cruisers together:


And finally for comparison, the USS Chester (Northampton class), the USS Tuscaloosa (New Orleans class), and the USS Portland (Portland class):

Northampton Victor Henry’s boat : ) Never heard of the false bow wave. I guess that was to make it look like it was going faster than it was ? Or is that just a customization thing ?
@barnee Yes, the idea was to give the illusion of speed. The USS Saratoga also wore bow wave camo for a while. Shipcamouflage.com actually uses the Northampton as an example here: http://www.shipcamouflage.com/measure_5.htm
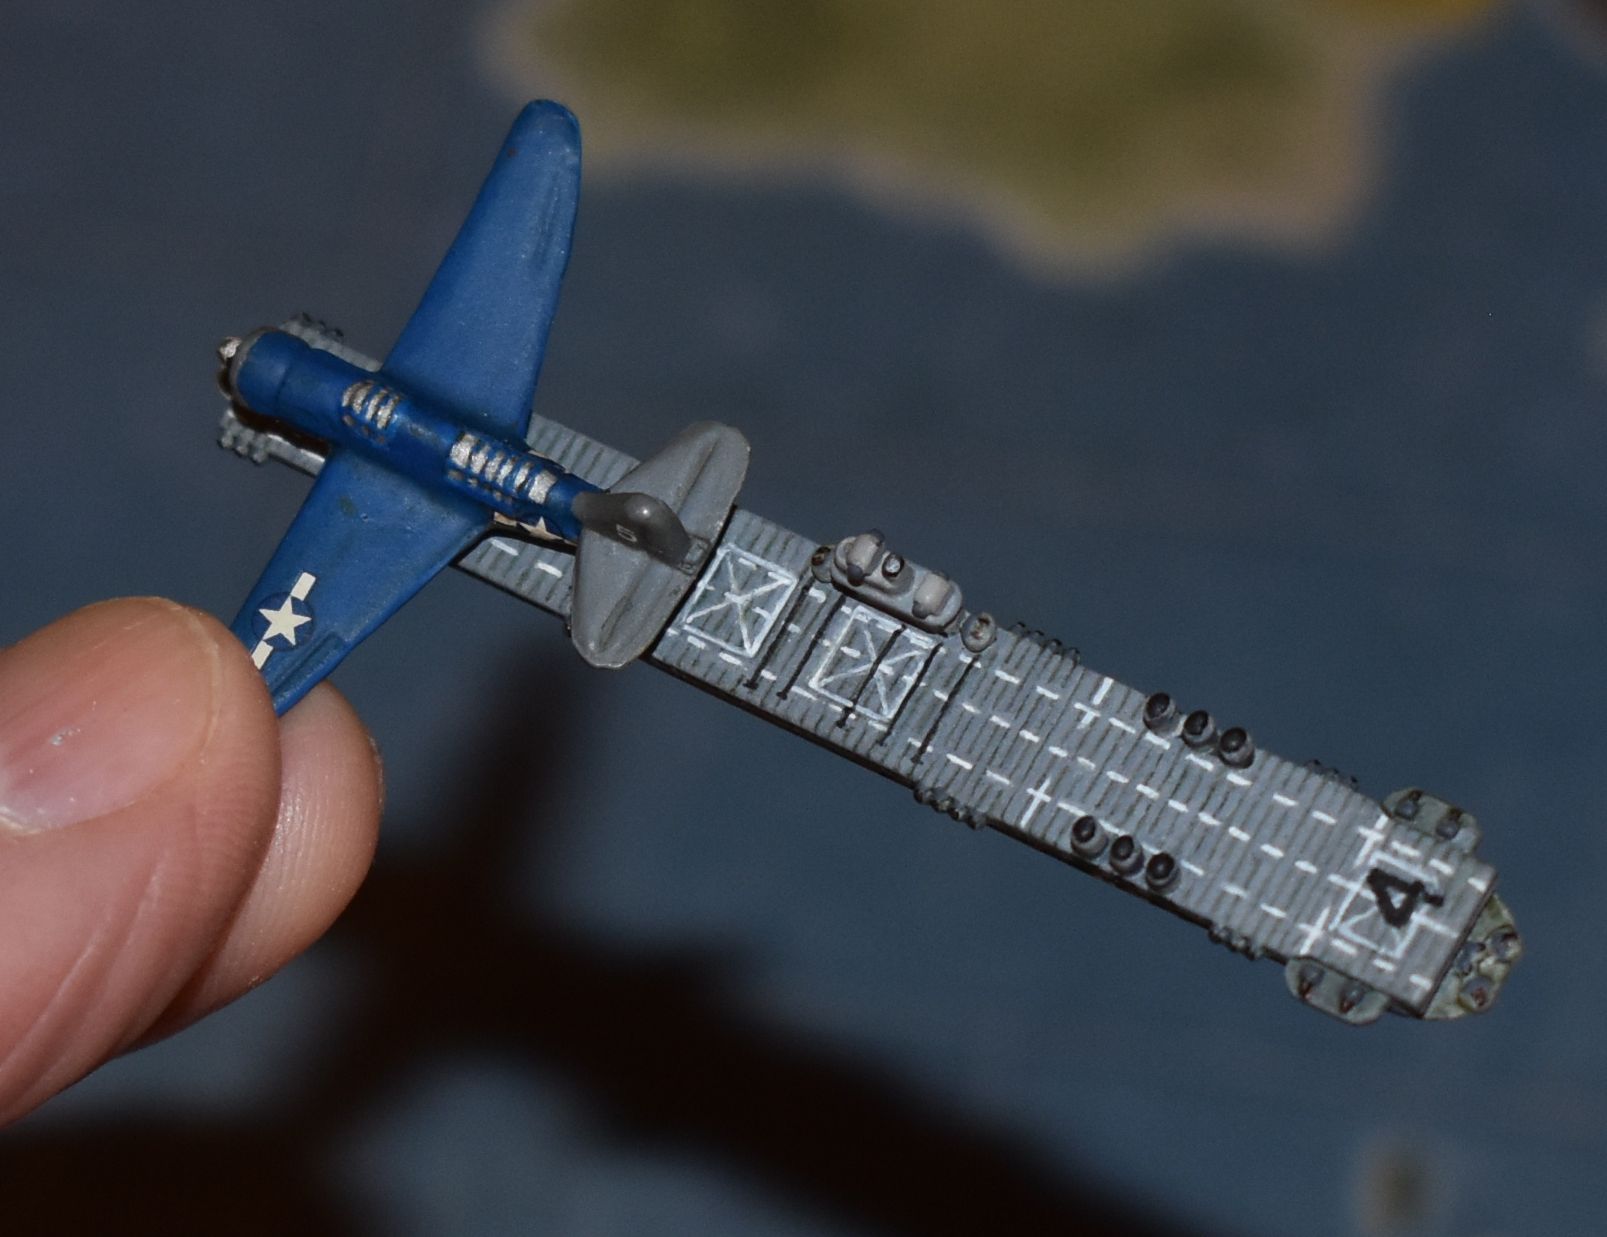
USS Ranger (CV-4) by FOlewnik. He actually finished this around the time of the cruiser mods for the Northamptons but I’m just now getting around to editing the pictures to post. Sculpt is from Ebard at Shapeways. Although we’ll most likely use it as a light carrier, it still has 2 magnets.


Also done are the heavy cruiser USS Boston (CA-69) and the light cruiser USS Concord (CL-10), sculpts from HBG.


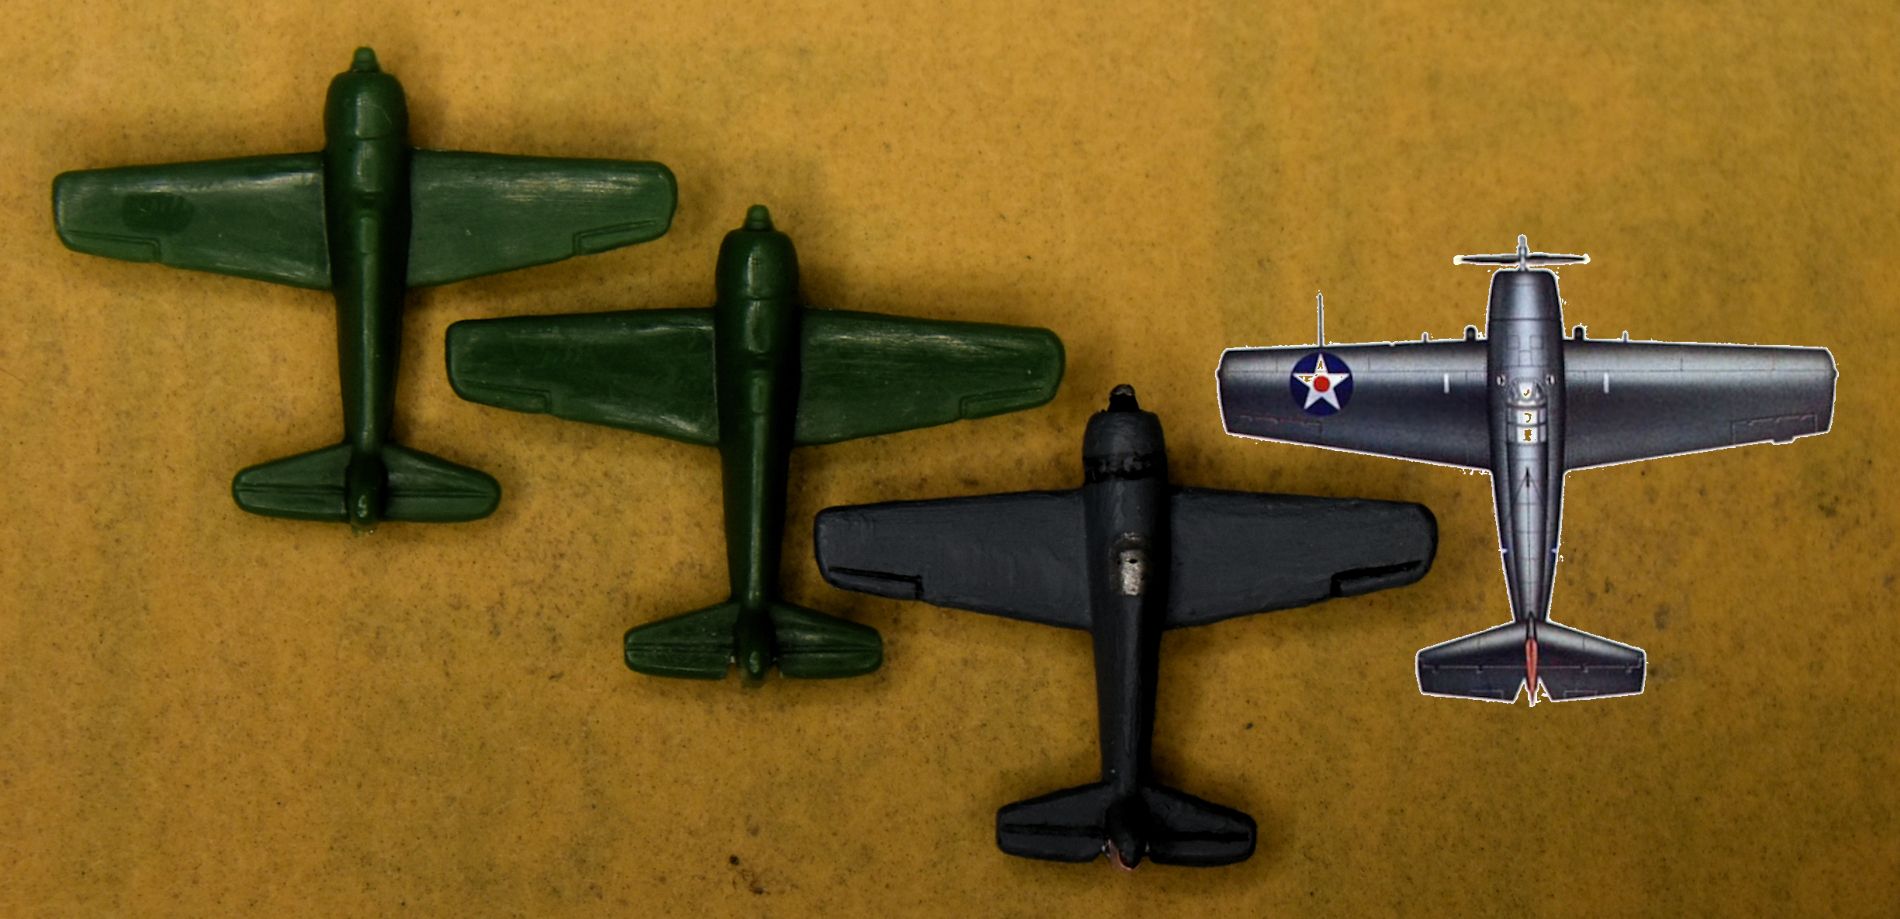
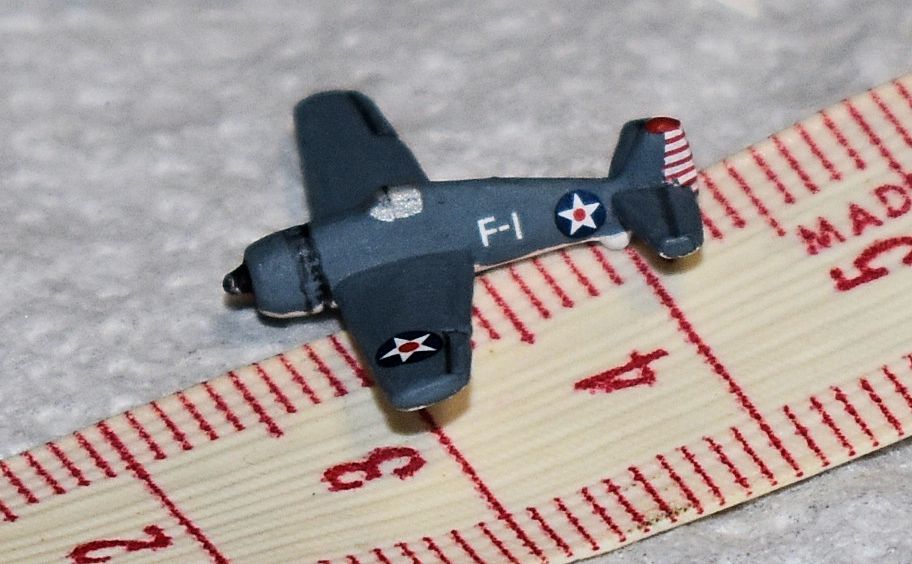
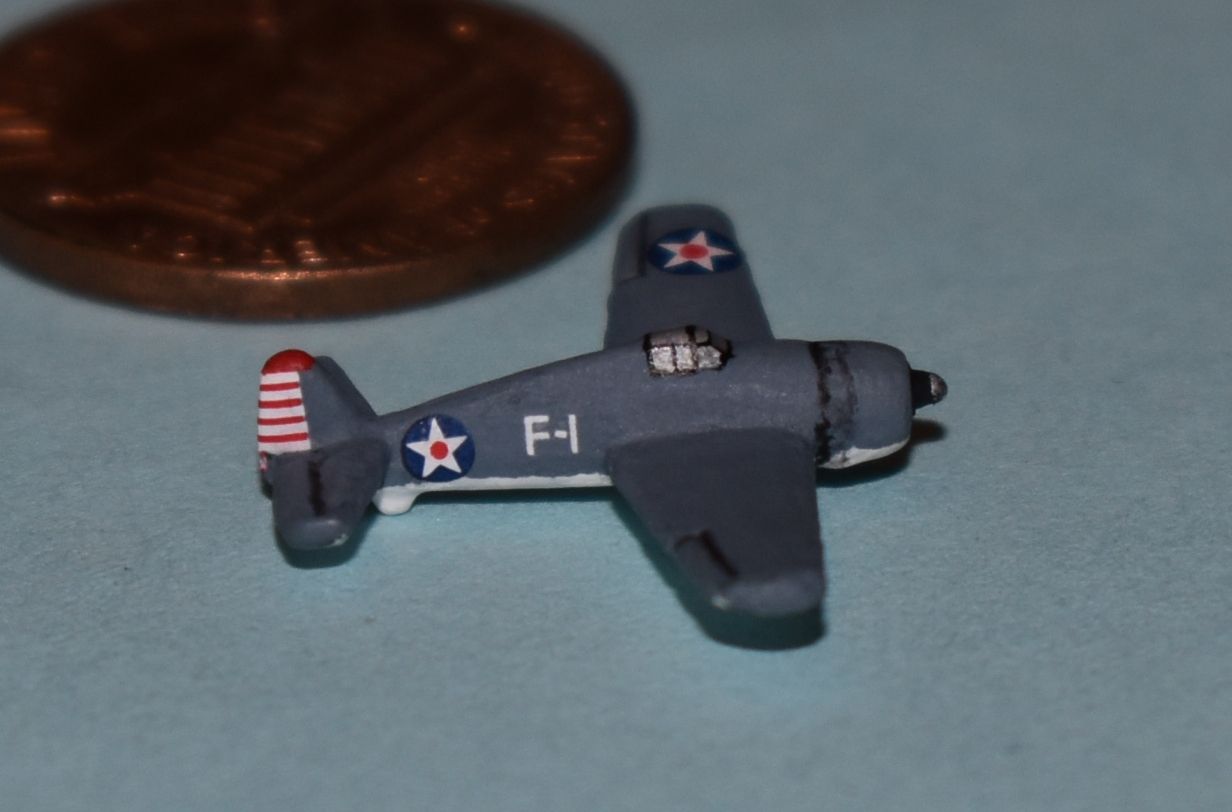
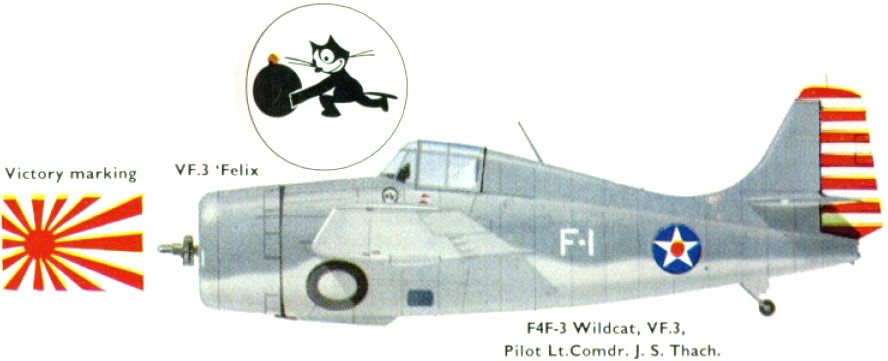
I’ve been making aircraft for the US carriers, doing SBD’s from the out of box sculpts as seen earlier in the post, and as seen above atttached by magnet to the USS Ranger, HBG’s SB2C Helldivers. But I couldn’t find F4F’s. Undaunted, I took HBG’s Hellcats, which are smaller than the out-of-box Hellcats, and shaped the tail so it looked more like the top view of an F4F I found on Wings Palette (inset below). I used 400 sandpaper and made a few passes on each round end to flatten it out, then took an X-Acto knife and cut a nick next to the rudder and ran the sandpaper through a few times to create a groove between the rudder and rear wing. The test piece became Jimmy Thatch’s F4F. Tiny decal time (LESS than one millimeter!)- I used the bottom half of each side of an unused letter “H” for the dash between the “F” and the “1” on the fuselage, and to match the pictures on Wings Palette, the “1” is actually an upper case “i”, from the decal sheet LW-100 at HBG (https://www.historicalboardgaming.com/LW-100-Decal-Sheets-White-Lettering-All-scales_p_1839.html). Now I just need FOlewnik to finish the USS Lexington so it has a place to park.
Before the cockpit is inked:
After the cockpit is inked:
Doolittle Raid USS Hornet (CV-8) by FOlewnik almost finished in these shots. It actually is finished (arrestor cables & AA guns missing here) but I don’t yet have pictures of it. FOlewnik is using Ebard’s Yorktown class for the sculpt. The unpainted sculpt shows where the magnets have been set and leveled with putty. You can see the hollow underside has also been filled. Prior to painting and drilling the magnet holes, the island bits that look fragile are brushed with liquid Super Glue (not the gel kind). Shapeways pieces are pretty porous so the glue soaks in and helps strengthen the piece.
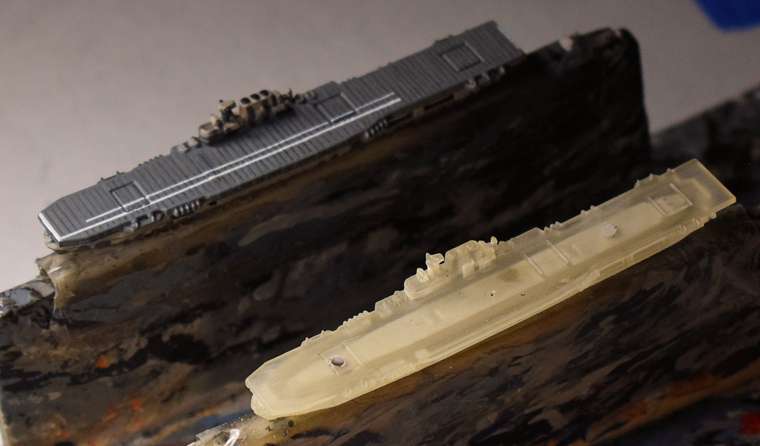
Close up pf the deck lines. These are done with a 10/0 brush, both the black and white. The deck AA guns haven’t been done yet.
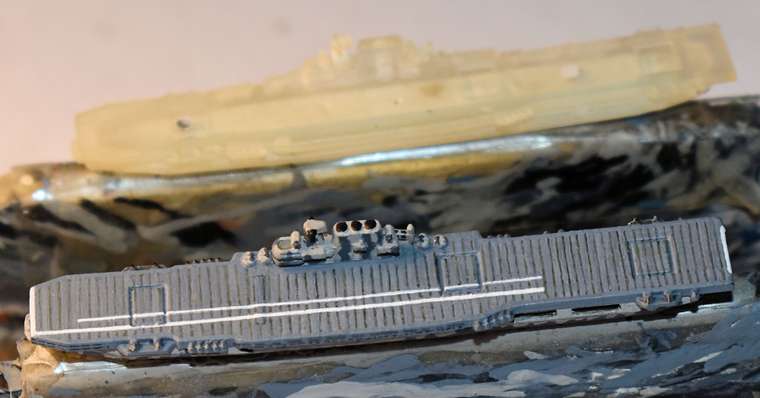
Side views:


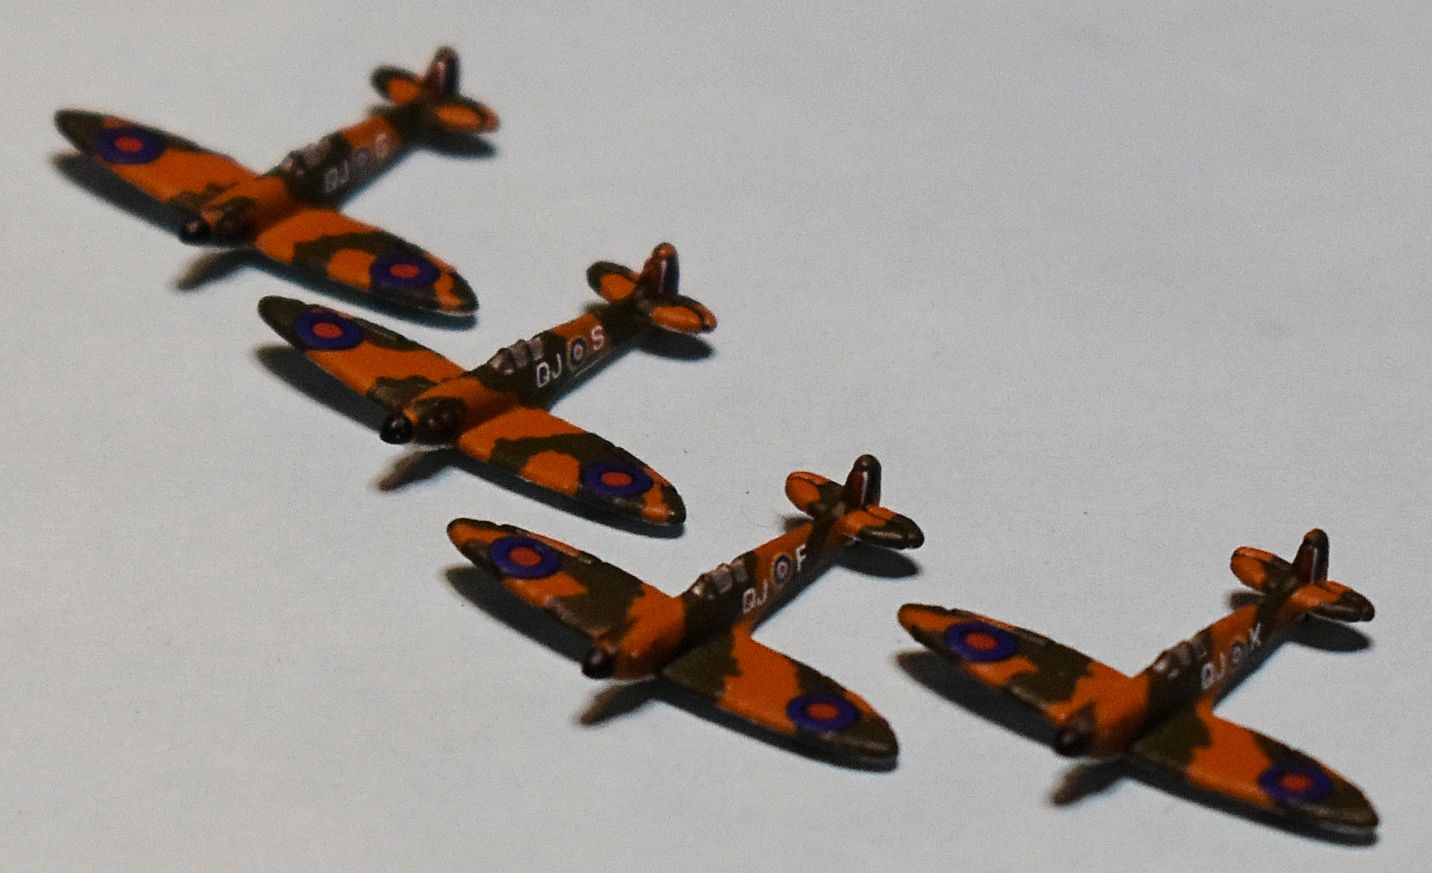
I’ve finally finished the decals on the 1/500 Spitfire MkI’s from SNAFU at Shapeways (https://www.shapeways.com/product/ZHFZWLMGK/spitfire-mk-ia-w-gear-x4-fud?optionId=66660049&li=marketplace) so I thought I’d share shots of those as well. They come with landing gear down like the Hawker Hurricanes shown earlier, but I’ve taken them off. They were used as funnels on the Japanese transports.


USS Yorktown (CV-5) circa 1938 started as the unpainted Shapeways print in the above post alongside the unfinished USS Hornet. Hornet is shown finished here.


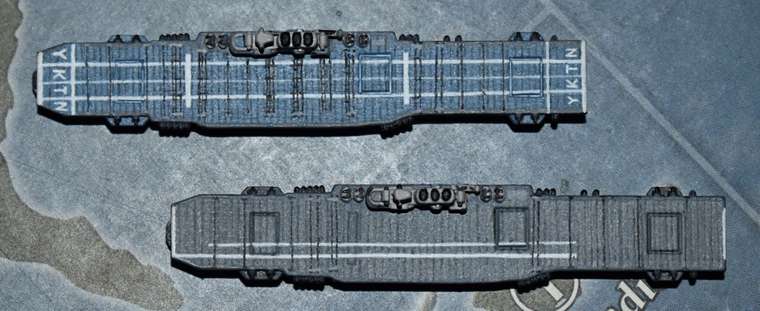
Port & starboard detail, USS Yorktown (CV-5):


Port & starboard detail, USS Hornet (CV-8):


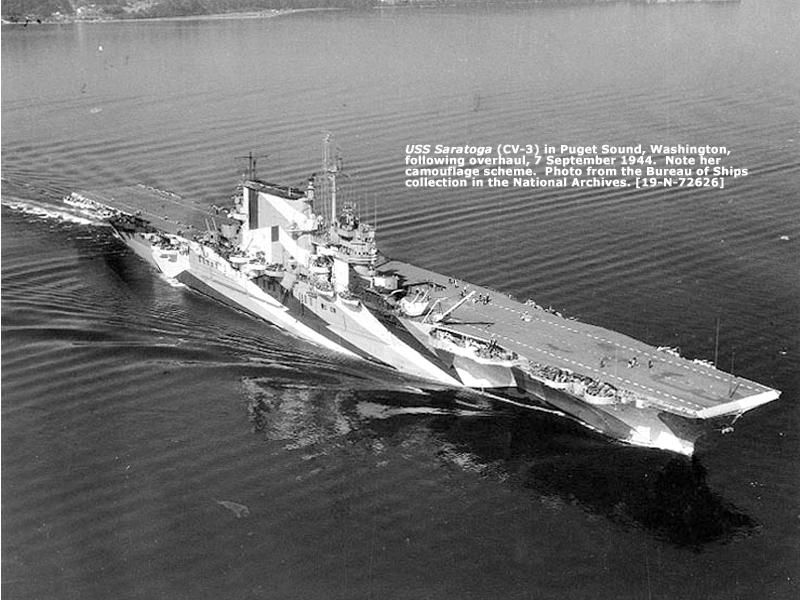
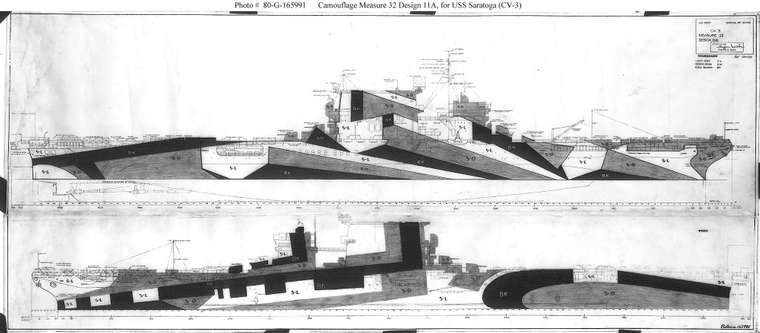
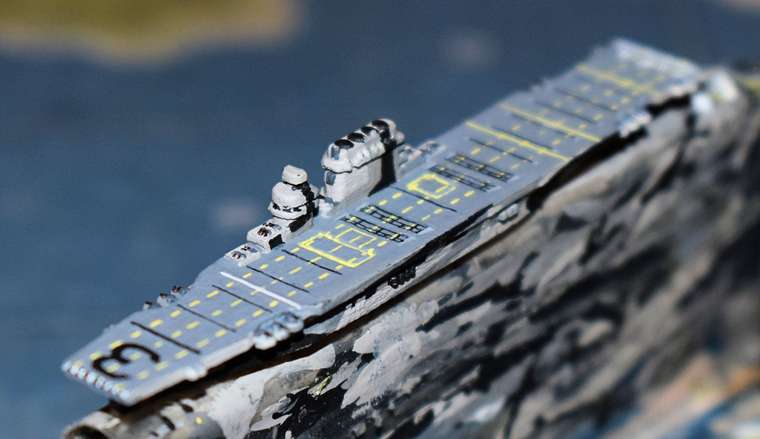
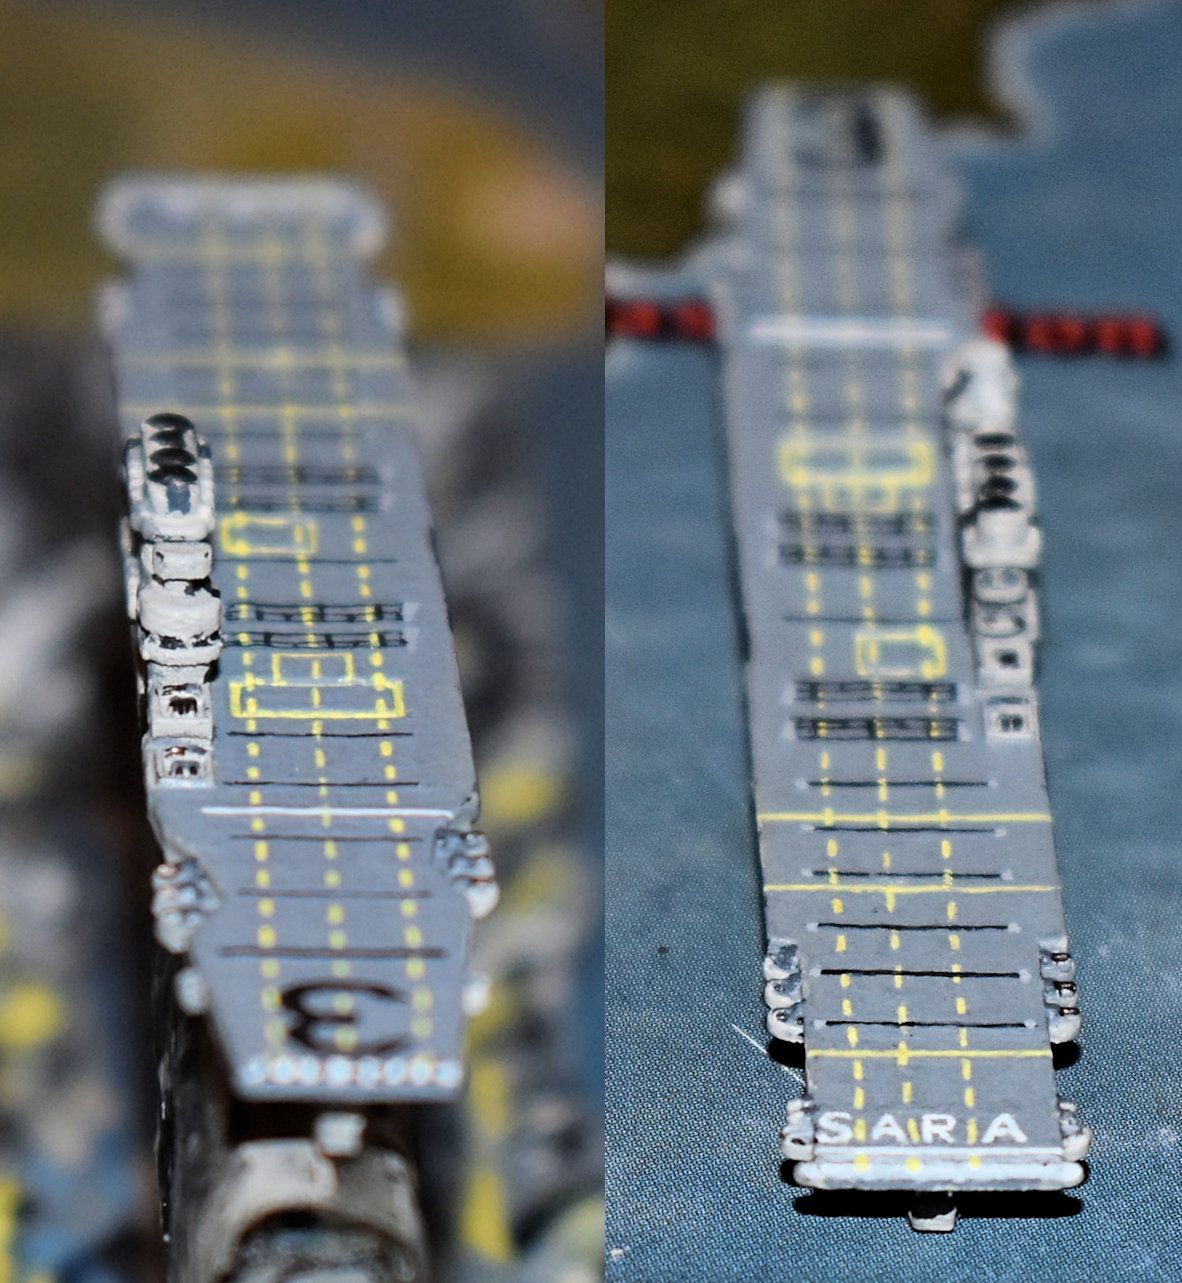
USS Saratoga (CV-3) wearing Camouflage Measure 32 Design 11a, 3d print by Ebard at Shapeways, painted by FOlewnik. It has 2 magnets for aircraft hidden beneath the paint. Two photographs from 1944 are shown for reference.




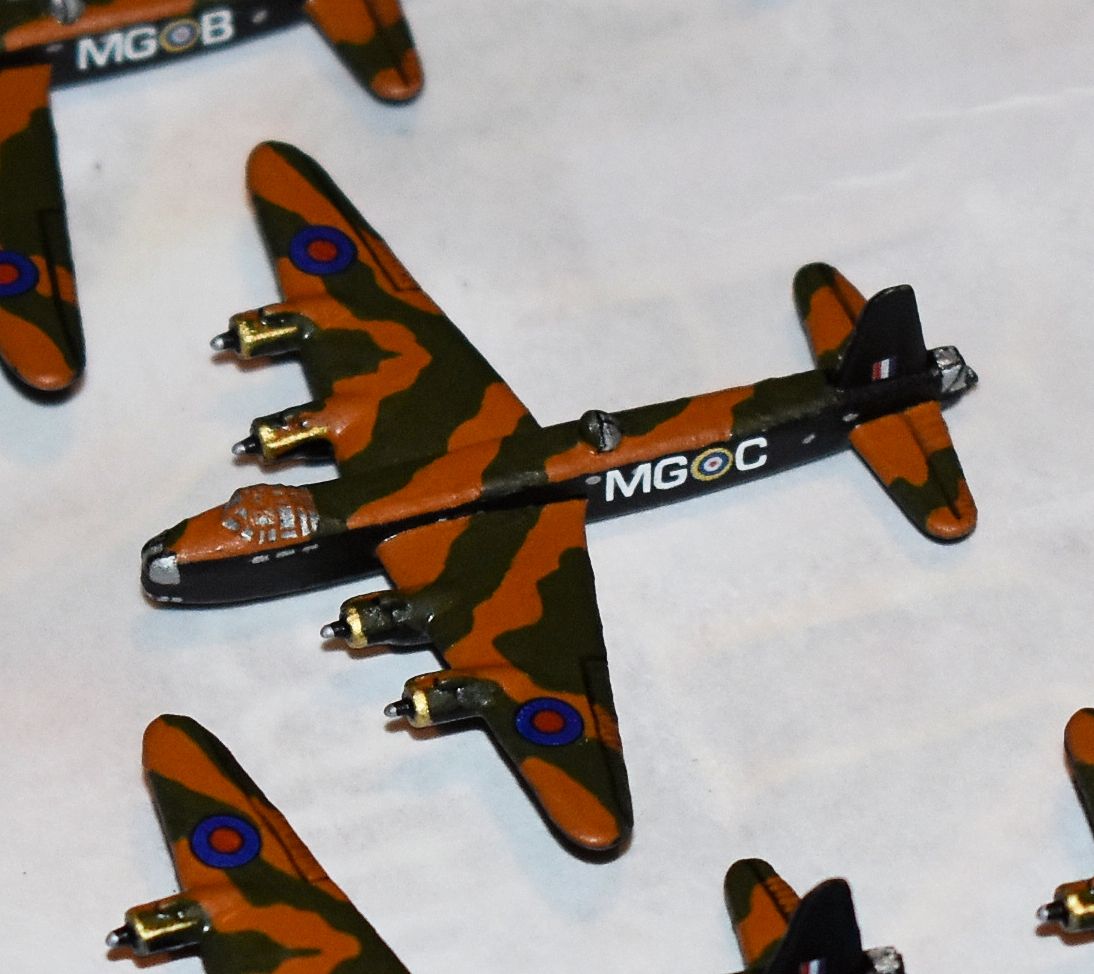
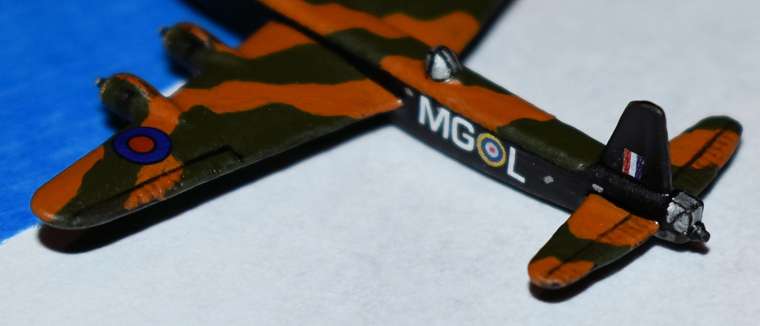
Short Stirling bombers from HBG painted by yours truly for the UK to use for long range or heavy bombers (or both). These are 1/600 scale, which is a little larger than the OOB bombers, but that gives room for more detail so I tried to take advantage of that. Each piece had to be heavily trimmed of flash plastic and mold grooves, and heated with a hair dryer to untwist and straighten out the fuselage and straighten the wings and rudder as best as possible. You can see a few rudders are still a little wilted, but compared to what they were, I was happy. From what I’ve been able to find in research, the actual bomber did not have counter rotating props like this sculpt does. These wear the markings of 7 Sqn, RAF, who were the first squadron to be equipped with the new Short Stirling heavy bomber, & the first RAF squadron to operate four engined bombers during the Second World War, flying the first bombing raids with the Stirling against oil storage tanks near Rotterdam on the night of 10/11 February 1941 (from the wiki).

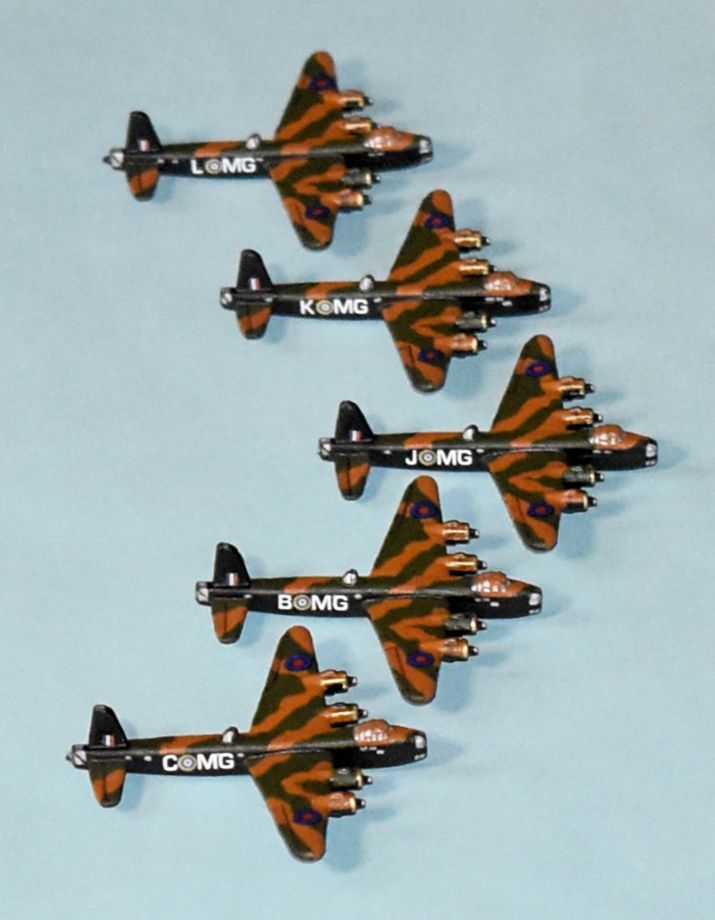


I accented the control surfaces with the same 20/0 brush used for the fine cockpit lines, which are molded into the sculpt. First a dark wash of brown over the first coat of camo, then go over the wash with the original color again, and it helps mimic the fabric control surfaces. The top turret and front and rear turrets and bombardier’s window were done with the 005 black pen. Fuselage windows were done in silver with the Insane Detail brush from Army Painter and shaped after the first coat of dullcote with the black 005 pen if needed.

@DMcLaren
Beauty.
Makes me want to rebuild my Lexingtons.
@DMcLaren said in Custom carriers from OOB's and painted pieces:
It’s been awhile since I’ve been on the forums and seen your customized work DMcLaren. Just now coming back to it… wow! What kinds of paints are you using that you can get such crisp lines? Are you thinning the paint at all to give yourself more definition on your lines? It looks amazing!
Thank you, gentlemen. We- FOlewnik and I- appreciate the feedback.
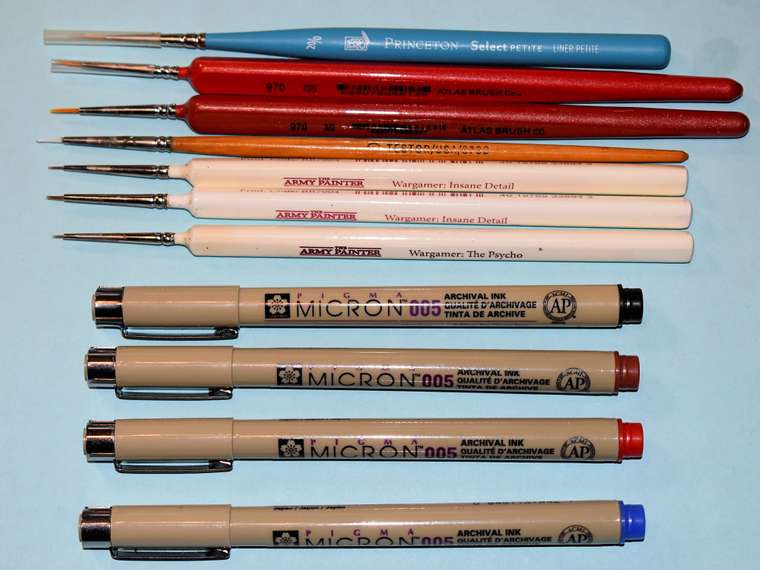
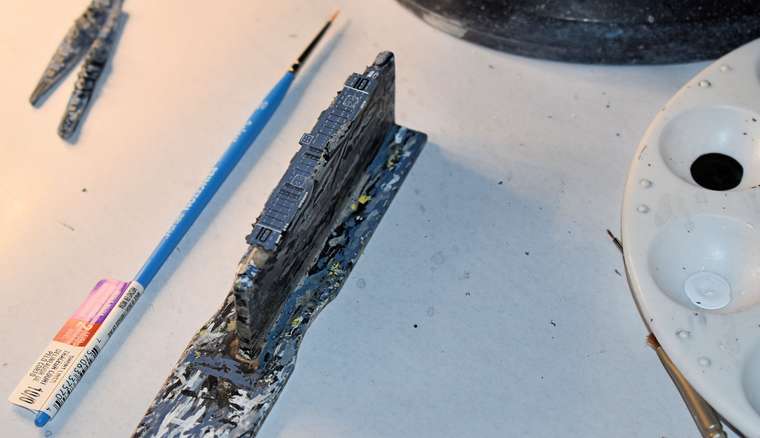
@Spitfire38 - It’s not the paint, it’s the brushes. FOlewnik does the ships with water based paint and I do the aircraft in enamel, both are finished with Testor’s Dullcote. FOlewnik relies heavily on his 10/0 brush for these US aircraft carrier decks, with help from his 20/0 and 0000 with the same on the hulls for camo detail and fine lines. I’d have to say I’m right around the same when I do the aircraft, but I do a lot with my incredibly old Testor’s 0 with a wooden handle. I’ve had it for about 40 years, now that I think about it! It (the zero brush) puts down the main coat on just about everything. My Army Painter brand “Psycho” and “Insane Detail” brushes are still in great shape and get a lot of use. The 20/0 I have did the cockpits for the SNAFU/Shapeways Hurricanes & Spitfires, and the above HBG Stirlings. I dip my 20/0 in whatever stays on the underside of the paint lid when the lid is set on the table. No thinner, clean brush. FOlewnik pours his paint onto one of those round plastic artist dishes with all the little round spaces for paint, one or two drops at a time, more if he’s doing a large area. He uses water based paint so he keeps the brush wet. It’s also important to “load” your brush properly- that is, to pick up the right amount of paint for what you want to do. If you have too much, paint the wooden holder to get rid of some, lol. If you notice FOlewnik’s ship holders that he made (angled pics of Sara above), they’re covered with paint stripes from where he’s removing paint from the brush and shaping the brush head to get a good point a lot of the time. But the idea is the smaller the detail wanted, the smaller the brush needed. It also helps to have a set of waterproof .005 pens, or just a black one if you can’t find a set of colors. Pens are best used after a base of dullcote to give the pen a smoother, porous surface to draw on. I still use pens, but FOlewnik has fallen in love with free-handing with a 20/0 paint brush and hasn’t used a pen since he finished the Japanese navy.
Five US Navy ships by FOlewnik- The USS Allen M Sumner (DD-692), the USS Pittsburgh (CA-72), USS Washington (BB-56), USS Massachusetts (BB-59), and my personal favorite of this particular post, the Essex class USS Yorktown (CV-10) from start to finish. To start, GHQ’s Sumner class destroyer as the Sumner itself, DD-692. GHQ pieces are made of pewter or similar alloy and are richly detailed. They’re five times the cost of an HBG piece, but they have a great variety of destroyers, too, so I guess you’re paying for variety and detail. They get painted quickly because they don’t need mods. FOlewnik bought several different DD types for the US Navy this past holiday season when orders over $100 got a fat discount, so the US Navy will have the hottest looking destroyer group when they’re all done. So here is the USS Allen M Sumner (DD-692):


The USS Pittsburgh (CA-72) is a Historical Board Gaming Baltimore class heavy cruiser. These pieces have a lot of detail but need a lot of prep work with trimming flash plastic from where the molds leave a seam. These get modded with scout planes & recovery cranes and after FOlewnik gets done with them, look really good. This was done from a scale model guide, shown here.


The USS Washington (BB-56) is the 2nd of the set from Ebard at Shapeways (there were 2 of this class). It also has the scout plane from GHQ added, and FOlewnik has added the life rafts during painting. It is painted as it looked during the Battle of Savo Island on the night of 14-15 November 1942.


HBG’s South Dakota Battleship is the basis for FOlewnik’s USS Massachusetts (BB-59). It required quite a bit of flash plastic trimming before the recovery crane was added. The scout planes from GHQ are painted separately and then glued in place before the tiny US star is added to the wings. Done to look like the ship appeared in July of 1942.


HBG’s Essex class carrier is the basis for FOlewnik’s USS Yorktown (CV-10). The bare sculpt had to be cleaned and prepped- you can see the brown putty added to level the deck. Magnets are glued in flush with the flight deck. In the second picture, you can see FOlewnik’s 10/0 brush used on the flight deck to the left, and at right is his paint palette with the paint wells.



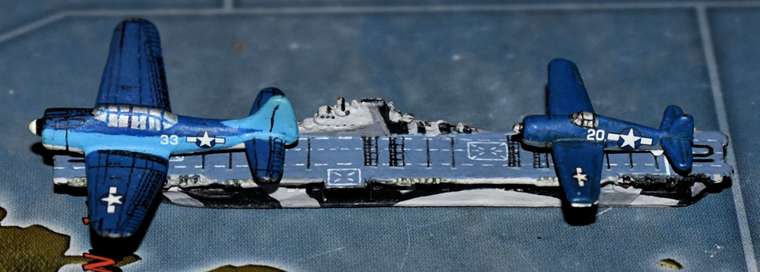

@DMcLaren test
The artist appears!
@Mr-Kell Lol. I finally got a laptop that can run windows so I could reset my password. I would like to thank everyone for their interest and comments,and can now respond to any questions anyone might have.Truly a great community.
While FOlewnik is finishing some US Navy carriers, I’m working to get appropriate aircraft for them. We’ve got Grumman F4F Wildcats made from HBG’s slightly smaller than the out-of-box Hellcats (as seen previously), the OOB Hellcats themselves, and HBG F4U Corsairs that will eventually make up the US Navy air arm. We’ve also got a few P-40’s and a lot of P-38’s. We’ll be using the P-38’s for the US long range aircraft. About 6-7 years ago when we decided to add decals to aircraft to separate the long range AC from regular, I painted up (poorly- before good brushes and equipment) some Hellcats. It was quickly apparent that the OOB sculpt lacking a propeller hub that all the other aircraft in the game had, and the converted F4F’s from HBG had, made it look just plain wrong. I could have painted a dot for a propeller hub but the profile would still be wrong. I wasn’t happy with the way they looked, as seen in this picture taken after I’d re-done the cockpit canopies on the tacticals and inked the cockpits on the Hellcats in late 2015:
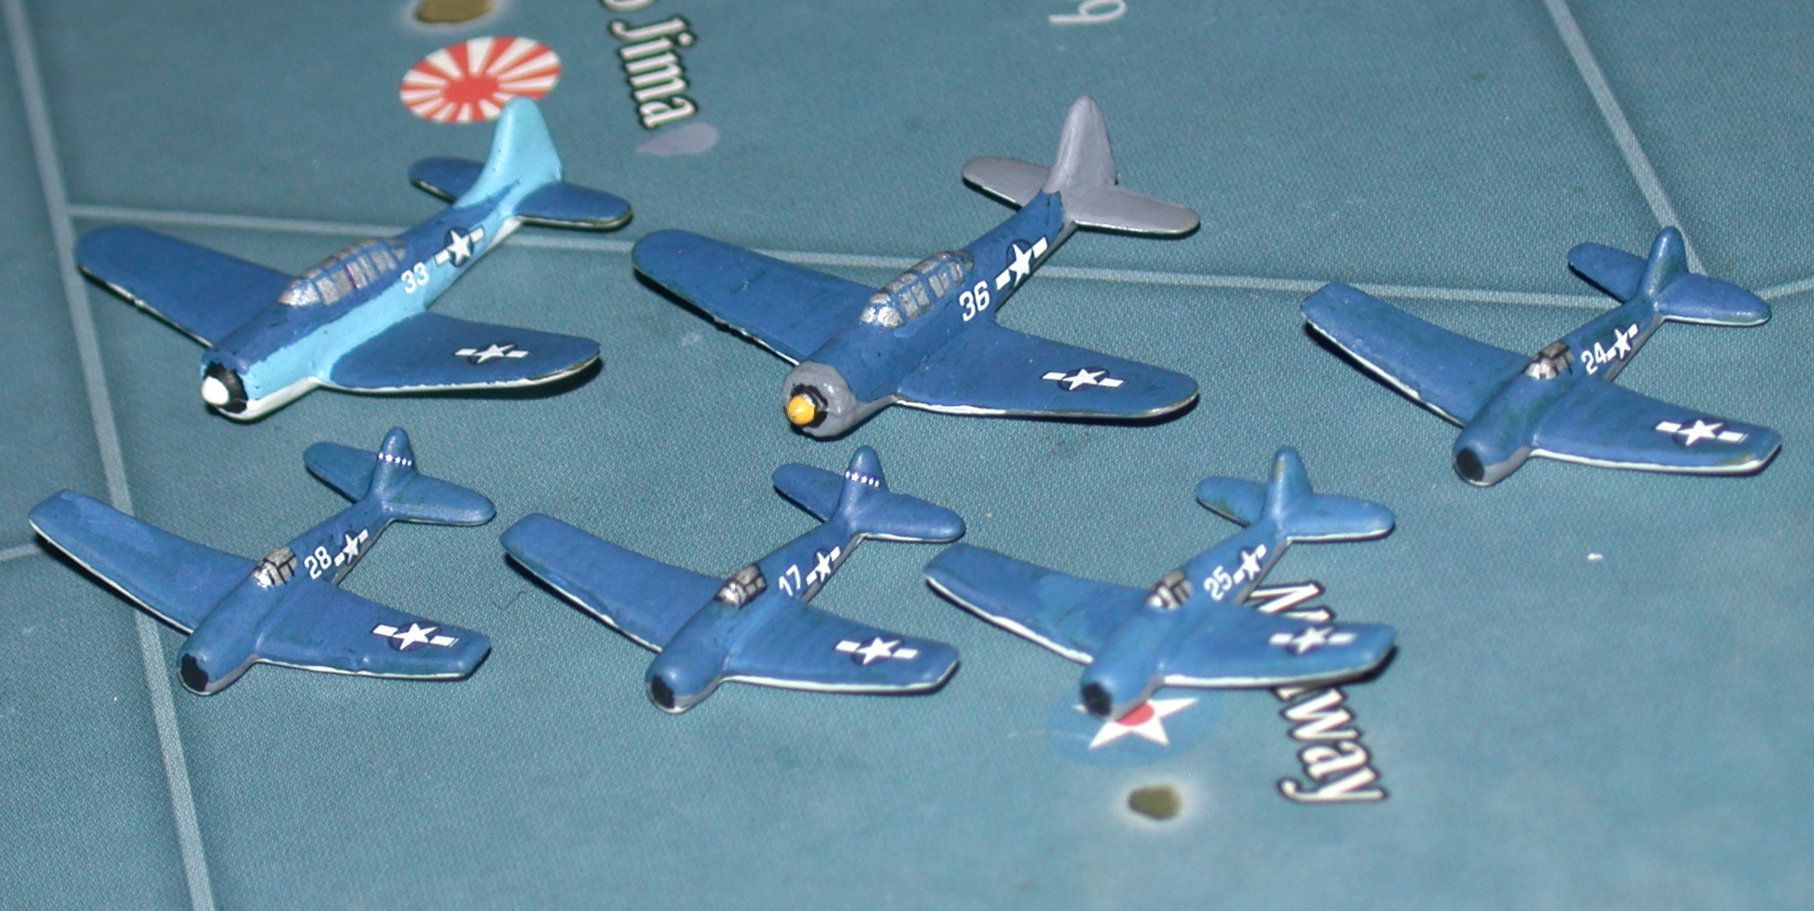
Two-tone tactical #33 is seen above before it was further modded with home made decals as shown earlier in the post. I knew I would repaint these Hellcats at some point because I wanted their noses to more resemble the grinning face they are known for, as seen here in this picture taken from navsource.org:
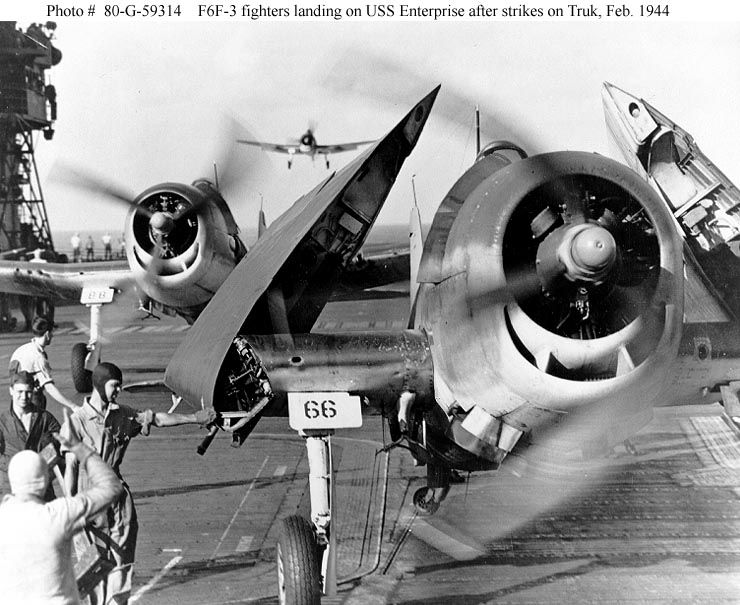
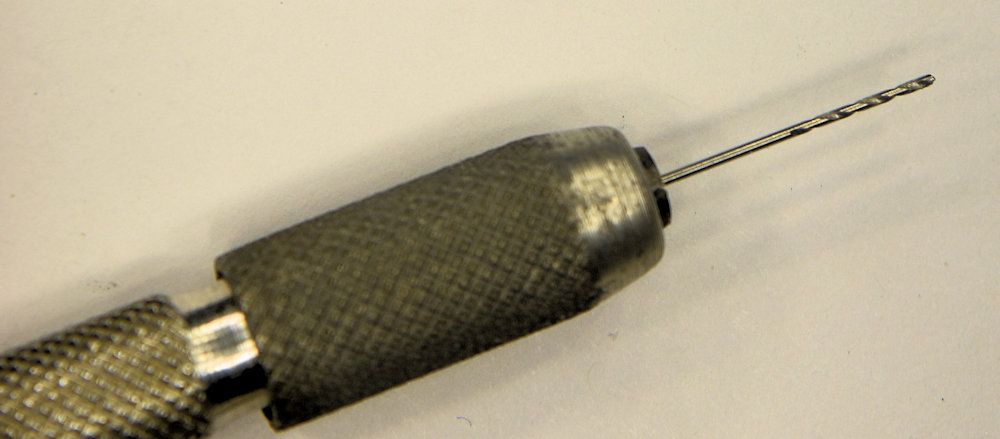
This had been in the back on my mind for a few years, and last Autumn after I’d bought some new clothes I saved the plastic strings that held the tags on after I’d cut them off thinking they could be of use. I felt it would be better to drill a hole to accept the propeller hub, so I used a drill bit that was just a bit larger than the plastic strings just in case I was off center I might have some wiggle room (turned out to be a good idea):
I use an old artist’s gummy eraser to hold the piece still while I drilled the hole to accept the plastic string (also to hold aircraft by the wing while fuselage decals are applied). The idea is that if the hole is straight, the string gets glued in straight and is therefore straight when the string is cut to make the prop hub stick out straight.

On the old painted Hellcats, I sanded the face so the glue would hold better, and I was repainting anyway. This also made it easier to set my starter hole with a tiny drill bit to ensure I was in the proper high off-center, leaving room for the lower air intake to be painted in, before changing to the larger bit to make the hole for the string.
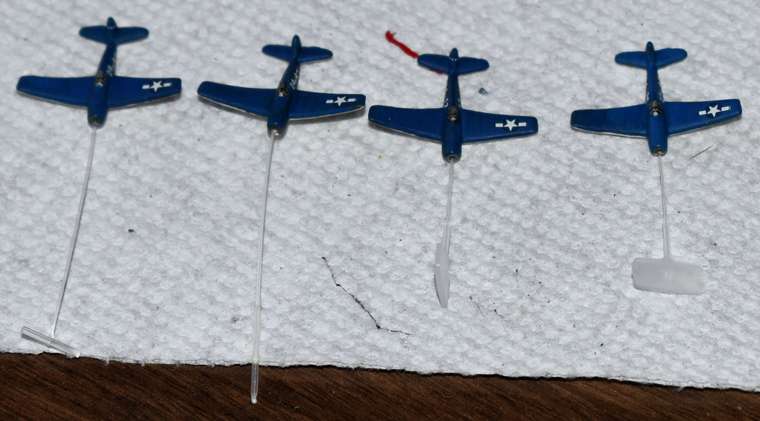
The string is cut off after the glue dries, leaving what will become the propeller hub. The entire face of the four Hellcats above were repainted (along with some minor touch-ups elsewhere) as the first test pieces with prop hubs and smiling air intakes:

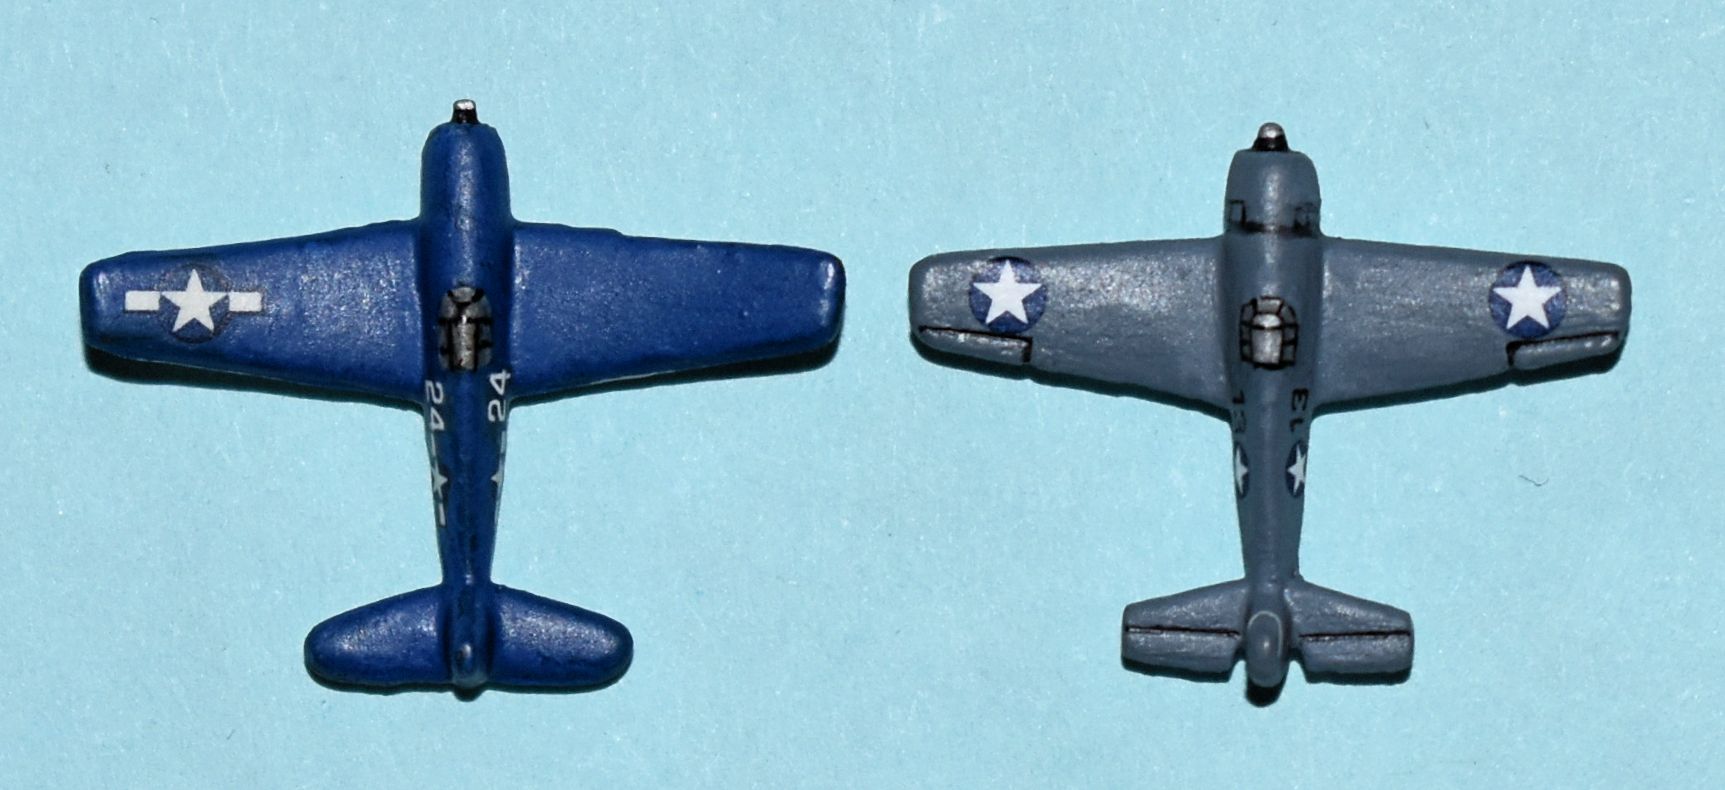
Now the OOB Grumman F6F Hellcats can be on the same game board as the Grumman F4F Wildcats and not look like they’re going to fall out of the sky and crash. They’re even sized right compared to each other:
Before adding magnets, it’s a good idea to place the piece on a smooth, flat surface and spin it by flicking a wing on the very edge with your finger and watching carefully to see where the center of weight is on the spinning piece. You’ll want to drill the hole for your 1/16" x 1/32" magnet on the bottom of the aircraft at this exact spot, or as close as you can possibly get. This makes it sit better on any flight stand, and is properly balanced for climbs, dives, and banks on a rounded flight stand:

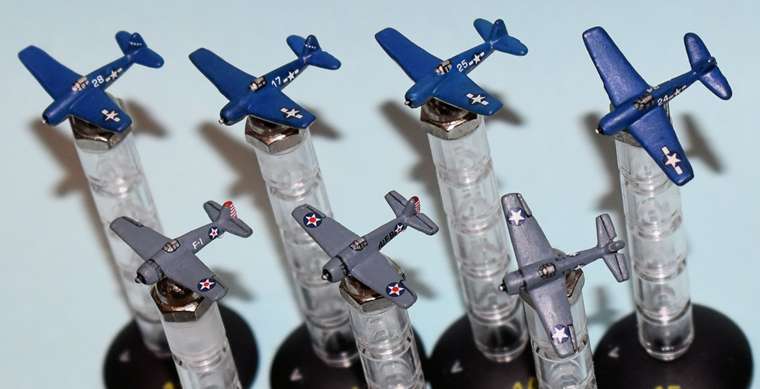
When the rest of the Hellcats are completed, they’ll get their control surfaces & cowls inked to better match the Wildcats.
From “Hellcat Aces of WW2” from Osprey publishing: “One of the most famous markings ever worn on a US combat aircraft, the ferocious cat’s mouth applied by VF-27 to it’s F6F-3’s and -5’s was conceived by Lts Carl Brown (10.5 kills front row fifth from left in the below picture) and Dick Stambrook (10 kills, standing fourth from right), and Ens Bob Burnell (four kills, to Stambrook’s right) whilst the unit was working up at NAS Kahului, Hawaii in March/April, 1944. Burnell hand-painted ‘teeth’ on all 24 F6F’s prior to embarking aboard USS Princeton on 29 May, 1944.”
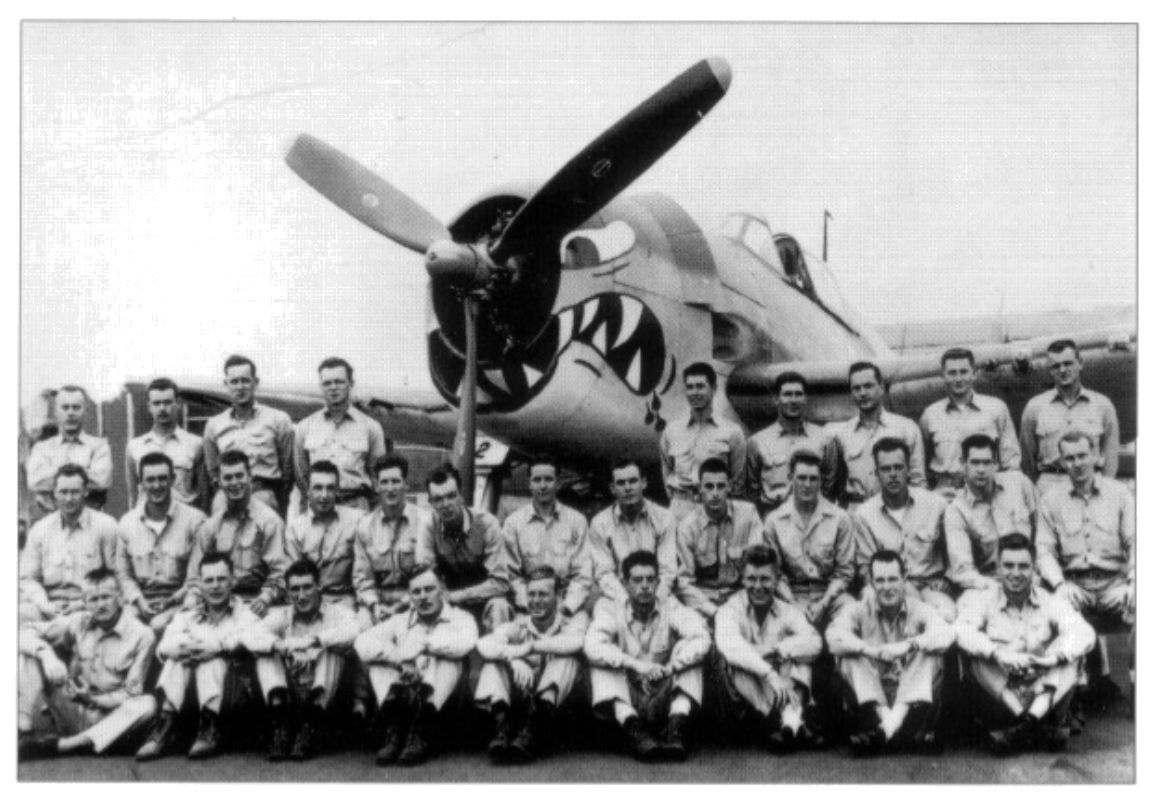
If you do an internet search for Hellcats, Lt. Robert M. Burnell’s Hellcat, named ‘Paper Doll’, comes up quite often in images, such as this one:

He may not have been the squadron’s top scoring ace, but he put in the time to put the eyes & teeth on all 24 aircraft before they embarked. So of course I had to do ‘Paper Doll’ and whomever would have flown wing for Burnell. It was quite a challenge but I’m very happy with the end result.
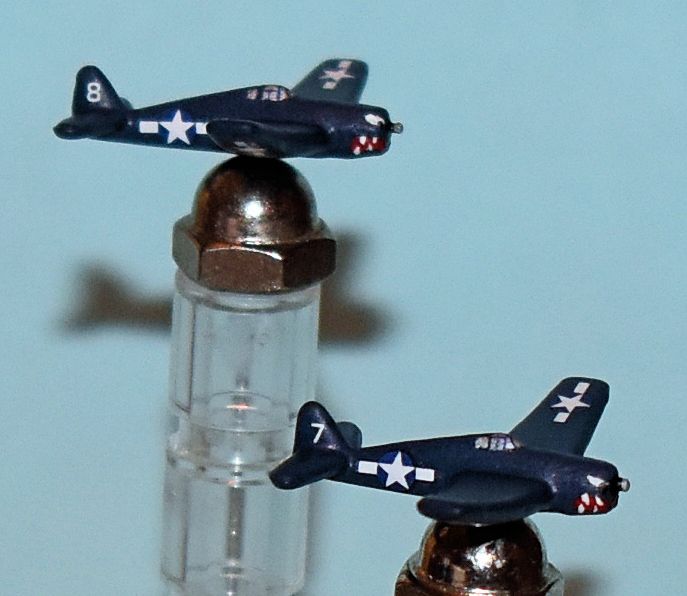

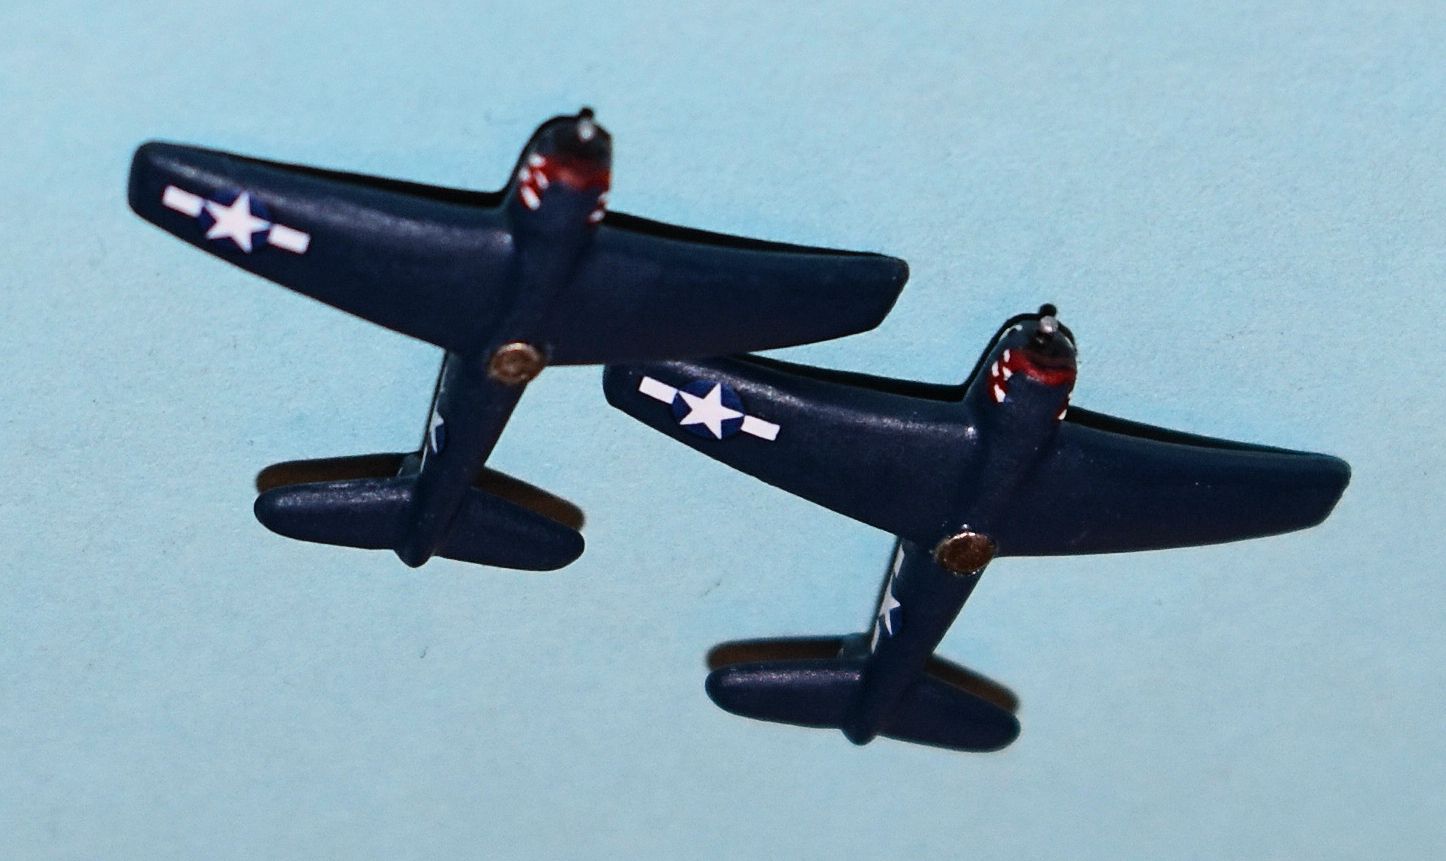
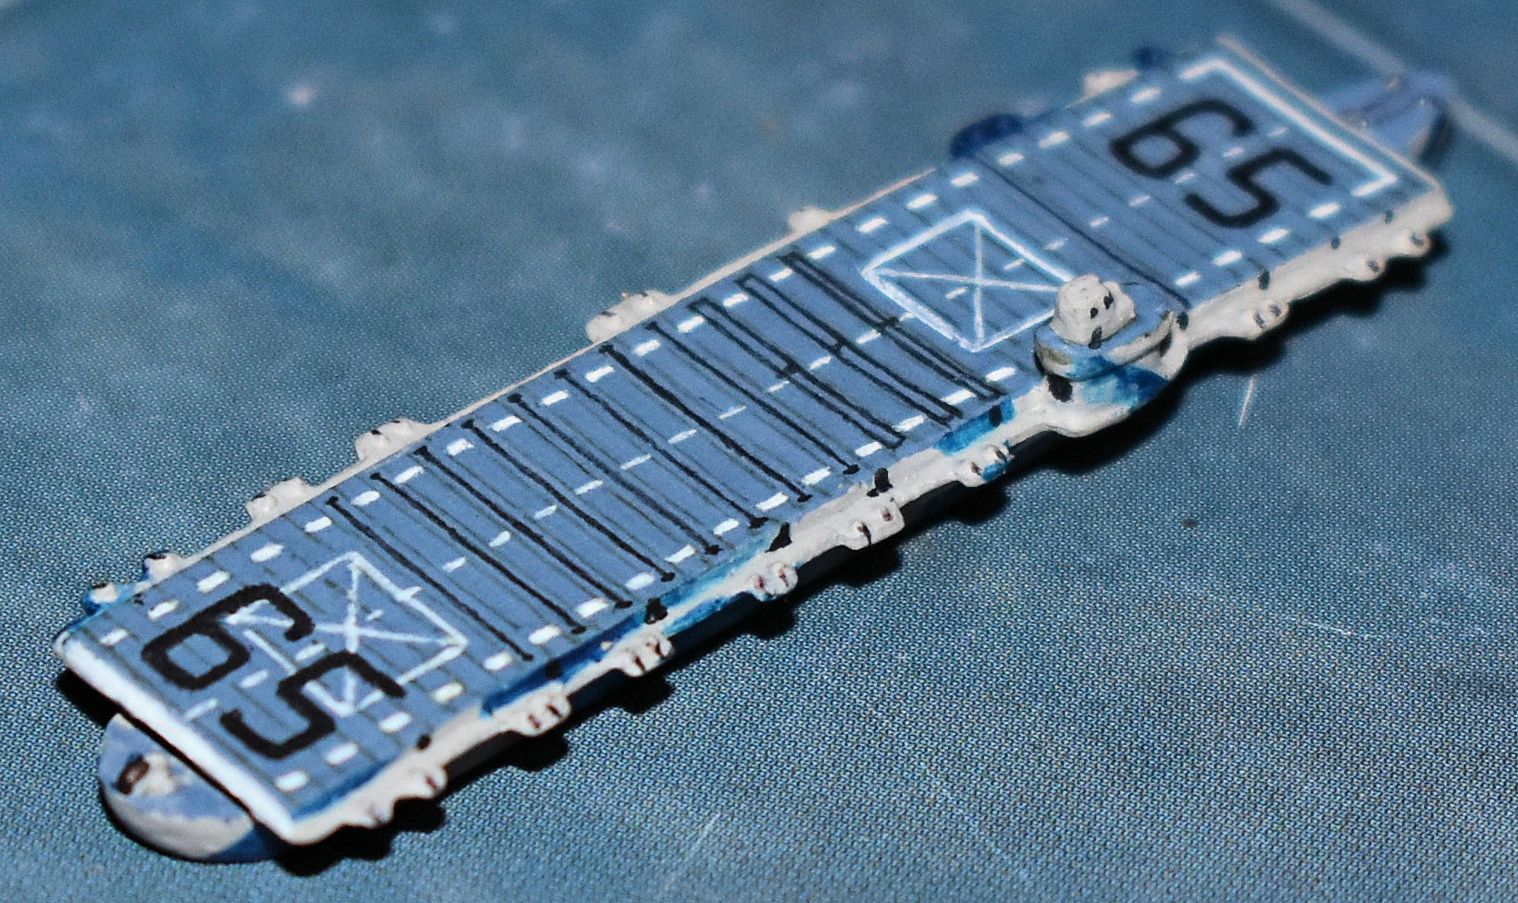
Casablanca class light carriers USS White Plains (CVE 66) painted in Camouflage Measure 33, Design 10A and USS Wake Island (CVE 65) painted in Camouflage Measure 32, Design 4A by FOlewnik. I think Wake Island started out to be the USS Tripoli (CVE 64), as Tripoli wore MS32/4A but Wake was in the same camo as White Plains. Either way, I think he did a great job. USS White Plains first:


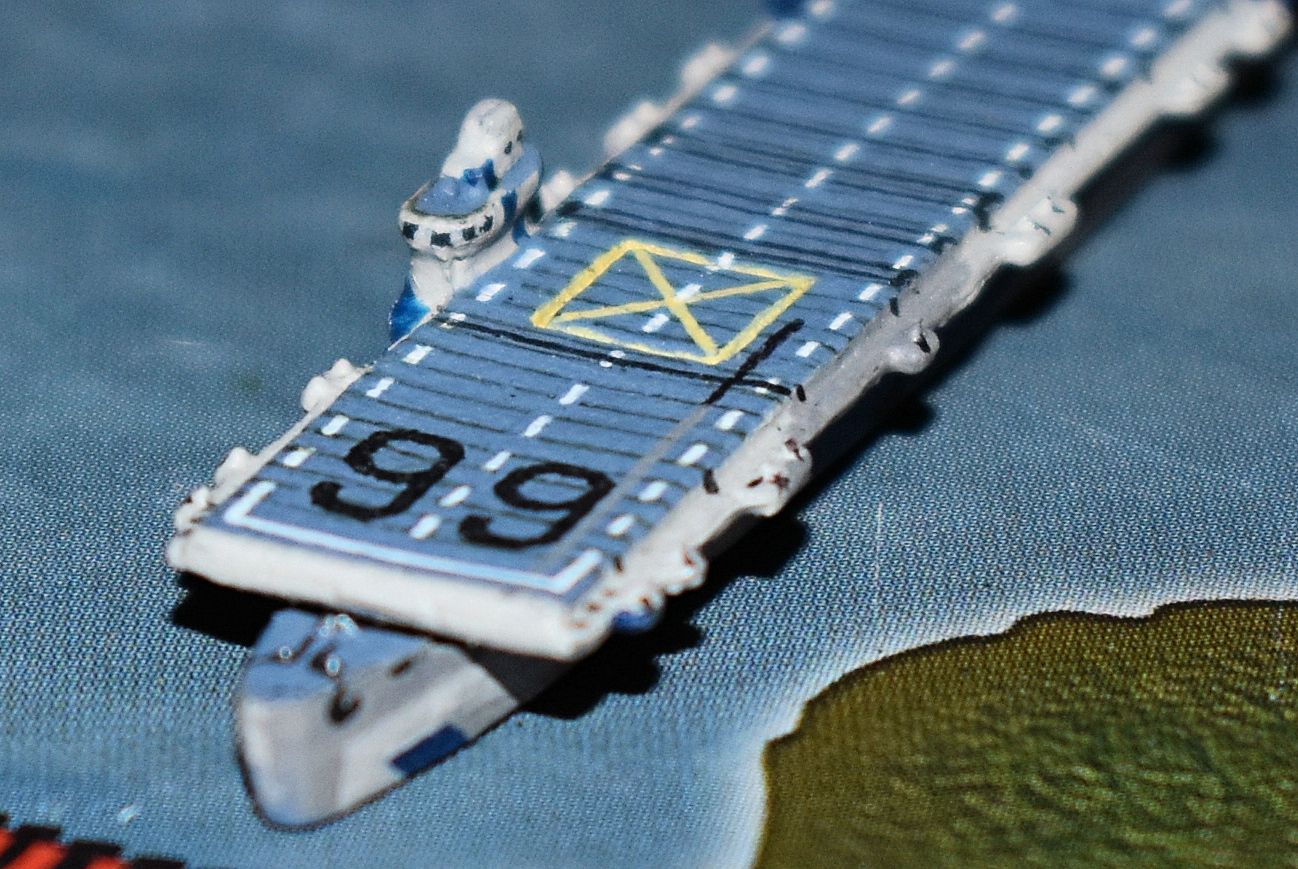


USS Wake Island:


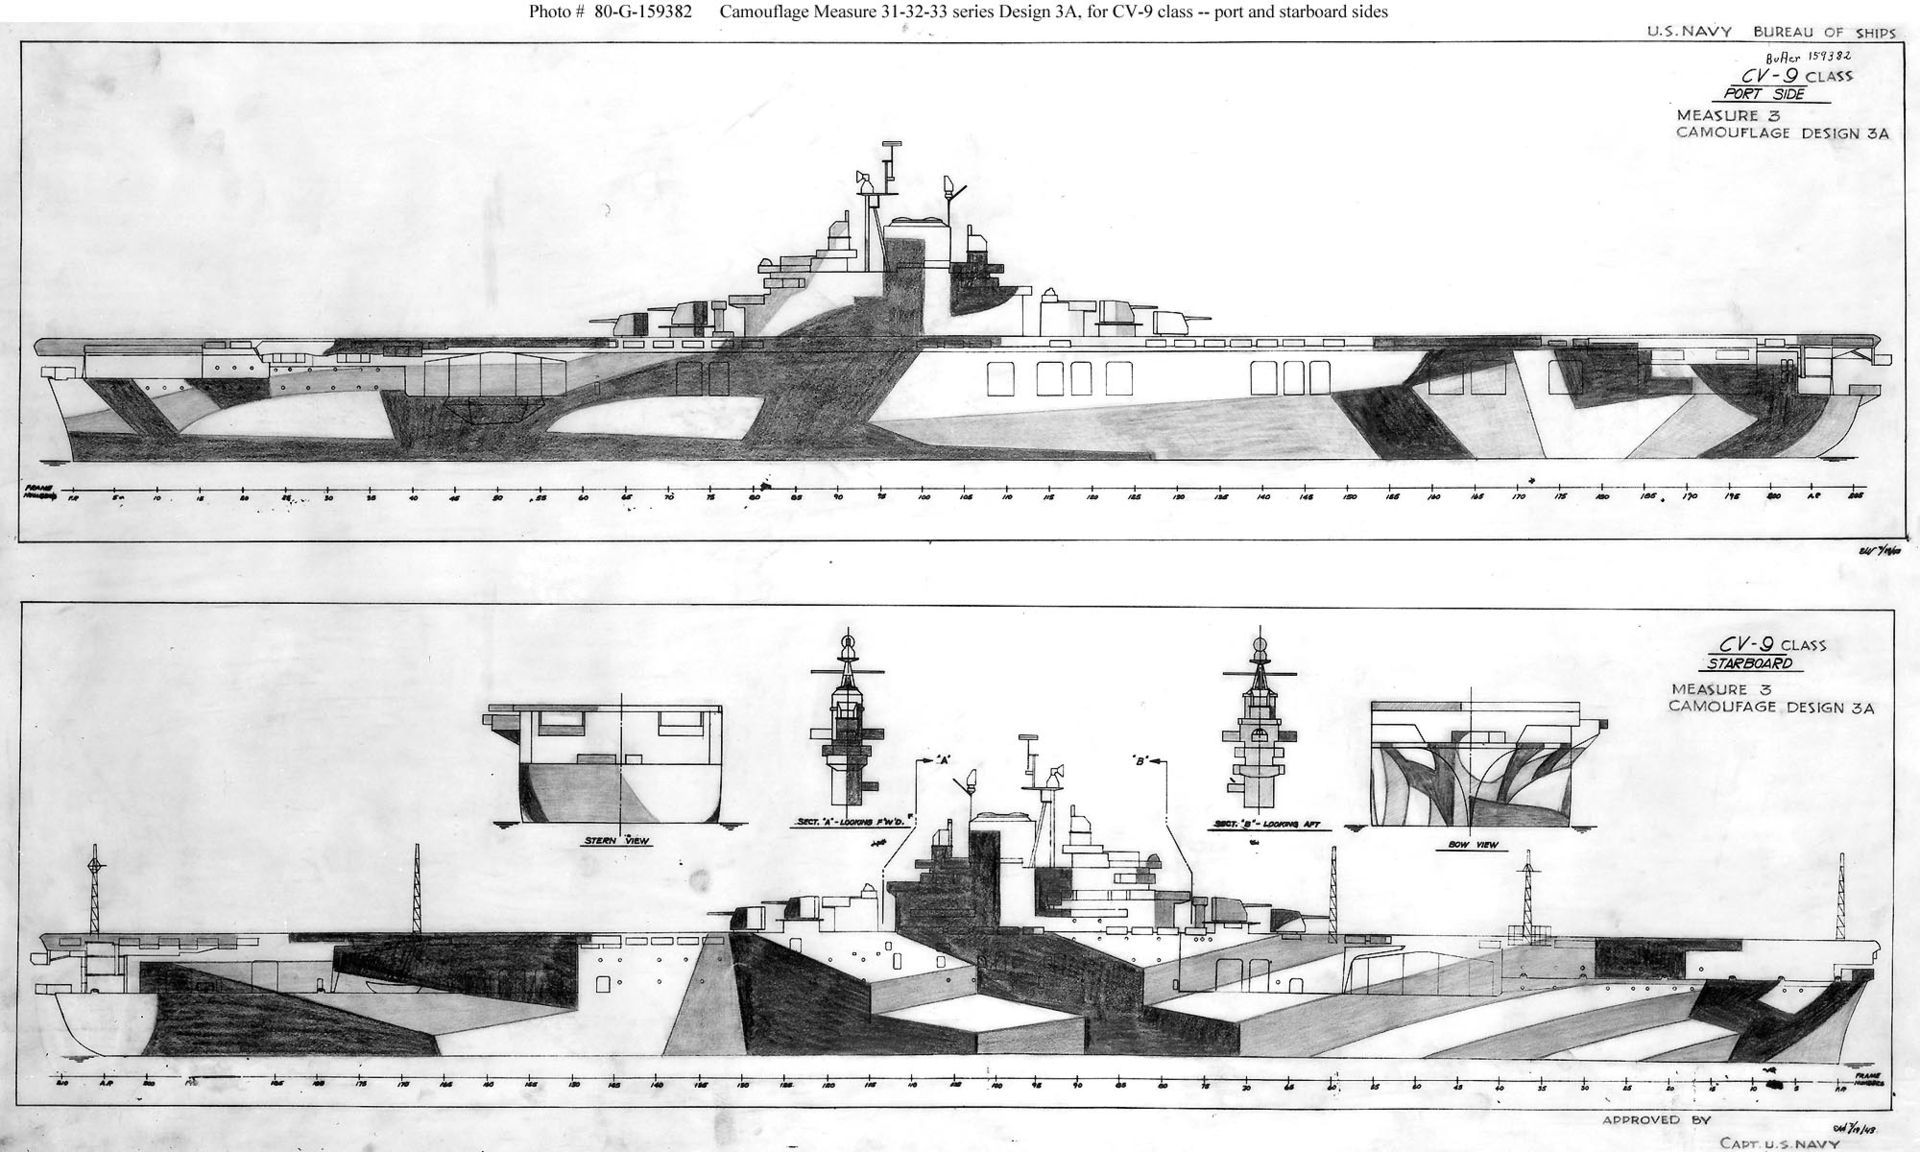
USS Intrepid (CV-11) by FOlewnik. This sculpt by HBG required a lot of cleaning and trimming of flash plastic as well as a little putty to look as clean and smooth as she does. You really can’t beat the price, though, for these good looking Essex class carriers. Not getting any compensation for saying that, just expressing my opinion. The USS Intrepid is wearing Measure 3, Design 3A, per this drawing taken from https://www.wikiwand.com/en/World_War_II_US_Navy_dazzle_camouflage_measures_31,_32_and_33:_aircraft_carriers:


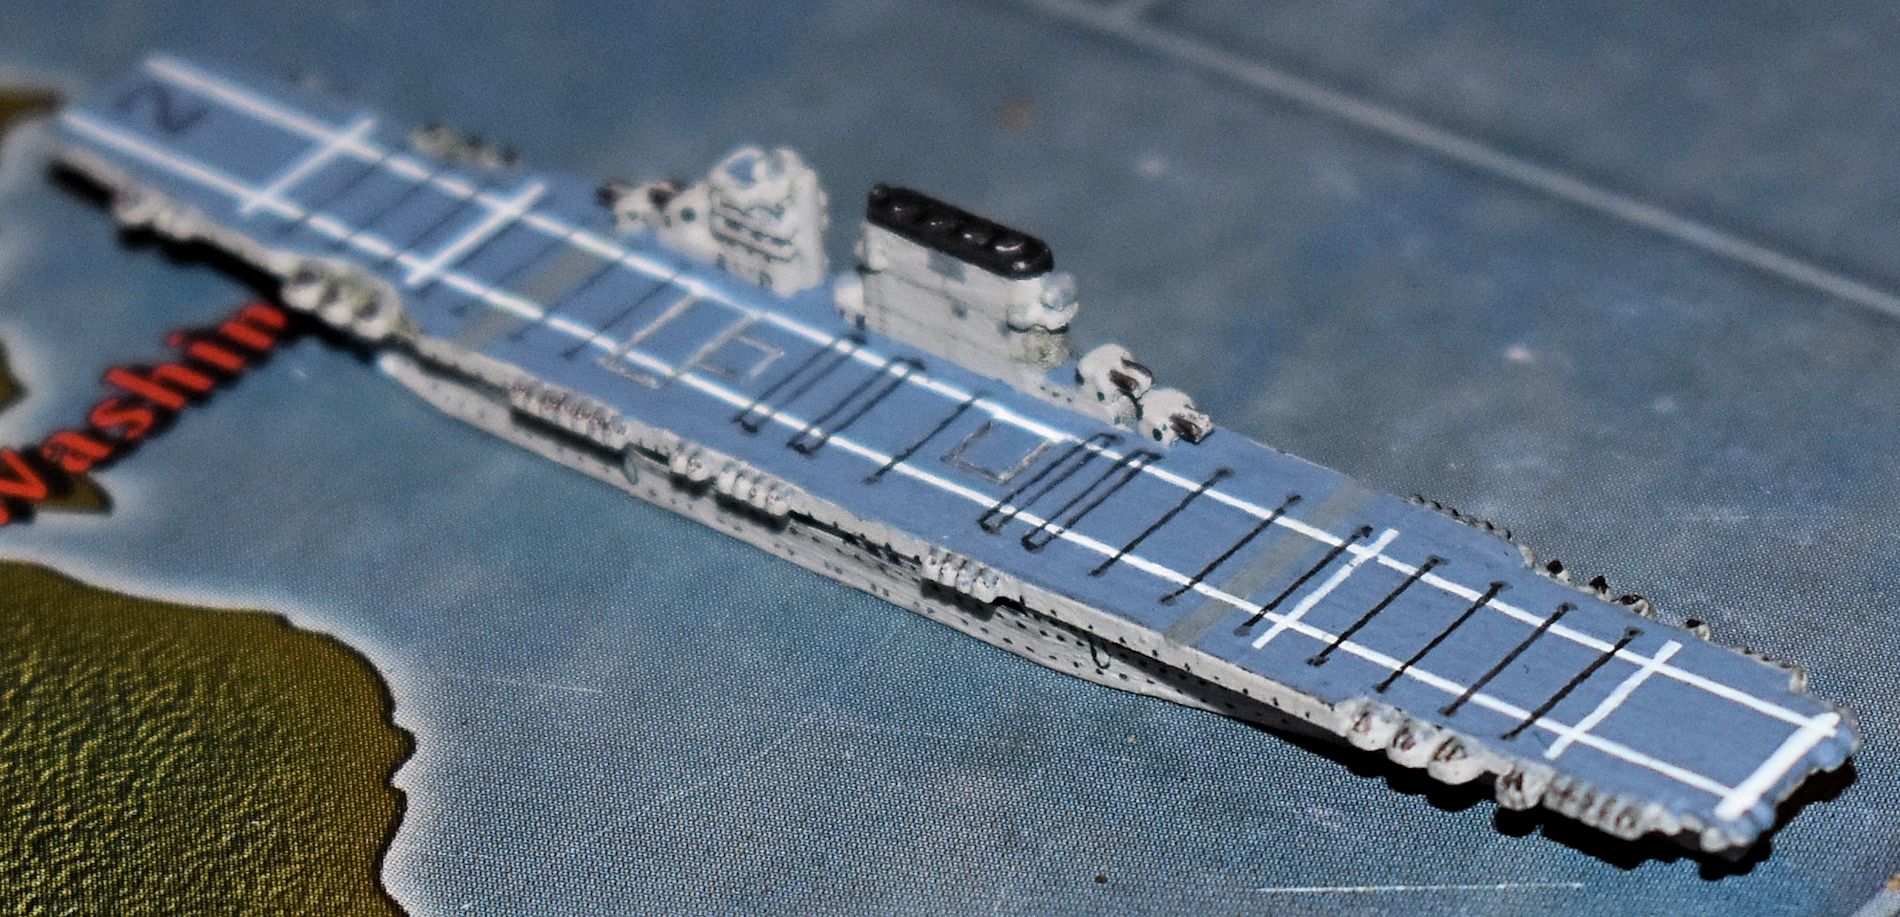
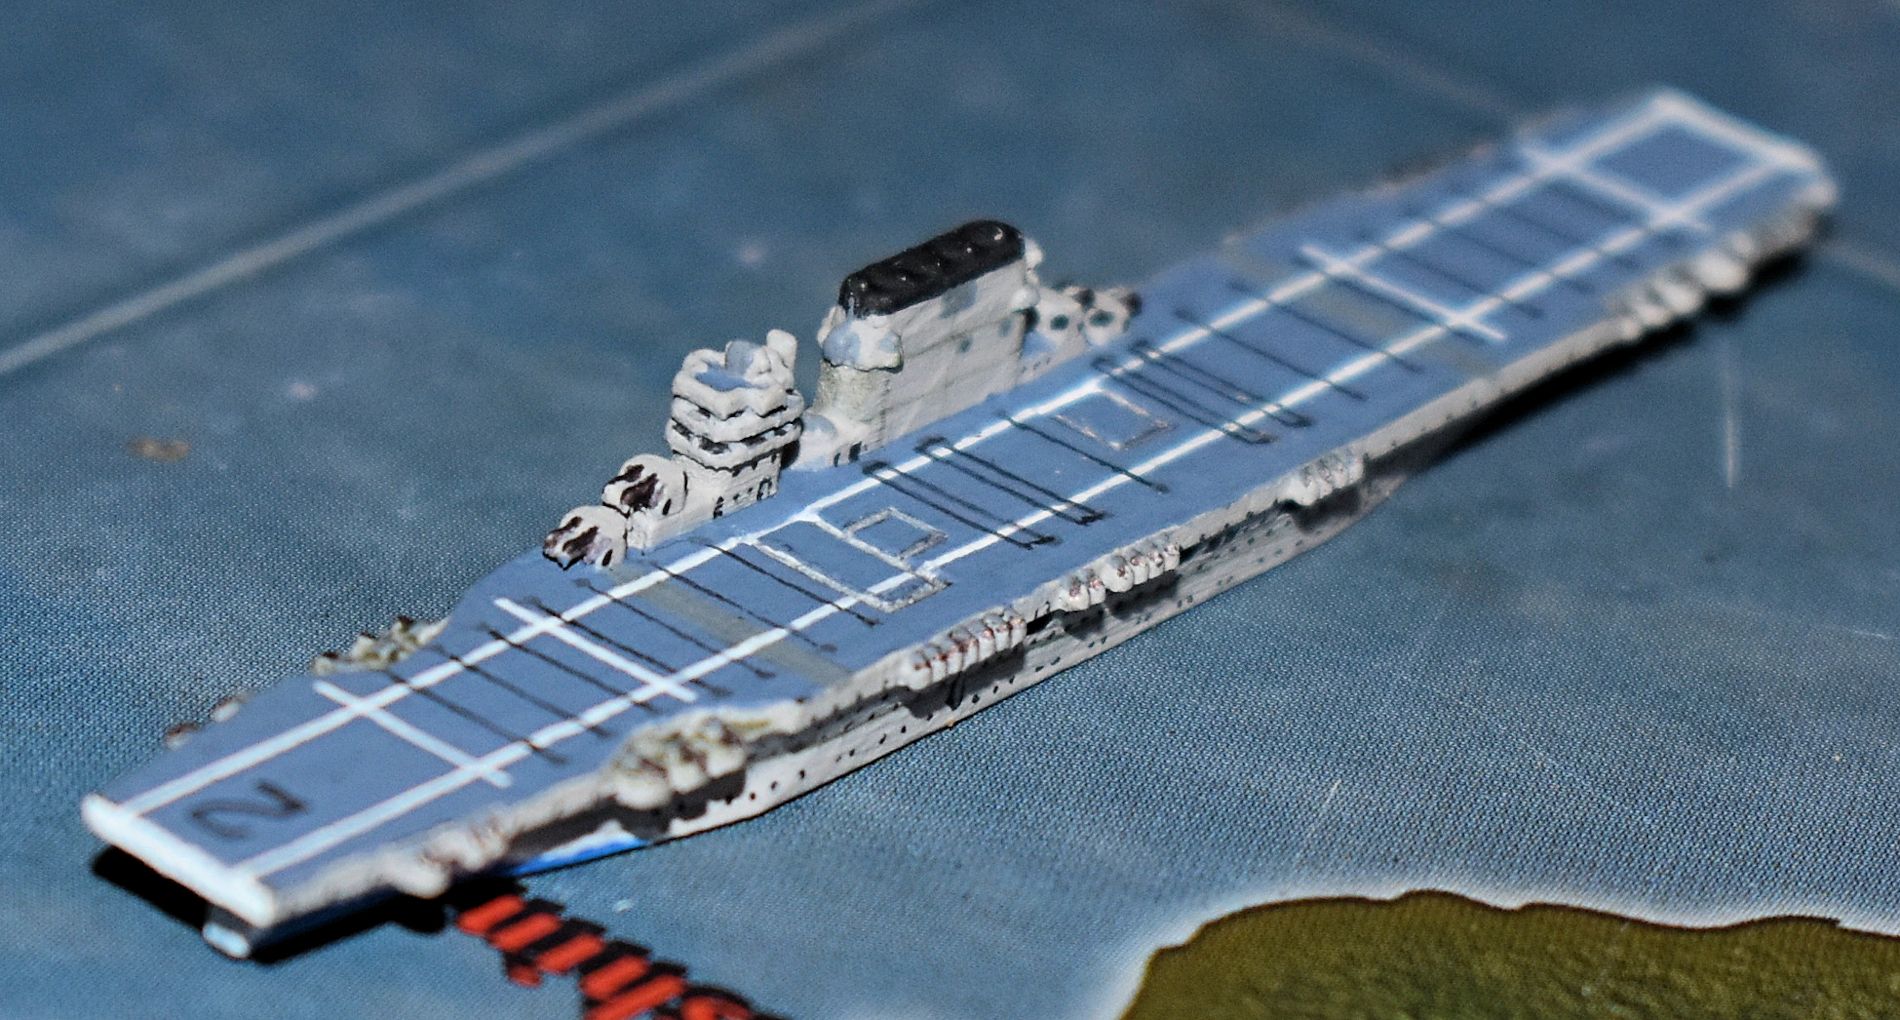
USS Lexington (CV-2) wearing a bow wave camo by FOlwenik. 3D print from Ebard at Shapeways. I think I mentioned this before, but when you work with 3D prints, they are both very porous and very fragile. To strengthen the piece, I like to add a little bit of liquid super glue (not the gel) to anything that sticks up, like the conning tower and smokestack. The liquid is immediately absorbed into the porous print, just don’t put too much on in one spot or you could lose detail. FOlewnik also filled the bottom with putty for both strength and weight. I have to admit that this is one of my favorites because of the work he put into the hull, which is nice and flat, making a good canvas. Comparison pictures taken from navsource.org.
